background image

4

102463_RevB


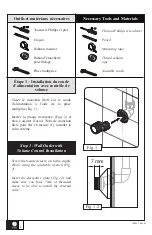
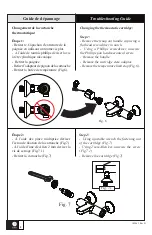
Étape 1 - Installation du coude 

d’alimentation avec contrôle de 

volume

Visser  le  manchon  fileté  sur  le  coude 

d’alimentation à l’aide de la pince 

multiprise (Fig. 1).

Insérer la plaque décorative (Fig.1.2) et 

bien s’assurer d’avoir 7mm de manchon 

fileté  pour  être  en  mesure  d’y  installer  la 

valve externe.

Fig. 1

7 mm

Fig. 1.2

Step 1 - Wall Outlet with 

Volume Control Installation

Screw the treaded sleeve on to the supply  

elbow using the ajustable wrench (Fig. 

1).

Insert the decorative plate (Fig 1.2) and 

make sure you have 7mm of threaded 

sleeve to be able to install the external 

valve.

Outils et matériaux nécessaires

Necessary Tools and Materials

Tournevis Phillips et plat

Crayon

Ruban à mesurer

Ruban d’étanchéité 

pour filetage

Pince multiprise

Flat and Phillips screwdriver

Pencil

Measuring tape

Thread sealant  

tape

Ajustable ranch

Summary of Contents for BF1216

Page 1: ...tructions after you have finished the installation it contains useful information regarding service and warranty Num ro de s rie Serial number BF1216 Valve Thermostatique Externe External Thermostatic...

Page 2: ...button giding pin 2 13 102446 XXX Capuchon d extr mit de la poign e Decorative handle cap 2 14 102453 Vis Phillips t te cylindrique m canique M4 x 25mm Phillips Cheese head mechanical scre M4 x 25mm...

Page 3: ...n externe de la poign e Handle button giding pin 2 13 102446 XXX Capuchon d extr mit de la poign e Decorative handle cap 2 14 102431 Vis Phillips t te cylindrique m canique M4 x 10mm Phillips Pan head...

Page 4: ...mm Fig 1 2 Step 1 Wall Outlet with Volume Control Installation Screw the treaded sleeve on to the supply elbow using the ajustable wrench Fig 1 Insert the decorative plate Fig 1 2 and make sure you ha...

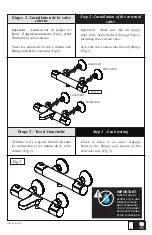
Page 5: ...lushed through before installing the external valve Screw the valve unions into the wall fittings Fig 2 Fig 2 CHAUD HOT FROID COLD CHAUD HOT FROID COLD V rifier s il n y a pas de fuite d eau entre les...

Page 6: ...iffusion du jet qui s en coule n est pas uniforme Solution D visser l a rateur l aide d une pi ce de monnaie et rincer l a rateur fig 4 Before any operation turn off the water and turn the faucet on t...

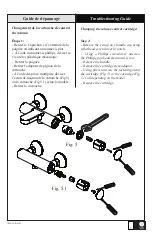
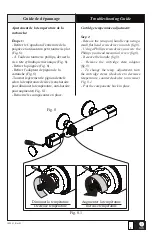
Page 7: ...e fixation de la cartouche Fig 5 ou la cartouche Fig 5 1 selon le mod le Retirer la cartouche Changing the volume control cartridge Step 1 Remove the snap on handle cap using a flat head screwdriver i...

Page 8: ...using a flat head screwdriver in notch Using a Phillips screwdriver unscrew the Phillips pan head mecanical screw Remove the handle Remove the cartridge stem adaptor Remove the temperature limit stop...

Page 9: ...pour augmenter Fig 8 1 Remettre les composantes en place Cartridge temperature adjustment Step 1 Remove the snap on handle cap using a small flat head screwdriver in notch fig 8 Using a Phillips screw...

Page 10: ...a totalit de la surface Rincer compl tement avec de l eau imm diatement apr s l application du nettoyant Un nettoyage r gulier pr vient l accumulation de salet et souillures tenaces Maintenance and Cl...

Page 11: ...vous n h sitez pas nous contacter Cette garantie est offerte exclusivement en lieu et place de toute autre garantie y compris les garanties de qualit marchande ou d aptitude de produit pour une appli...

Page 12: ...Imprim en Chine Printed in China 102463_RevB...

Reviews: