background image

46

English

VCR

You can always perform the following operations:

VCR 1 


(for RX-8030VBK) or 

VCR 


(for RX-7030VBK):

Turn on or off a VCR.

For RX-8030VBK:

 After pressing VCR 1 (or selecting “ VCR 1”

by pressing CONTROL repeatedly), you can perform the following
operations on a VCR:

For RX-7030VBK:

 After pressing VCR (or VCR CONTROL), you

can perform the following operations on a VCR:

1 – 9, 0:

Select the TV channels on a VCR.

3

:

Start playing.

REW:

Rewind a tape.

FF:

Fast wind a tape.

7

:

Stop playing or recording.

8

:

Pause playing. To resume, press 

3

.

REC PAUSE:

Enter recording pause by pressing this button.
To start recording again, press this button then 

3

.

CH +/–:

Change the TV channels on the VCR.

Note:

You can use either VCR 1 (for RX-8030VBK) or VCR (for RX-
7030VBK) or the control button (CONTROL for RX-8030VBK or VCR
CONTROL for RX-7030VBK) to activate the buttons listed above. If
you press one of the source selection buttons, the playing source also
changes. On the other hand, pressing the control button does not
change the playing source.

DVD player

After pressing DVD or DVD MULTI, you can perform the
following operations on a DVD player:

3

:

Start playing.

4

:

Return to the beginning of the current (or previous) chapter.

¢

:

Skip to the beginning of the next chapter.

7

:

Stop playing.

8

:

Pause playing. To resume, press 

3

.

After pressing DVD or DVD MULTI,
these buttons can be used for the DVD
menu operations.

Note:

For detailed menu operations, refer to the
instructions supplied with the discs or the
DVD player.

TV

You can always perform the following operations:

TV 

:

Turn on or off the TV.

TV VOL +/–

:

Adjust the volume.

TV/VIDEO

:

Set the input mode (either TV or VIDEO).

After pressing TV/DBS, you can perform the following operations
on a TV:

CH +/–:

Change the channels.

1 – 9, 0, 100+:

Select the channels.

RETURN:

Alternate between the previously selected channel
and the current channel.

Operating Video Components

IMPORTANT:

To operate JVC’s video components using the supplied remote
control:
• You need to connect JVC’s video components through the AV

COMPU LINK jacks (see page 42) in addition to the connections
using cables with RCA pin plugs (see pages 14 and 15).

• Some JVC’s VCRs can accept two types of the control signals—

remote code “A” and “B.” Before using this remote control, make
sure that the remote control code of the target VCR is set to code
“A.”

For RX-8030VBK:

 When another JVC’s VCR is connected to

the VCR 2 or VIDEO terminals, set its remote control code to
code “B.” (This remote control cannot emit the control signals of
code “B.”)

• When using the remote control, aim the remote control directly at

the remote sensor on each component, not on the receiver.

For RX-8030VBK:

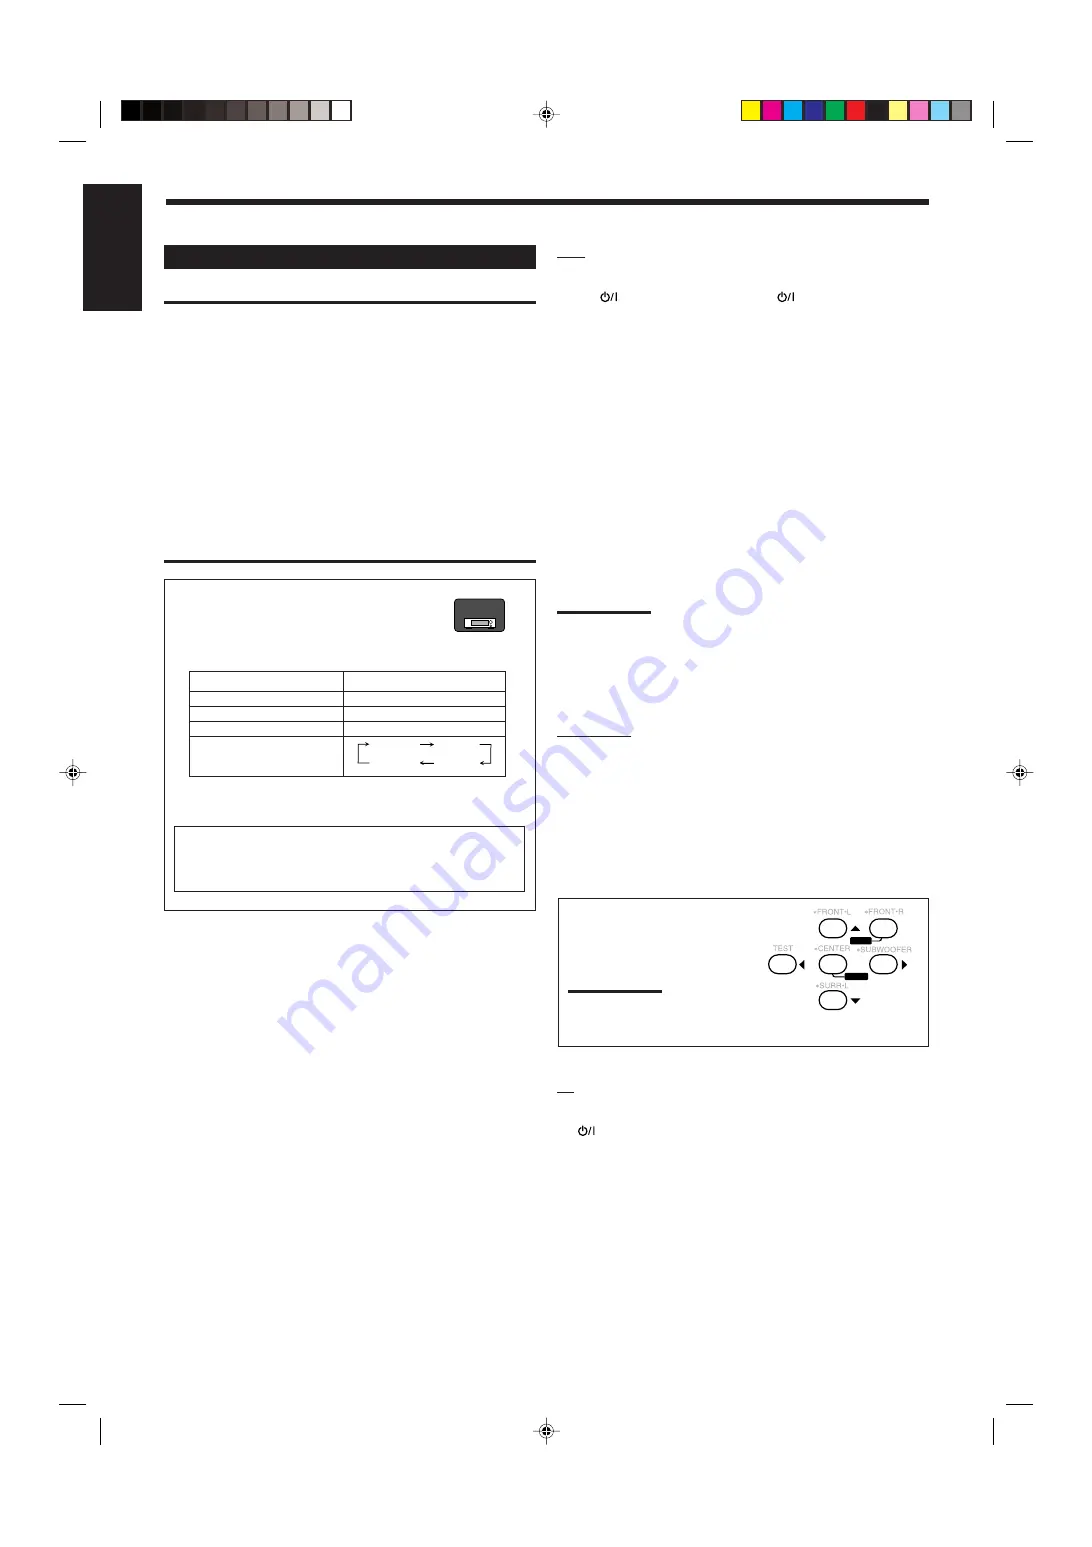
• When you press one of the source selection

buttons, the operation mode appears on the
display window.

Buttons

Indications

VCR 1

VCR 1

DVD or DVD MULTI

DVD

TV/DBS

TV

CONTROL (repeatedly)*

*

By pressing CONTROL repeatedly, you can select
“VCR 1,”  “TAPE,”  “CDR” or “CDDSC” as the source.

2

3

4

5

6

8

MENU

ENTER

VCR 1

TAPE

CDR

CDDSC

When you press one of the buttons listed above, the remote
operation mode appears on the operation mode display for
about two hours.

RX-8030V

ONLY

42-52_8030&7030[C]7.pm6

03.2.13, 2:52 PM

46

Summary of Contents for RX-7030VBK

Page 1: ...mation for future reference Model No Serial No LVT1007 002A C RX 8030VBK RX 7030VBK 2 3 1 5 6 4 8 9 7 P 0 10 MENU ENTER CONTROL A V CONTROL RECEIVER 10 0 For RX 8030VBK For RX 8030VBK INSTRUCTIONS MANUEL D INSTRUCTIONS AUDIO VIDEO CONTROL RECEIVER AMPLI TUNER DE COMMANDE AUDIO VIDEO English Français COVER_8030 7030 C 7 pm6 03 2 13 2 53 PM 1 ...

Page 2: ...uelle que soit sa position Le courant peut être télécommandé CAUTION TO REDUCE THE RISK OF ELECTRIC SHOCK DO NOT REMOVE COVER OR BACK NO USER SERVICEABLE PARTS INSIDE REFER SERVICING TO QUALIFIED SERVICE PERSONNEL RISK OF ELECTRIC SHOCK DO NOT OPEN The lightning flash with arrowhead symbol within an equilateral triangle is intended to alert the user to the presence of uninsulated dangerous voltage...

Page 3: ...he FCC Rules These limits are designed to provide reasonable protection against harmful interference in a residential installation This equipment generates uses and can radiate radio frequency energy and if not installed and used in accordance with the instructions may cause harmful interference to radio communications However there is no guarantee that interference will not occur in a particular ...

Page 4: ...chocs électriques l incendie et tout autre dégât Disposer l appareil en tenant compte des impératifs suivants Avant Rien ne doit gêner le dégagement Flancs Laisser 10 cm de dégagement latéral Dessus Laisser 10 cm de dégagement supérieur Arrière Laisser 15 cm de dégagement arrière Dessous Riennedoitobstruerpardessous poserl appareil sur une surface plate Veiller également à ce que l air circule le ...

Page 5: ...50 Specifications 51 Introduction 2 Features 2 Precautions 2 Parts Identification 3 Remote Control 3 Front Panel 4 Rear Panel 6 Getting Started 8 Before Installation 8 Checking the Supplied Accessories 8 Putting Batteries in the Remote Control 8 Connecting the FM and AM Antennas 8 Connecting the Speakers 9 Connecting Audio Video Components 11 7 Analog Connections 11 7 Digital Connections 16 Connec...

Page 6: ...channel software according to the speaker setting Multi channel headphone virtual surround sound 3D HEADPHONE Mode The built in headphone virtual surround system is compatible with Multi channel software like Dolby Digital DTS Surround etc Thanks to the new signal processing algorithms used by the high performance DSP you can enjoy a natural surround sound through the headphones COMPU LINK AV COMP...

Page 7: ...LEVEL buttons function only after pressing SOUND then 10 keys which are marked with an asterisk on the remote control u VOLUME buttons 18 i TV VOL volume buttons 46 47 o MUTING button 22 TUNING UP DOWN buttons 23 Operating buttons for audio video components 44 46 48 3 8 7 4 REW FF a DIMMER button 22 å Only for RX 7030VBK TAPE CDR CONTROL button 45 Remote Control RX 8030VBK RX 7030VBK 2 3 1 5 6 4 8...

Page 8: ...OFF VIDEO L AUDIO R DIGITAL S VIDEO VIDEO PUSH SET MULTI JOG MASTER VOLUME 1 2 s i a 4 5 7 u o p 9 3 PUSH OPEN CC CONVERTER BASS BOOST 8 RX 8030VBK RX 7030VBK Only for RX 8030VBK Inside the front door TUNER CONTROL MIDNIGHT MODE EX ES INPUT ATT INPUT ANALOG INPUT DIGITAL FM AM TUNING FM AM PRESET FM MODE MEMORY VIDEO L AUDIO R DIGITAL S VIDEO VIDEO r e q w y t 6 TV SOUND DBS VIDEO VCR 2 VCR 1 DVD ...

Page 9: ...ndicator 34 35 ONE TOUCH OPERATION indicator 30 w INPUT ANALOG button 20 INPUT ATT button 20 e MIDNIGHT MODE button 20 r INPUT DIGITAL button 20 t TUNER CONTROL buttons FM AM TUNING 5 buttons 23 FM AM PRESET 5 buttons 23 24 FM MODE button 24 MEMORY button 23 y Only for RX 8030VBK VIDEO input jacks 13 DIGITAL optical terminal S VIDEO jack VIDEO jack AUDIO L R jacks u SETTING button 27 i QUICK SPEAK...

Page 10: ...UTION SPEAKER IMPEDANCE SINGLE USE See Instruction Manual For Connection 1 OR 2 8 16 1 AND 2 16 32 PREOUT SURR REAR 1 2 3 4 5 6 7 8 9 t r e w q p y VIDEO RIGHT LEFT S VIDEO VIDEO AUDIO DIGITAL IN DIGITAL 1 DVD DIGITAL 2 CD DIGITAL 3 TV DIGITAL 4 CDR PCM DOLBYDIGITAL DTS DIGITAL OUT FM 75 COAXIAL AM EXT AM LOOP RIGHT LEFT 1 2 CENTER SPEAKER SURROUND SPEAKERS 8 16 CAUTION SPEAKER IMPEDANCE MONITOR O...

Page 11: ...cal DIGITAL 2 CD DIGITAL 3 TV DIGITAL 4 CDR 2 AUDIO input output jacks 12 15 Input DVD IN FRONT CENTER SUBWOOFER SURR REAR TV SOUND DBS IN VCR IN PLAY TAPE CDR IN PLAY CD IN Output VCR OUT REC TAPE CDR OUT REC 3 S VIDEO and composite VIDEO input output jacks 14 15 Input DVD IN TV SOUND DBS IN VCR IN PLAY Output VCR OUT REC MONITOR OUT 4 FM AM ANTENNA terminals 8 5 SUBWOOFER OUT jack 10 6 COMPONENT...

Page 12: ...ries first 1 Press and slide the battery cover on the back of the remote control 2 Insert the batteries Make sure to match the polarity to and to 3 Replace the cover B FM Antenna supplied Outdoor FM Antenna Cable not supplied Extend the supplied FM antenna horizontally A If the remote control cannot transmit signals or operate the receiver correctly replace the batteries Use two R6P SUM 3 AA 15F t...

Page 13: ...eaker to emphasize human voices One subwoofer to enhance the bass CAUTION Use only the speakers of the SPEAKER IMPEDANCE indicated by the speaker terminals When connecting to both of the FRONT SPEAKERS 1 and 2 terminals use speakers with an impedance of 16 Ω to 32 Ω When connecting to either the FRONT SPEAKERS 1 or 2 terminals use speakers with an impedance of 8 Ω to 16 Ω Basic connecting procedur...

Page 14: ...nformation setting see page 25 To obtain the best possible Surround DSP effect see Setting the Speakers on page 27 Front speakers 1 Right Left Surround back speakers Right Left Front speakers 2 Right Left Center speaker When using only one surround back speaker connect the ª cord to the RIGHT ª terminal and the cord to the LEFT terminal Surround speakers Right Left RIGHT LEFT CENTER SPEAKER SURROU...

Page 15: ...onnection press PHONO If a ground cable is provided for your turntable connect the cable to the screw marked H on the rear Note This connection is for the turntable with an MM moving magnet type cartridge Any turntables incorporating a small output cartridge such as an MC moving coil type must be connected to this receiver through a commercial head amplifier or step up transformer Direct connectio...

Page 16: ...ction press CDR for RX 8030VBK or TAPE CDR for RX 7030VBK For RX 8030VBK For RX 7030VBK You can connect either a CD recorder or a cassette deck to the TAPE CDR jacks When connecting a cassette deck to the TAPE CDR jacks see the left column Note For RX 7030VBK When connecting a CD recorder to the TAPE CDR jacks change the source name to CDR which will be shown on the display when it is selected as ...

Page 17: ...eo cable not supplied By using these jacks you can get better picture quality in the order Component video S video Composite video If your video components have an AV COMPULINK jack See also page 42 for detailed information about the connection and the AV COMPU LINK remote control system IMPORTANT This receiver is equipped with the following video jacks composite video S video and component video ...

Page 18: ...control TV DBS tuner Å To audio output ı To component video input Ç To S video input Î To composite video input When connecting the TV to the AUDIO jacks TV SOUND DBS IN DO NOT connect the TV s video output to these video input jacks Å To audio output ı To component video output Ç To S video output Î To composite video output Notes When connecting a DBS tuner to the TV SOUND DBS IN jacks change th...

Page 19: ...SURR REAR R L A B C D RX 8030VBK RX 7030VBK When you connect a DVD player with its analog discrete output 5 1 channel reproduction jacks To listen to the sound after connection press DVD MULTI Å To component video output ı To subwoofer output Ç To center channel audio output Î To S video output To composite video output Ï To left right front channel audio output Ì To left right surround channel au...

Page 20: ...tal components having coaxial or optical digital output terminal Digital output terminal You can connect any digital components which have an optical digital input terminal Digital coaxial cable not supplied between digital coaxial terminals Digital optical cable not supplied between digital optical terminals Before connecting a digital optical cable unplug the protective plug When the component h...

Page 21: ...ng the Source to Play to the right 3 Adjust the volume See Adjusting the Volume on page 18 4 Select the surround or DSP modes See Activating the Surround Modes page 37 and Activating the DSP Modes page 39 Turning On the Power Press STANDBY ON or AUDIO on the remote control The STANDBY lamp goes off The name of the current source and Surround DSP mode appear on the display Current source name and S...

Page 22: ...VD MULTI is selected as the source L C R LFE LS and RS light up CD CDR TAPE MD PHONO FM AM AM FM TAPE CDR CD CD TAPE CDR FM AM Adjusting the Volume On the front panel To increase the volume turn MASTER VOLUME clockwise To decrease the volume turn it counterclockwise From the remote control To increase the volume press VOLUME To decrease the volume press VOLUME CAUTION Always set the volume to the ...

Page 23: ...akers When you have connected two pairs of the front speakers you can select which to use To use the speakers connected to the FRONT SPEAKERS 1 terminals press SPEAKERS ON OFF 1 so that the SPEAKERS 1 indicator lights up on the display Make sure that the SPEAKERS 2 indicator is not lit on the display To use the speakers connected to the FRONT SPEAKERS 2 terminals press SPEAKERS ON OFF 2 so that SP...

Page 24: ...n Lights up when DTS signals come in No indicator lights up when the receiver cannot recognize the digital signal format of the incoming signals VOLUME DIGITAL L SUBWFR LS RS C R LFE DIGITAL AUTO SPEAKERS 1 DGTL AUTO DGTL D D DGTL DTS Dolby Digital Digital VOLUME LINEAR PCM L R ANALOG SPEAKERS 1 VOLUME DIGITAL L SUBWFR LS RS C R LFE DIGITAL AUTO SPEAKERS 1 Setting the Dynamic Range You can enjoy a...

Page 25: ...alog Direct is in use If you turn on Analog Direct while this function is in use this function will be canceled Changing the Source Name When you have connected an MD recorder to the TAPE MD jacks or a DBS tuner to the TV SOUND DBS jacks on the rear panel change the source name which will be shown on the display When changing the source name from TV to DBS 1 Press TV SOUND DBS Make sure TV appears...

Page 26: ...ssible The output volume level Midnight Mode see page 20 Bass Boost see the left column Digital Equalization see page 32 Surround modes and DSP modes see pages 34 to 39 cannot affect the recording Basic adjustment auto memory This receiver memorizes sound settings for each source when you turn off the power when you change the source and when you assign the source name see page 21 When you change ...

Page 27: ... L R ANALOG SPEAKERS 1 VOLUME TUNED STEREO LINEAR PCM L R ANALOG SPEAKERS 1 VOLUME TUNED STEREO LINEAR PCM L R ANALOG SPEAKERS 1 Using Preset Tuning Once a station is assigned to a channel number the station can be quickly tuned in You can preset up to 30 FM and 15 AM stations To store the preset stations Before you start remember There is a time limit in doing the following steps If the setting i...

Page 28: ...sy you can change the FM reception mode while receiving an FM broadcast You can store the FM reception mode for each preset station see page 23 While listening to an FM station press FM MODE Each time you press the button the FM reception mode alternates between AUTOMUTING and MODE MONO AUTOMUTING Normally select this When a program is broadcasted in stereo you will hear stereo sound when in monau...

Page 29: ...positioning your speakers while others will make operations easier You can use QUICK SPEAKER SETUP to easily set up your speaker configuration 3 Press in MULTI JOG PUSH SET ROOM SIZE appear on the display then the initial room size setting appears 4 Turn MULTI JOG to select an appropriate room size to match to your listening room The room size changes as follows To select your appropriate room siz...

Page 30: ...5 ft SB 1 2 m 4 ft Basic Setting Items On the following pages you can adjust the following items Items To do See page SUB WOOFER 1 Register your subwoofer 27 FRONT SPEAKER 1 Register your front speaker size 27 CNTR SPEAKER 1 Register your center speaker size 27 SURR SPEAKER 1 Register your surround speaker size 27 SBACK SPEAKER 1 Register your surround back speaker size 27 SBACK OUT 1 Register the...

Page 31: ...nected speaker LARGE 1 Select when the speaker size is relatively large SMALL 2 Select when the speaker size is relatively small NONE Select this when you have not connected a speaker Not selectable for the front speakers 1 Initial setting for front speakers 2 Initial setting for center surround and surround back speakers Notes Keep the following comments in mind as reference when adjusting If the...

Page 32: ... can select the type of the signal which can be transmitted through the subwoofer In other words you can determine whether or not the bass elements of the front speaker channels are transmitted through the subwoofer regardless of the front speaker size setting either SMALL or LARGE Select one of the following LFE Select to transmit only the LFE signals while playing Dolby Digital and DTS software ...

Page 33: ...n you use the digital input terminals register which components you have connected to the digital input terminals 7 Digital coaxial terminal DGTL IN COAX Set the component connected to the digital coaxial terminal DIGITAL IN 1 For RX 8030VBK DVD initial setting MD CDR TV or DBS or CD For RX 7030VBK DVD initial setting CD TV or DBS or CDR 7 Digital optical terminals DGTL IN OPTICAL For RX 8030VBK S...

Page 34: ...omatically fixed to connect the components listed below When DIGITAL IN 1 DGTL IN COAX is set to DVD 2 CD 3 TV or DBS 4 CDR When DIGITAL IN 1 DGTL IN COAX is set to CD 2 DVD 3 TV or DBS 4 CDR When DIGITAL IN 1 DGTL IN COAX is set to TV or DBS 2 DVD 3 CD 4 CDR When DIGITAL IN 1 DGTL IN COAX is set to CDR 2 DVD 3 CD 4 TV or DBS If you have changed the source name from TV to DBS DBS appears see page ...

Page 35: ...pattern 32 SUBWFR LVL Adjust the subwoofer output level 32 FRONT L LVL Adjust the left front speaker output level 32 FRONT R LVL Adjust the right front speaker output level 32 CENTER LVL Adjust the center speaker output level 32 SURR L LVL Adjust the left surround speaker output level 32 SURR R LVL Adjust the right surround speaker output level 32 SBACK LVL Adjust the surround back speaker output ...

Page 36: ...ustable when Analog Direct is in use To adjust subwoofer output level see page 19 Adjusting the Equalization Patterns You can adjust the equalization patterns to your preference Once you have made adjustment it is memorized for each source 7 Equalization adjustment DIGITAL EQ You can adjust five frequency 63 Hz 250 Hz 1 kHz 4 kHz 16 kHz within the range of 8 dB to 8 dB 0 dB is the initial setting ...

Page 37: ...g is common to all surround modes and is memorized separately for DSP modes CTR TONE Adjust the center tone As the number increases the dialogue becomes clearer so that the human voices change from soft to sharp Normally select 3 initial setting Adjustable range 1 to 5 For DAP modes Once you have made an adjustment it is memorized for each DAP mode EFFECT Adjust the DAP effect level As the number ...

Page 38: ...e surround treble at 20 kHz compared to 7 kHz for Dolby Pro Logic As such the sound movement and being there feeling are enhanced much more than Dolby Pro Logic Dolby Digital EX Dolby Digital EX DOLBY D EX is a digital surround encoding format that adds the third surround channels called surround back Compared to the conventional Dolby Digital 5 1CH these newly added surround back channels can rep...

Page 39: ...e on CD LD and DVD software Compared to Dolby Digital the DTS Digital Surround format has a lower audio compression rate which enables it to add breadth and depth to the sounds reproduced As such DTS Digital Surround features natural solid and clear sound When EX ES setting is set to ON DTS Neo 6 DTS NEO 6 is applied while playing back multi channel DTS software It creates the same surround ambien...

Page 40: ...S ES 96 24 Matrix OFF DTS NONE AUTO ON DTS VIRTUAL SB 1 2 OFF DTS DTS DTS 96 24 3 2 2 2 2SPK 1SPK AUTO DTS ON DTS NEO 6 2 OFF DTS NONE Not available DTS DTS 3 1 2 1 2SPK 1SPK AUTO ON OFF DTS NONE Not available DTS DTS 1 0 3 0 2SPK 1SPK NONE Not available DTS DTS Dual Mono 2SPK 1SPK NONE Not available DUAL MONO 3D HEADPHONE Mode 3D H PHONE You can also enjoy the Surround modes through the headphone...

Page 41: ...current source When an analog or digital 2 channel source is playing you can adjust the EX ES 7 1 channel reproduction mode and store the setting but it will not affect the current source When the source is one to which the EX ES 7 1 channel reproduction cannot be applied you can adjust the setting and store in memory but reproduction channels will remain unchanged Activating the Surround Modes 1 ...

Page 42: ...s the spatial feeling of a large shoebox shaped hall designed primarily for classical concerts Its seating capacity is about 2000 HALL 2 Reproduces the spatial feeling of a large vineyard shaped hall designed primarily for classical concerts Its seating capacity is about 2000 LIVE CLUB Reproduces the spatial feeling of a live music club with a low ceiling DANCE CLUB Reproduces the spatial feeling ...

Page 43: ... Surround mode is activated Activating the DSP Modes Activating one of the DSP modes for a source automatically recalls the memorized settings and adjustments see pages 25 to 33 You can also use the buttons on the remote control for the same functions 1 Select and play any sound source 2 Press DSP repeatedly until the DSP mode you want appears on the display Each time you press the button the DSP ...

Page 44: ... the Equalization Patterns on page 32 for details Notes Midnight Mode is not available for DVD MULTI playback mode see page 20 When using a headphones you can listen to the front channels left and right only Connection diagram DVD VIDEO RIGHT LEFT S VIDEO VIDEO AUDIO SUBWOOFER CENTER DVD IN FRONT DVD IN COMPONENT VIDEO DVD IN SURR REAR R L R L A B C D E F G RX 8030VBK RX 7030VBK Å To component vid...

Page 45: ...on as play starts the cassette deck or MD recorder starts recording When the play ends the cassette deck or MD recorder enters recording pause and stops about 4 seconds later Notes During synchronized recording the selected source cannot be changed If the power of any component is shut off during synchronized recording the COMPU LINK remote control system may not operate properly In this case you ...

Page 46: ...th three types of the video terminals S video composite video and component video and the signals coming into this receiver through one type of video jacks can output only through the jack of the same type So you need to connect the VCR and or DVD player to the TV using one of the following three ways When using the AV COMPU LINK remote control system set the component video input for the DVD play...

Page 47: ...n enjoy the DVD playback without setting other switches manually When the DVD player is connected through the analog input jacks on this receiver and analog input is selected the receiver automatically turns on and changes the source to DVD or DVD MULTI When the DVD player is connected through the digital input terminal on this receiver and digital input is selected the receiver automatically turn...

Page 48: ...r After pressing CD you can perform the following operations on a CD player 3 Start playing 4 Return to the beginning of the current or previous track Skip to the beginning of the next track 7 Stop playing 8 Pause playing To resume press 3 1 10 0 10 Select a track number directly For track number 5 press 5 For track number 15 press 10 then 5 For track number 20 press 10 then 10 0 For track number ...

Page 49: ...30VBK After pressing TAPE CDR or TAPE CDR CONTROL you can perform the following operations on a CD recorder 3 Start playing 4 Return to the beginning of the current or previous track Skip to the beginning of the next track 7 Stop playing or recording 8 Pause playing To resume press 3 1 10 0 10 Select a track number directly For track number 5 press 5 For track number 15 press 10 then 5 For track n...

Page 50: ...e DVD player TV You can always perform the following operations TV Turn on or off the TV TV VOL Adjust the volume TV VIDEO Set the input mode either TV or VIDEO After pressing TV DBS you can perform the following operations on a TV CH Change the channels 1 9 0 100 Select the channels RETURN Alternate between the previously selected channel and the current channel Operating Video Components IMPORTA...

Page 51: ...ssing 10 keys press CH for changing the channels 5 Try to operate your TV by pressing TV When your TV turns on or off you have entered the correct code If there are more than one code listed for your brand of TV try each one until the correct one is entered To change the transmittable signals for operating a CATV converter or DBS tuner 1 Press and hold CATV DBS 2 Press CATV DBS CONTROL For RX 8030...

Page 52: ...nsmittable signals for operating another manufacturer s VCR 1 Press and hold VCR 1 for RX 8030VBK or VCR for RX 7030VBK 2 Press VCR 1 for RX 8030VBK or VCR for RX 7030VBK For RX 8030VBK CALL appears on the display window of the remote control 3 Enter manufacturer s code using buttons 1 9 and 0 See the list on page 49 to find the code 4 Release VCR 1 or VCR The following buttons can be used for ope...

Page 53: ...l 01 02 03 04 05 Jerrold 06 07 08 09 10 11 12 13 14 Oak 15 16 17 Panasonic 18 19 20 Pioneer 21 22 Scientific Atlanta 23 24 25 Tocom 26 Zenith 27 28 Manufacturer Codes JVC 56 57 67 Amstrad 43 44 45 46 47 48 49 Blaupunkt 30 Echostar 50 51 67 Goldstar 31 Grundig 32 33 Hirshmann 48 52 53 54 55 Instrument 68 ITT NOKIA 34 Kathrein 52 58 59 60 61 62 63 NEC 35 36 Orbitech 48 Philips 37 38 RCA 65 Samsung 3...

Page 54: ... 8 Select the correct remote control operation mode See pages 44 to 49 POSSIBLE CAUSE The power cord is not plugged in Speaker signal cables are not connected The SPEAKERS ON OFF 1 and SPEAKERS ON OFF 2 buttons are not set correctly An incorrect source is selected Muting is activated An incorrect input mode analog or digital is selected Speaker signal cables are not connected properly Incoming sig...

Page 55: ...IDEO 87 dB 80 dB CD IN CDR IN TAPE MD IN 87 dB 80 dB Frequency Response 8 Ω PHONO IN 20 Hz to 20 kHz 1 dB DVD IN VCR 1 IN VCR 2 IN TV SOUND DBS IN VIDEO 20 Hz to 100 kHz 1 dB 3 dB CD IN CDR IN TAPE MD IN 20 Hz to 100 kHz 1 dB 3 dB RIAA Phono Equalization 1 0 dB 20 Hz to 20 kHz Equalization 5 bands 63 Hz 250 Hz 1 kHz 4 kHz 16 kHz 8 dB Bass boost 6 dB 1 0 dB at 100 Hz Video Video Input Sensitivity I...

Page 56: ...CR IN TV SOUND DBS IN 87 dB 80 dB CD IN TAPE CDR IN 87 dB 80 dB Frequency Response 8 Ω DVD IN VCR IN TV SOUND DBS IN 20 Hz to 100 kHz 1 dB 3 dB CD IN TAPE CDR IN 20 Hz to 100 kHz 1 dB 3 dB Equalization 5 bands 63 Hz 250 Hz 1 kHz 4 kHz 16 kHz 8 dB Bass boost 6 dB 1 0 dB at 100 Hz Video Video Input Sensitivity Impedance Composite video DVD IN VCR IN TV SOUND DBS IN 1 V p p 75 Ω S video DVD IN VCR IN...

Page 57: ...stiques 2 Précautions 2 Identification des parties 3 Télécommande 3 Panneau avant 4 Panneau arrière 6 Pour commencer 8 Avant l installation 8 Vérification des accessoires fournis 8 Mise en place des piles dans la télécommande 8 Connexion des antennes FM et AM 8 Connexion des enceintes 9 Connexion des appareils audio vidéo 11 7 Connexions analogiques 11 7 Connexions numériques 16 Connexion du cordo...

Page 58: ...ux en fonction des réglages des enceintes Son Surround muticanaux virtuel pour casque d écoute Mode 3D HEADPHONE Le système surround virtuel intégré pour casque d écoute est compatible avec les sources multicanaux telles que le Dolby Digital DTS Surround etc Grâce au nouvel algorithme de traitement de signal utilisé pour le processeur DSP à haute performance vous pouvez obtenir un son surround nat...

Page 59: ...naux 46 48 Touches LEVEL 32 33 44 Les touches LEVEL fonctionnent uniquement après avoir appuyé sur SOUND puis sur les touches numériques marquées d un astérisque sur la télécommande u Touches VOLUME 18 i Touches TV VOL volume 46 47 o Touche MUTING 22 Touches TUNING UP DOWN 23 Touches de commande des appareils audio vidéo 44 46 48 3 8 7 4 REW FF a Touche DIMMER 22 å Uniquement pour le RX 7030VBK To...

Page 60: ... OFF VIDEO L AUDIO R DIGITAL S VIDEO VIDEO PUSH SET MULTI JOG MASTER VOLUME 1 2 s i a 4 5 7 u o p 9 3 PUSH OPEN CC CONVERTER BASS BOOST 8 RX 8030VBK RX 7030VBK Uniquement pour le RX 8030VBK Derrière la porte avant TUNER CONTROL MIDNIGHT MODE EX ES INPUT ATT INPUT ANALOG INPUT DIGITAL FM AM TUNING FM AM PRESET FM MODE MEMORY VIDEO L AUDIO R DIGITAL S VIDEO VIDEO r e q w y t 6 TV SOUND DBS VIDEO VCR...

Page 61: ...che INPUT ATT 20 e Touche MIDNIGHT MODE 20 r Touche INPUT DIGITAL 20 t Touches TUNER CONTROL Touches FM AM TUNING 5 23 Touches FM AM PRESET 5 23 24 Touche FM MODE 24 Touche MEMORY 23 y Uniquement pour le RX 8030VBK Prises d entrée VIDEO 13 Prise optique DIGITAL prise S VIDEO prise VIDEO prises AUDIO L R u Touche SETTING 27 i Touche QUICK SPEAKER SETUP 25 o Réglage MULTI JOG 25 27 31 Touche PUSH SE...

Page 62: ...CAUTION SPEAKER IMPEDANCE SINGLE USE See Instruction Manual For Connection 1 OR 2 8 16 1 AND 2 16 32 PREOUT SURR REAR 1 2 3 4 5 6 7 8 9 t r e w q p y VIDEO RIGHT LEFT S VIDEO VIDEO AUDIO DIGITAL IN DIGITAL 1 DVD DIGITAL 2 CD DIGITAL 3 TV DIGITAL 4 CDR PCM DOLBYDIGITAL DTS DIGITALOUT FM 75 COAXIAL AM EXT AM LOOP RIGHT LEFT 1 2 CENTER SPEAKER SURROUND SPEAKERS 8 16 CAUTION SPEAKER IMPEDANCE MONITOR ...

Page 63: ...TAL 2 CD DIGITAL 3 TV DIGITAL 4 CDR 2 Prises d entrée sortie AUDIO 12 15 Entrée DVD IN FRONT CENTER SUBWOOFER SURR REAR TV SOUND DBS IN VCR IN PLAY TAPE CDR IN PLAY CD IN Sortie VCR OUT REC TAPE CDR OUT REC 3 Prises d entrée sortie S VIDEO et VIDEO composite 14 15 Entrée DVD IN TV SOUND DBS IN VCR IN PLAY Sortie VCR OUT REC MONITOR OUT 4 Prises FM AM ANTENNA 8 5 Prise SUBWOOFER OUT 10 6 Prises d e...

Page 64: ...plique comment connecter les appareils audio vidéo et les enceintes à l ampli tuner et comment connecter l appareil au secteur Avant l installation Général Assurez vous d avoir les mains sèches Mettez tous les appareils hors tension Lisez les modes d emploi fournis avec les appareils qui doivent être connectés Emplacement Installez l ampli tuner dans un endroit plat et protégé de l humidité La tem...

Page 65: ...rer les graves ATTENTION Utilisez uniquement des enceintes dont l impédance correspond à l impédance SPEAKER IMPEDANCE indiquée sur les prises d enceintes Quand vous utilisez les deux prises FRONT SPEAKERS 1 et 2 utilisez des enceintes d une impédance de 16 Ω à 32 Ω Quand vous n utilisez qu une seule prise FRONT SPEAKERS 1 ou 2 utilisez des enceintes d une impédance de 8 Ω à 16 Ω RIG HT LEFT RIG H...

Page 66: ...acilement les informations d installation des enceintes voir page 25 Pour obtenir le meilleur effet Surround DSP possible référez vous à Réglage des enceintes à la page 27 Enceintes avant 1 droite gauche Enceintes Surround arrière droite gauche Enceintes avant 2 droite gauche Enceinte centrale Lors de l utilisation d une seule enceinte Surround arrière connectez le cordon ª à la prise RIGHT ª et l...

Page 67: ...rise audio gauche et la fiche rouge à la prise audio droite Si vos appareils audio possèdent une prise COMPU LINK Référez vous aussi à la page 41 pour plus d informations sur la connexion et le système de commande à distance COMPU LINK ATTENTION Si vous connectez un appareil d amélioration du son tel qu un égaliseur graphique entre l appareil source et cet ampli tuner la sortie sonore à travers ce...

Page 68: ... sur CDR pour le RX 8030VBK ou sur TAPE CDR pour le RX 7030VBK Pour le RX 8030VBK Pour le RX 7030VBK Vous povuez connecter un enregistreur de CD ou une platine cassette aux prises TAPE CDR Pour la connexion d une platine cassette aux prises TAPE CDR référez vous à la colonne de gauche Remarque Pour le RX 7030VBK Lors de la connexion d un enregistreur de CD aux prises TAPE CDR changez le nom de la ...

Page 69: ...ourni En utilisant ces prises vous pouvez obtenir une meilleure qualité vidéo dans l ordre suivant Composantes vidéo S vidéo Vidéo composite Si votre appareil vidéo est muni d une prise AV COMPULINK Référez vous aussi à la page 42 pour des informations détaillées sur la connexion et le système de commande à distance AV COMPU LINK IMPORTANT Cet ampli tuner est muni des prises vidéo suivantes vidéo ...

Page 70: ... sortie audio ı À l entrée en composantes vidéo Ç À l entrée S Vidéo Î À l entrée vidéo composite Lors de la connexion du téléviseur aux prises jacks AUDIO TV SOUND DBS IN NE connectez pas la sortie vidéo du téléviseur à ces prises d entrée vidéo Å À la sortie audio ı À la sortie en composantes vidéo Ç À la sortie S Vidéo Î À la sortie vidéo composite Remarques Lors de la connexion d un tuner DBS ...

Page 71: ... un lecteur DVD muni des prises de sortie stéréo Pour écouter le son après la connexion appuyez sur DVD Å À la sortie en composantes vidéo ı À la sortie S Vidéo Ç À la sortie vidéo composite Î À la sortie audio du canal avant gauche droit ou à la sortie audio mixée si nécessaire Remarque Lors de la connexion d un lecteur de DVD aux prises d entrée en composantes vidéo régler correctement l entrée ...

Page 72: ...édant une prise de sortie numérique coaxiale ou optique Prise de sortie numérique Vous pouvez connecter n importe quel appareil numérique muni d une prise d entrée numérique optique Câble coaxial numérique non fourni entre les prises numériques coaxiales Câble optique numérique non fourni entre les prises numériques optiques Avant de connecter un câble numérique optique enlever le capuchon protect...

Page 73: ...la source Référez vous à Sélection de la source de lecture ci à droite 3 Ajustez le volume Référez vous à Ajustement du volume à la page 18 4 Choisissez le mode Surround ou DSP Référez vous à Mise en service du mode Surround page 37 et Mise en service du mode DSP page 39 Mise sous tension de l appareil Appuyez sur STANDBY ON ou sur AUDIO sur la télécommande Le témoin STANDBY s éteint Le nom de la ...

Page 74: ... AM FM TAPE CDR CD CD TAPE CDR FM AM Ajustement du volume Sur le panneau avant Pour augmenter le volume tournez MASTER VOLUME dans le sens des aiguilles d une montre Pour diminuer le volume tournez le dans le sens contraire A partir de la télécommande Pour augmenter le volume appuyez sur VOLUME Pour diminuer le volume appuyez sur VOLUME ATTENTION Réglez toujours le volume au minimum avant de démar...

Page 75: ...peut être sorti par les enceintes Sélection des enceintes avant Si vous avez connecté deux paires d enceintes avant vous pouvez choisir laquelle utiliser Pour utiliser les enceintes connectées aux prises FRONT SPEAKERS 1 appuyez sur SPEAKERS ON OFF 1 de façon que l indicateur SPEAKERS 1 s allume sur l affichage Assurez vous que l indicateur SPEAKERS 2 n est pas allumé sur l affichage Pour utiliser...

Page 76: ...é quand l ampli tuner ne peut pas reconnaître le format du signal numérique entrant VOLUME DIGITAL L SUBWFR LS RS C R LFE DIGITAL AUTO SPEAKERS 1 DGTL AUTO DGTL D D DGTL DTS Dolby Digital Digital VOLUME LINEAR PCM L R ANALOG SPEAKERS 1 VOLUME DIGITAL L SUBWFR LS RS C R LFE DIGITAL AUTO SPEAKERS 1 Réglage de la plage dynamique Vous pouvez profiter d un son puissant la nuit en utilisant le mode de m...

Page 77: ...n et hors service le témoin s éteint Remarque Vous ne pouvez pas utiliser cette fonction quand Analog Direct est en service Si vous mettez en marche Analog Direct pendant que cette fonction est en service cette fonction sera annulée Modification du nom de la source Si un enregistreur de MD a été connecté aux prises TAPE MD ou si un tuner DBS a été connecté aux prises TV SOUND DBS sur le panneau ar...

Page 78: ...logique ne sont pas possibles Le niveau du volume de sortie le mode de minuit voir page 20 l accentuation des graves voir la colonne de gauche l égalisation numérique voir page 32 les modes Surround et les modes DSP voir pages 34 à 39 n affectent pas l enregistrement Ajustement de base et mémorisation automatique Cet appareil mémorise les réglages sonores pour chaque source Quand vous mettez l app...

Page 79: ...UNED STEREO LINEAR PCM L R ANALOG SPEAKERS 1 VOLUME TUNED STEREO LINEAR PCM L R ANALOG SPEAKERS 1 Utilisation de l accord par préréglage Une fois qu une station est affectée à un numéro de canal cette station peut être accordée rapidement Vous pouvez prérégler un maximum de 30 stations FM et de 15 stations AM Pour mémoriser les stations préréglées Avant de commencer rappelez vous Il y a un temps l...

Page 80: ...cile à recevoir ou parasitée il est possible de changer le mode de réception FM lors de la réception d une émission FM Vous pouvez mémoriser le mode de réception FM pour chaque station préréglée voir page 23 Pendant l écoute d une station FM appuyez sur FM MODE Chaque fois que vous appuyez sur la touche le mode de réception FM alterne entre AUTOMUTING et MODE MONO AUTOMUTING Normalement choisissez...

Page 81: ...chage puis le réglage initial de la taille de la pièce apparaît 4 Tournez MULTI JOG pour choisir la taille appropriée de la pièce par rapport à votre pièce d écoute La taille de la pièce change comme suit Pour choisir la taille appropriée de la pièce référez vous à Taille de la pièce et distance des enceintes à la page 26 LARGE est le réglage initial 5 Apppuyez sur MULTI JOG PUSH SET COMPLETE appa...

Page 82: ...e base Sur les pages suivantes vous pouvez ajuster les réglages suivants Élément Pour Voir page SUB WOOFER 1 Enregistrer le caisson de grave 27 FRONT SPEAKER 1 Enregistrer la taille des enceintes avant 27 CNTR SPEAKER 1 Enregistrer la taille de l enceinte centrale 27 SURR SPEAKER 1 Eregister la taille des enceintes Surround 27 SBACK SPEAKER 1 Enregistrer la taille des enceintes Surround arrière 27...

Page 83: ...AKER Choisissez la taille pour chaque enceinte connectée LARGE 1 Choisissez ce réglage quand la taille est relativement grande SMALL 2 Choisissez ce réglage quand la taille est relativement petite NONE Choisissez ce réglage si vous n avez pas connecté d enceinte ne peut pas être choisi pour les enceintes avant 1 Réglage initial pour les enceintes avant 2 Réglage initial pour l enceinte centrale et...

Page 84: ...is par le caisson de grave En d autres termes vous pouvez choisir si les éléments des graves des canaux des enceintes avant sont transmis par le caisson de grave sans tenir compte du réglage de la taille des enceintes avant SMALL ou LARGE Choisissez un des réglages suivants LFE Choisissez ce réglage pour transmettre seulement des signaux LFE lors de la reproduction d un support Dolby Digital et DT...

Page 85: ...e DGTL IN COAX Choisissez l appareil connecté à la prise coaxiale numérique DIGITAL IN 1 Pour le RX 8030VBK DVD réglage initial MD CDR TV ou DBS ou CD Pour le RX 7030VBK DVD réglage initial CD TV ou DBS ou CDR 7 Prises optiques numériques DGTL IN OPTICAL Pour le RX 8030VBK Choisissez les appareils connectés aux prises optiques numériques DIGITAL IN 2 4 Quand vous tournez MULTI JOG les prises d ent...

Page 86: ...uement sur les appareils donnés ci dessous Quand DIGITAL IN 1 DGTL IN COAX est réglé sur DVD 2 CD 3 TV ou DBS 4 CDR Quand DIGITAL IN 1 DGTL IN COAX est réglé sur CD 2 DVD 3 TV ou DBS 4 CDR Quand DIGITAL IN 1 DGTL IN COAX est réglé sur TV ou DBS 2 DVD 3 CD 4 CDR Quand DIGITAL IN 1 DGTL IN COAX est réglé sur CDR 2 DVD 3 CD 4 TV ou DBS Si vous avez changé le nom de source de TV sur DBS DBS apparaît v...

Page 87: ...ge DIGITAL EQ Ajuster la courbe d égalisation 32 SUBWFR LVL Ajuster le niveau de sortie du caisson de grave 32 FRONT L LVL Ajuster le niveau de sortie de l enceinte avant gauche 32 FRONT R LVL Ajuster le niveau de sortie de l enceinte avant droite 32 CENTER LVL Ajuster le niveau de sortie de l enceinte centrale 32 SURR L LVL Ajuster le niveau de sortie de l enceinte Surround gauche 32 SURR R LVL A...

Page 88: ...le niveau de sortie du caisson de grave ne sont pas ajustables quand la fonction Analog Direct est en service Pour ajuster le niveau de sortie du caisson de grave référez vous à la page 19 Ajustement des courbes d égalisation Vous pouvez ajuster les courbes d égalisation selon vos préférences Une fois que l ajustement est réalisé il est mémorisé pour chaque source 7 Ajustement de l égalisation DIG...

Page 89: ...mmun pour tous les modes Surround et est mémorisé séparément pour les modes DSP CTR TONE Permet d ajuster la tonalité centrale Plus le nombre augmente plus les dialogues deviennent clairs et les voix humaines passent d une tonalité douce à une tonalité nette Normalement choisissez 3 réglage initial Plage d ajustement 1 à 5 Pour les modes DAP Une fois que vous avez réalisé un ajustement il est mémo...

Page 90: ...round est réglée sur 20 kHz un niveau nettement supérieur aux 7 kHz du Dolby Pro Logic De même le mouvement du son et l impression de direct sont encore plus accentuées qu avec le Dolby Pro Logic Dolby Digital EX Dolby Digital EX DOLBY D EX est un format de codage Surround numérique qui ajoute des troisièmes canaux Surround appelés Surround arrière Par rapport au Dolby Digital 5 1CH conventionnel ...

Page 91: ...étecté par l entrée numérique l indicateur s allume sur l affichage DTS Digital Surround Le DTS Digital Surround DTS est un autre format audio numérique à 5 1 canaux discrets disponible sur les supports CD LD et DVD Quand le réglage EX ES est réglé sur ON DTS Neo 6 DTS NEO 6 est mis en service lors de la lecture de supports DTS multicanaux Il crée la même ambiance Surround que pour les supports à ...

Page 92: ...UAL SB 1 2 OFF DTS DTS DTS 96 24 3 2 2 2 2SPK 1SPK AUTO DTS ON DTS NEO 6 2 OFF DTS NONE Non disponible DTS DTS 3 1 2 1 2SPK 1SPK AUTO ON OFF DTS NONE Non disponible DTS DTS 1 0 3 0 2SPK 1SPK NONE Non disponible DTS DTS Dual Mono 2SPK 1SPK NONE Non disponible DUAL MONO Type de signal entrant Mode Surround disponible Analog PCM Dolby Digital 2 0 DTS 2 0 PL II MOVIE PL II MUSIC PRO LOGIC NEO 6 CINMA ...

Page 93: ...x est reproduite vous pouvez ajuster le mode de reproduction EX ES 7 1 canaux et mémoriser le réglage mais il n affectera pas la source actuelle Si la source est une source pour laquelle la reproduction EX ES 7 1 canaux ne peut pas être appliquée vous pouvez ajuster les réglages et les mémoriser mais les canaux reproduits resteront inchangés Mise en service des modes Surround 1 Choisissez et repro...

Page 94: ...onçue principalement pour les concerts classiques Sa capacité en siège est d environ 2000 HALL 2 Reproduit la sensation spatiale d une grande salle de concert en forme de champ de vigne conçue principalement pour les concerts classiques Sa capacité en siège est d environ 2000 LIVE CLUB Reproduit la sensation spatiale d un club à concert à plafonds bas DANCE CLUB Reproduit la sensation spatiale d u...

Page 95: ...vice Mise en service du mode DSP Mettre en service un des modes DSP pour une source rappelle automatiquement les réglages et les ajustements mémorisés Voir pages 25 à 33 Vous pouvez aussi utiliser les touches sur la télécommande pour les mêmes fonctions 1 Choisissez et reproduisez une source 2 Appuyez répétitivement sur DSP jusqu à ce que le mode DSP souhaité apparaisse sur l affichage Chaque fois...

Page 96: ...courbes d égalisation à la page 32 pour les détails Remarques Le mode de minuit n est pas disponible pour le mode de lecture DVD MULTI voir page 20 Lors de l utilisation d un casque d écoute vous pouvez écouter uniquement les canaux avant gauche et droit Schéma de connexion DVD VIDEO RIGHT LEFT S VIDEO VIDEO AUDIO SUBWOOFER CENTER DVD IN FRONT DVD IN COMPONENT VIDEO DVD IN SURR REAR R L R L A B C ...

Page 97: ...pli tuner se met automatiquement sous tension et change la source sur l appareil Inversement si vous choisissez une nouvelle source sur l ampli tuner ou sur sa télécommande l appareil choisi démarre la lecture immédiatement Dans les deux cas la source précédemment choisie continue d être reproduite sans son pendant quelques secondes Pour le RX 7030VBK Vous ne pouvez pas utiliser le système de comm...

Page 98: ... pour le lecteur de DVD et le tuner DBS référez vous à Réglage de l entrée en composantes vidéo à la page 30 sinon l entrée correcte pour cet ampli tuner n est pas choisie sur le téléviseur Remarques Lors de la connexion de l ampli tuner et d un téléviseur avec une prise AV COMPU LINK EX en utilisant un câble en composantes vidéo il n est pas possible d utiliser la sélection automatique du mode d ...

Page 99: ... est possible de voir un DVD sans avoir à appuyer sur d autres touches Quand le lecteur de DVD est connecté par les prises d entrée analogiques à cet ampli tuner et que l entrée analogique est choisie l ampli tuner se met automatiquement sous tension et change la source sur DVD ou DVD MULTI Quand le lecteur de DVD est connecté par la prise d entrée numérique à cet ampli tuner et que l entrée numér...

Page 100: ... 5 appuyez sur 5 Pour le numéro de canal 15 appuyez sur 10 puis sur 5 Pour le numéro de canal 20 appuyez sur 10 puis sur 10 0 TUNING UP DOWN Accorder une station FM MODE Changer le mode de réception FM Section de commande du son Amplificateur Vous pouvez toujours réaliser les opérations suivantes SURROUND Mettre en service et choisir un mode Surround DSP Mettre en service et choisir un mode DSP SU...

Page 101: ...r appuyé sur TAPE CDR ou TAPE CDR CONTROL vous pouvez réaliser les opérations suivantes sur un enregistreur de CD 3 Démarer la lecture 4 Retourner au début de la plage actuelle ou précédente Sauter au début de la plage suivante 7 Arrêter la lecture 8 Arrêter la lecture momentanément Pour reprendre appuyez sur 3 1 10 0 10 Choisir un numéro de plage directement Pour la plage numéro 5 appuyez sur 5 P...

Page 102: ...es opérations détaillées concernant le menu DVD se référer aux instructions fournies avec les disques ou le lecteur de DVD Téléviseur Vous pouvez toujours réaliser les opérations suivantes TV Mettre sous ou hors tension le téléviseur TV VOL Ajuster le volume TV VIDEO Régler le mode d entrée TV ou VIDEO Après avoir appuyé sur TV DBS vous pouvez réaliser les opérations suivantes sur un téléviseur CH...

Page 103: ...ur les touches numériques appuyez sur CH pour changer les canaux 5 Essayez de commander votre téléviseur en appuyant sur TV Si le téléviseur se met sous ou hors tension c est que vous avez entré le bon code S il y a plus d un code pour votre marque de téléviseur essayez chaque code jusqu à ce que vous trouviez le bon Pour changer les signaux émettables pour commander le convertisseur CATV ou tuner...

Page 104: ...pour le RX 8030VBK ou VCR pour le RX 7030VBK 2 Appuyez sur VCR 1 pour le RX 8030VBK ou VCR pour le RX 7030VBK 3 Entrez le code du fabricant en utilisant les touches numériques 1 9 et 0 Référez vous à la liste de la page 49 pour trouver le code 4 Relâchez VCR 1 ou VCR Les touches suivantes peuvent être utilisées pour commander le magnétoscope VCR 1 Pour le RX 8030VBK Met sous ou hors tension le mag...

Page 105: ...03 04 05 Jerrold 06 07 08 09 10 11 12 13 14 Oak 15 16 17 Panasonic 18 19 20 Pioneer 21 22 Scientific Atlanta 23 24 25 Tocom 26 Zenith 27 28 Fabricant Codes JVC 56 57 67 Amstrad 43 44 45 46 47 48 49 Blaupunkt 30 Echostar 50 51 67 Goldstar 31 Grundig 32 33 Hirshmann 48 52 53 54 55 Instrument 68 ITT NOKIA 34 Kathrein 52 58 59 60 61 62 63 NEC 35 36 Orbitech 48 Philips 37 38 RCA 65 Samsung 39 40 Schwai...

Page 106: ...ement de télécommande correct Voir pages 44 à 49 CAUSE POSSIBLE Le cordon d alimentation n est pas branché Les câbles de signal d enceinte ne sont pas connectés Les touches SPEAKERS ON OFF 1 et SPEAKERS ON OFF 2 ne sont pas positionnées correctement Une source incorrecte est choisie La mise en sourdine est en service Un mode d entrée incorrect analogique ou numérique est choisi Les câbles de signa...

Page 107: ...87 dB 80 dB CD IN CDR IN TAPE MD IN 87 dB 80 dB Réponse en fréquence 8 Ω PHONO IN 20 Hz à 20 kHz 1 dB DVD IN VCR 1 IN VCR 2 IN TV SOUND DBS IN VIDEO 20 Hz à 100 kHz 1 dB 3 dB CD IN CDR IN TAPE MD IN 20 Hz à 100 kHz 1 dB 3 dB Égalisation Phono RIAA 1 0 dB 20 Hz à 20 kHz Égalisation 5 bandes 63 Hz 250 Hz 1 kHz 4 kHz 16 kHz 8 dB Accentuation des graves 6 dB 1 0 dB à 100 Hz Spécifications Vidéo Sensib...

Page 108: ...DVD IN VCR IN TV SOUND DBS IN 87 dB 80 dB CD IN TAPE CDR IN 87 dB 80 dB Réponse en fréquence 8 Ω DVD IN VCR IN TV SOUND DBS IN 20 Hz à 100 kHz 1 dB 3 dB CD IN TAPE CDR IN 20 Hz à 100 kHz 1 dB 3 dB Égalisation 5 bandes 63 Hz 250 Hz 1 kHz 4 kHz 16 kHz 8 dB Accentuation des graves 6 dB 1 0 dB à 100 Hz Vidéo Sensibilité d entrée vidéo Impédance Vidéo composite DVD IN VCR IN TV SOUND DBS IN 1 V c c 75 ...

Page 109: ...EN FR 0203NHMMDWJEIN 2003 VICTOR COMPANY OF JAPAN LIMITED VICTOR COMPANY OF JAPAN LIMITED COVER_8030 7030 C 7 pm6 03 2 13 2 53 PM 2 ...

Reviews: