17
Basic Setting Items
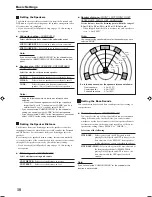
On the following pages, you can adjust the following items:
• You can only select the items currently available. For details, see
the explanation of each item.
Items
To do
See page
SUBWOOFER
*
Register your subwoofer.
18
FRNT SPEAKERS
* Register your front speaker size.
18
CNTR SPEAKER
*
Register your center speaker size.
18
SURR SPEAKERS
* Register your surround speaker size.
18
DISTANCE UNIT
Select the measuring unit for the
speaker distance.
18
FRONT L DIST
*
Register the distance from the left front
speaker to your listening point.
18
FRONT R DIST
*
Register the distance from the right front
speaker to your listening point.
18
CENTER DIST
*
Register the distance from the center
speaker to your listening point.
18
SURR L DIST
*
Register the distance from the left
surround speaker to your listening
point.
18
SURR R DIST
*
Register the distance from the right
surround speaker to your listening
point.
18
SUBWOOFER OUT
Select the type of the sounds emitted from
the subwoofer.
18
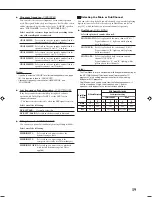
CROSSOVER
Select the cutoff frequency to the
subwoofer.
19
LFE ATTENUATE
Attenuate the bass (LFE) sounds.
19
MIDNIGHT MODE
Reproduce a powerful sound at night.
19
DUAL MONO
Select the Dual Mono sound channel.
19
VIRTUAL SBACK
Turn on or off Virtual Surround Back.
20
DIGITAL IN
Select the component connected to
digital input terminal.
20
Note:
*
These items can be set using Quick Speaker Setup.
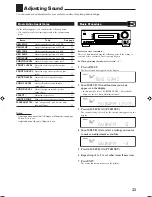
Basic Procedure
Before you start, remember...
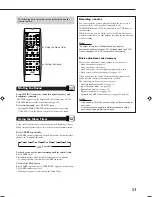
There is a time limit in doing the following steps. If the setting is
canceled before you finish, start from step
1
again.
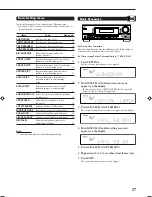
Ex. When setting Virtual Surround Back to “VRTL SB ON.”
1 Press SETTING.
The last selected item appears on the display.
2 Turn MULTI JOG until an item you want
appears on the display.
• In this example, select “VIRTUAL SBACK.” For available
items, see the list “Basic Setting Items.”
3 Press in MULTI JOG (PUSH SET).
The current setting for the selected item appears on the display.
4 Turn MULTI JOG until a setting you want
appears on the display.
5 Press in MULTI JOG (PUSH SET).
6 Repeat steps 2 to 5 to set other items if necessary.
7 Press EXIT.
The source indication resumes on the display.
Remote
NOT
16-20_RX-5060B[J].p65
05.11.28, 20:25
17
Summary of Contents for RX-5060B
Page 38: ......
Page 39: ......
Page 40: ...1205YHMMDWJEIN EN 2005 Victor Company of Japan Limited AUDIO VIDEO CONTROL RECEIVER RX 5060B ...
Page 78: ...LVT1507 003A B RX 5062S AUDIO VIDEO CONTROL RECEIVER INSTRUCTIONS TA NEWS INFO DISPLAY MODE ...
Page 116: ...0106YHMMDWJEIN EN 2006 Victor Company of Japan Limited AUDIO VIDEO CONTROL RECEIVER RX 5062S ...

