44
EN
1
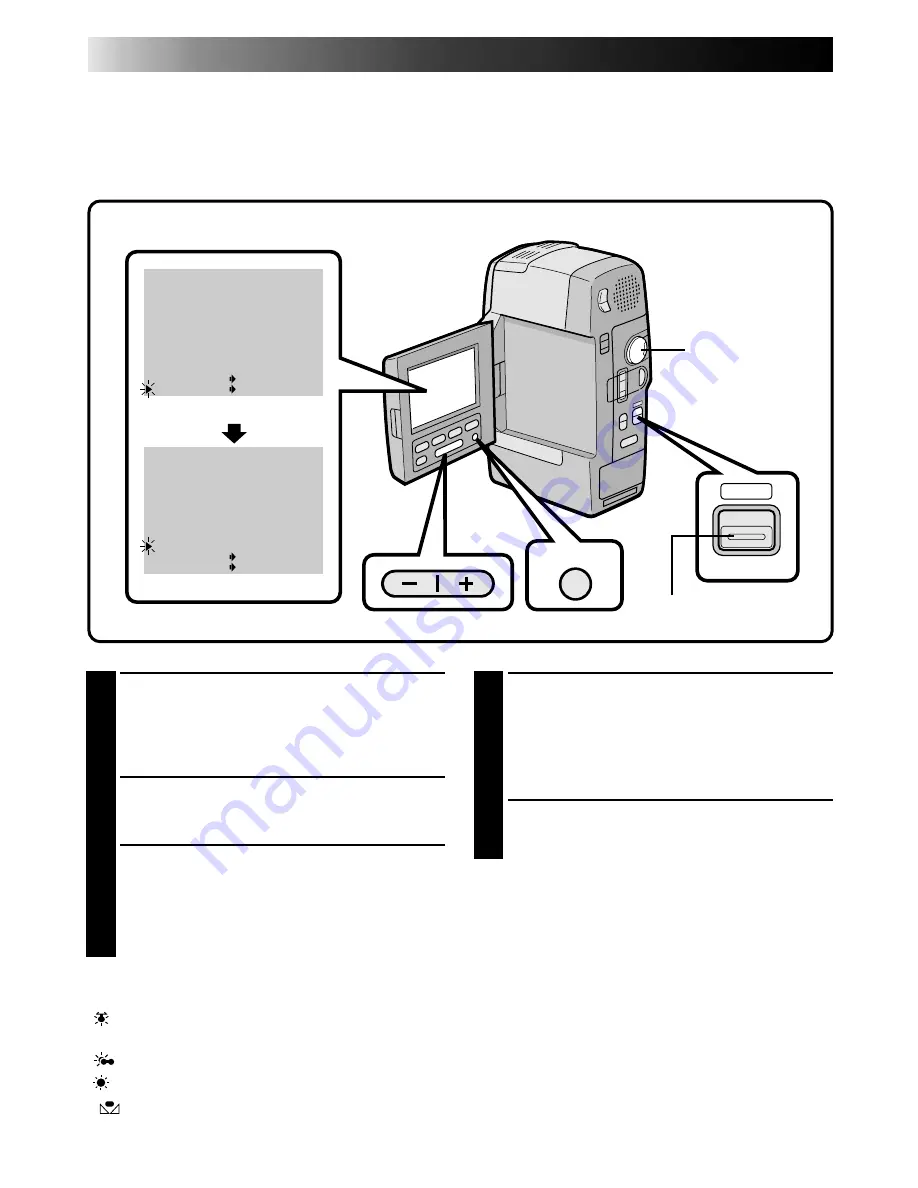
SELECT MODE
First make sure the LCD monitor is open fully.
Turn the Power Dial to "REC" while pressing
down the lock button located on the dial, and
set the shooting mode selector to "MANUAL".
2
ACCESS RECORDING MENU
Press MENU. The Recording Menu appears in
the LCD monitor.
3
ACCESS WHITE BALANCE MENU
Place the pointer next to "W.BALANCE" by
pressing the –/+ button. Press "+" to move up
and "–" to move down. Then press MENU. The
pointer stops blinking, indicating that the
function has been selected.
AUTO–The white balance is adjusted automatically.
This is the factory preset position.
“ ”– When using a video light or other similar
type of lighting.
“
”– When shooting outdoors on a cloudy day.
“
”– When shooting outdoors on a sunny day.
“
”–When shooting with the white balance
already having been set on the subject (
Z
pg. 45).
White Balance Adjustment
A term that refers to the correctness of colour reproduction under various lighting. If the white balance is
correct, all other colours will be accurately reproduced.
The white balance is usually adjusted automatically. However, the more advanced camcorder operator
would prefer to control this function manually and achieve a more professional colour/tint reproduction.
4
SET FUNCTION PARAMETERS
Cycle through the available settings of the
selected functions by pressing the –/+ button,
and stop when the one you want is displayed.
Then press MENU and the pointer
automatically moves to "END".
5
CLOSE RECORDING MENU
Press MENU again. Selection is complete and
the menu disappears.
To Return To Automatic White Balance . . .
..... select “AUTO” in step 3. Or set the shooting
mode selector to “AUTO”.
NOTE:
White balance cannot be used when P.AE/Effects
Sepia or Monotone are activated.
RECORDING
Advanced Features (Cont.)
WIDE MODE
ZOOM
D I S
GA I N UP
TO F ADER / W IPE MENU
TO P. AE / EFFECT MENU
TO DATE / TIME MENU
TO SYSTEM MENU
W.BALANCE
END
O FF
2 0X
OFF
AGC
I T EM –/+ BUTTON
SET MENU BUTTON
WIDE MODE
ZOOM
D I S
GA I N UP
TO F ADER / W IPE MENU
TO P. AE / EFFECT MENU
TO DATE / TIME MENU
TO SYSTEM MENU
W.BALANCE
END
O FF
2 0X
OFF
AGC
I T EM –/+ BUTTON
SET MENU BUTTON
MENU
AUTO
MANUAL
AUTO
AUTO
LCD monitor
Recording Menu
Power Dial
Shooting mode selector
Summary of Contents for LYT0002-0F2A
Page 1: ...GR DVM801 DIGITAL VIDEO CAMERA LYT0002 0F2A GR DVM801 INSTRUCTIONS ENGLISH N EN ...
Page 83: ...EN 83 ...
Page 84: ...H N ...


