


53
54
IMPORT
ANT!
PREP
ARE
USE
SETTINGS
TROUBLE?
“CH/CC” List
“T-V LINK” allows the TV to share information easily with a connected “T-V LINK” compatible device.
By using T-V LINK :
You can send the analogue channel information programmed on the TV to the “T-V LINK” compatible device,
so that both the TV and the external device have the same channel settings. When connecting a new external
device, channel information is loaded into it, allowing channel setup to be completed very quickly. For more
details, refer to the external device’s manual.
You can easily record the TV programme you are viewing on a “T-V LINK” compatible device by using the
“DIRECT REC” feature. For more details, refer to the external device’s manual.
After timer-record setting, the TV will instruct the recorder to start and stop recording, via DIRECT REC.
Technical information
What is “T-V LINK”?
Connect a “DVI“ device to “EXT-4 (HDMI)” using “DVI-HDMI” conversion cable. Connect analogue sound output of
the DVI device to L and R terminals in EXT-3.
Set “AUDIO” in “HDMI SETTING” to “ANALOGUE” or “AUTO”
(P. 34)
EXT-5 input does not support analogue sound (EXT-3).
EXT-5 input does not support DVI devices.
Connect “DVI” devices
When “AUTO” is selected in ZOOM, the aspect ratio will turn to the ratio obtained from the information the TV
received.
The aspect ratio will turn to the ratio obtained from WSS (Wide Screen Identification Signal), video signal, or
control signal of the external devices. Without receiving the aspect information, it will be the setting in “4:3 AUTO
ASPECT” (P. 38)
AUTO in “ZOOM”
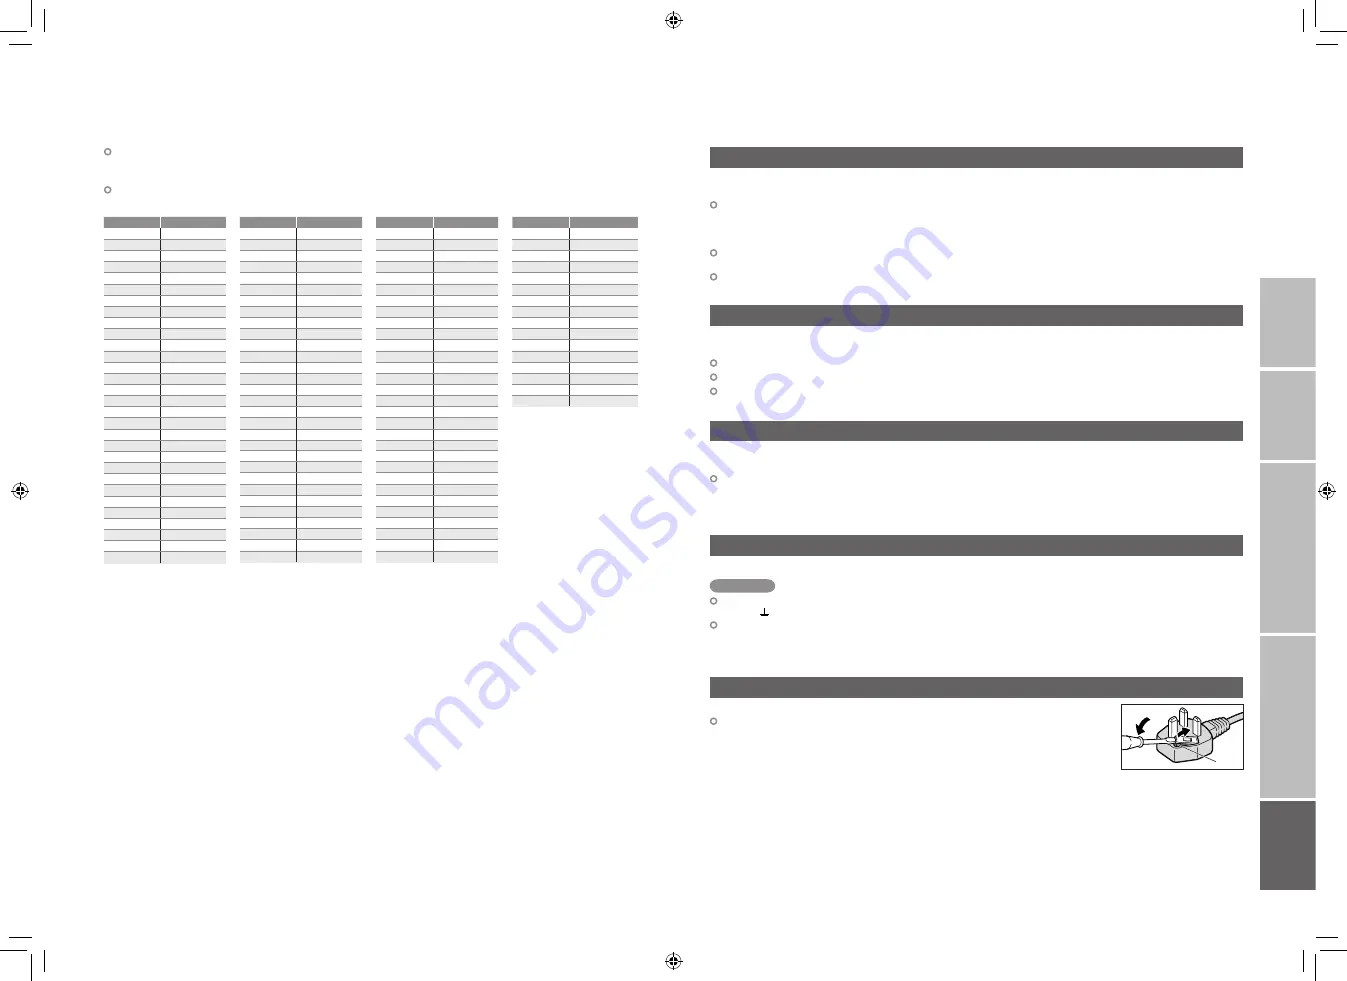
Fuse
Attach a new plug following the steps below. If in doubt, contact your local retailer.
Never connect to the larger terminal marked with an “E”, the safety earth
symbol “ ” or coloured green or green-and-yellow.
The wires in the mains lead on this product are coloured with the following code:
· Blue: Neutral wire (connect to the black terminal, or one marked “N”)
· Brown: Live wire (connect to the red terminal, or one marked “L”)
Open the plug as illustrated on the right.
When replacing the fuse, always use a correctly rated and approved type and
re-fit the fuse cover when finished.
If in doubt, contact your local retailer.
If you accidentally cut the power cord
Change the fuse in the plug
Important
To use the INSERT function (P. 48), find the CH/CC number corresponding to the TV’s channel number
from this table. If you want to know a particular TV channel’s channel menu, look in TV listings magazines or
contact the broadcaster.
When the Country setting is United Kingdom, the CC number channels and channels from CH02 to
CH12 cannot be received.
CH
Channel
CH 02
E2, IR A
CH 03
E3, IR B
CH 04
E4, IR C
CH 05
E5, IR D
CH 06
E6, IR E
CH 07
E7, IR F
CH 08
E8, IR G
CH 09
E9
CH 10
E10, IR H
CH 11
E11, IR J
CH 12
E12
CH 21
E21
CH 22
E22
CH 23
E23
CH 24
E24
CH 25
E25
CH 26
E26
CH 27
E27
CH 28
E28
CH 29
E29
CH 30
E30
CH 31
E31
CH 32
E32
CH 33
E33
CH 34
E34
CH 35
E35
CH 36
E36
CH 37
E37
CH 38
E38
CH 39
E39
CH
Channel
CH 40
E40
CH 41
E41
CH 42
E42
CH 43
E43
CH 44
E44
CH 45
E45
CH 46
E46
CH 47
E47
CH 48
E48
CH 49
E49
CH 50
E50
CH 51
E51
CH 52
E52
CH 53
E53
CH 54
E54
CH 55
E55
CH 56
E56
CH 57
E57
CH 58
E58
CH 59
E59
CH 60
E60
CH 61
E61
CH 62
E62
CH 63
E63
CH 64
E64
CH 65
E65
CH 66
E66
CH 67
E67
CH 68
E68
CH 69
E69
CC
Channel
CC 31
S31
CC 32
S32
CC 33
S33
CC 34
S34
CC 35
S35
CC 36
S36
CC 37
S37
CC 38
S38
CC 39
S39
CC 40
S40
CC 41
S41
CC 75
X
CC 76
Y
CC 77
Z
CC 78
Z+1
CC 79
Z+2
CC
Channel
CC 01
S1
CC 02
S2
CC 03
S3
CC 04
S4
CC 05
S5
CC 06
S6
CC 07
S7
CC 08
S8
CC 09
S9
CC 10
S10
CC 11
S11
CC 12
S12
CC 13
S13
CC 14
S14
CC 15
S15
CC 16
S16
CC 17
S17
CC 18
S18
CC 19
S19
CC 20
S20
CC 21
S21
CC 22
S22
CC 23
S23
CC 24
S24
CC 25
S25
CC 26
S26
CC 27
S27
CC 28
S28
CC 29
S29
CC 30
S30
53-54
1/25/2007 3:09:01 PM