


— 25 —
Audio Dubbing
Audio Dubbing replaces a previously recorded normal audio track
with a new soundtrack.
A
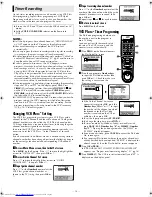
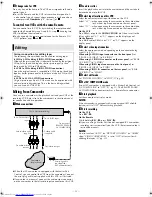
Make connections
Connect an audio cable between the VCR’s audio input
connectors and the audio component’s audio output connectors.
●
When connecting a monaural audio component, use only the
VCR’s AUDIO L input connector.
●
Audio Dubbing is possible only by using the audio input
connectors on the front panel or on the rear panel.
B
Select input location
Select “F-1” —when connecting the audio component to the
audio input connectors on the front panel.
Select “L-1” —when connecting the audio component to the
audio input connectors on the rear panel.
On the VCR
Press
CH+/–
or push the
ADVANCED JOG
dial, then turn it to the
left or right until “L-1” or “F-1” appears on the display panel.
On the Remote
Press
AUX
and/or
CH+/–
until “L-1” or “F-1” appears on the
display panel.
C
Locate start point, and engage Audio Dubbing mode
Load a cassette and press
PLAY
(
4
) on the VCR. Press
PAUSE
(
9
)
at the point where you want to start dubbing, then press
A.DUB
.
●
The VCR enters the Audio Dubbing Pause mode. “
o
” blinks,
“
u
” and “
i
“ light up on the display panel.
D
Start dubbing
Engage the Play mode on the audio component, then press
PLAY
(
4
) on the VCR. Audio Dubbing begins. “
o
” blinks, and “
u
”
lights up on the display panel.
●
To pause dubbing, press
PAUSE
(
9
). Press
PLAY
(
4
) to resume
dubbing.
E
End Audio Dubbing
Press
STOP
(
8
) on the Remote or
STOP/EJECT
(
0
) on the VCR,
then engage the Stop mode of the audio component.
NOTES:
●
When monitoring the sound during Audio Dubbing, the normal
soundtrack is automatically selected. If you wish to hear the
Hi-Fi or mixed sound (Hi-Fi + normal soundtracks), press
A.MONITOR
to select “NORM HI-FI”. (
墌
pg. 11, “Selecting
monitor sound”)
●
Audio Dubbing stops automatically when the counter reaches
“0:00:00”, and the VCR enters the Play mode. Check the
counter reading before dubbing.
●
Audio Dubbing is not possible with a cassette whose record
safety tab has been removed.
●
When playing back an audio-dubbed tape, press
A.MONITOR
to select the soundtrack you wish to hear. (
墌
pg. 11, “Selecting
monitor sound”)
Insert Editing and AV Dubbing
Insert Editing:
You can replace a recorded scene with new scene recorded on
another tape or with other material. Both the picture and the
sound recorded on the Hi-Fi sound track are replaced at the same
time.
AV Dubbing:
You can perform Audio Dubbing and Insert Editing at the same
time. This means that the picture and the sounds recorded on the
Hi-Fi sound track and on the normal track are replaced at the
same time.
●
For AV Dubbing, you can edit pictures and sound using different
sources; connect a video source to the video input connector,
and an audio source to the audio input connectors.
A
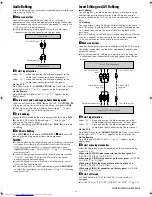
Make connections
Connect the supplied audio/video cable between the VCR’s audio/
video input connectors and the other component’s audio/video
output connectors.
●
Insert Editing and AV Dubbing are possible only by using the
audio/video input connectors on the front panel or on the rear
panel.
B
Select input location
Select “F-1” —when connecting the other component to the
audio/video input connectors on the front panel.
Select “L-1” —when connecting the other component to the
audio/video input connectors on the rear panel.
On the VCR
Press
CH+/–
or push the
ADVANCED JOG
dial, then turn it to the
left or right until “L-1” or “F-1” appears on the display panel.
On the Remote
Press
AUX
and/or
CH+/–
until “L-1” or “F-1” appears on the
display panel.
C
Select video input connector
Select the appropriate mode depending on the connector being
used (
墌
pg. 21).
When using S-VIDEO input connector on the front panel
, set
“FRONT AUX INPUT” to “S-VIDEO”.
When using S-VIDEO IN connector on the rear panel
, set “REAR
AUX INPUT” to “S-VIDEO”.
When using VIDEO input connector on the front panel
, set
“FRONT AUX INPUT” to “VIDEO”.
When using VIDEO IN connector on the rear panel
, set “REAR
AUX INPUT” to “VIDEO”.
D
Select edit mode
Set the edit mode to “ON” for the VCRs if such a mode is
equipped.
●
On this VCR, set “PICTURE CONTROL” to “EDIT” (
墌
pg. 20).
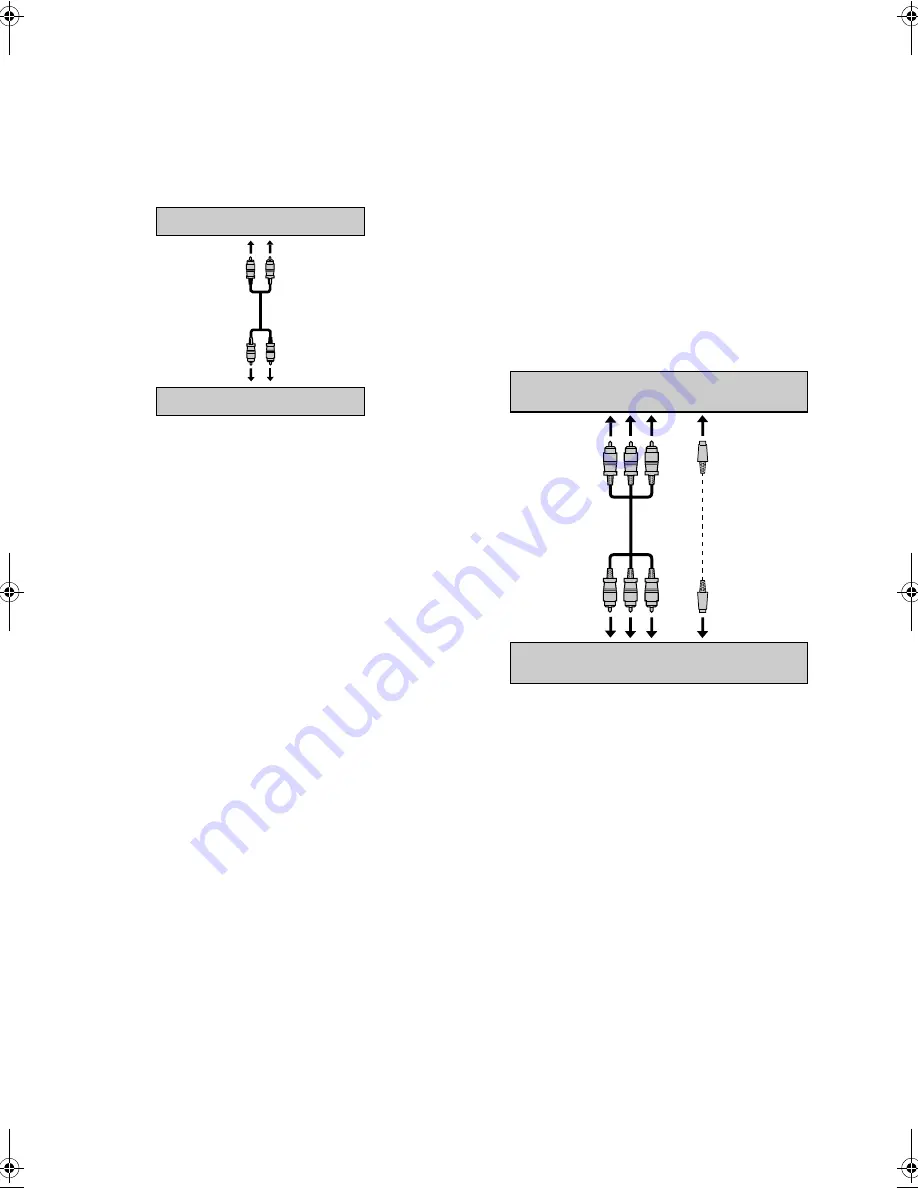
To AUDIO input
This VCR
CD player, etc.
To audio output
To S-video output
This VCR (for recording)
Another VCR (for playback)
S-video cable
(supplied)
To S-VIDEO input
To audio/video output
Audio/video cable
(supplied)
To AUDIO/VIDEO
input
CONTINUED ON NEXT PAGE
HR-S9911U-EN.fm Page 25 Monday, April 22, 2002 1:34 PM


