JVC HR-S9911U - S-VHS Hi-Fi Stereo VCR Instructions Manual Download Page 13

— 13 —

NOTE:

If the tape reaches its end during recording, the recording stops 
and “

[

” on the display panel blinks. Press 

STOP/EJECT

 (

0

on the VCR to eject the cassette, or press 

REW

 (

3

) on the 

Remote or turn the 

ADVANCED JOG

 dial to the left on the VCR to 

rewind the tape.

Recording Features

Recording Resume Function

If there is a power outage during recording (or Instant Timer 
Recording, or timer recording), the recording will resume 
automatically when the power is restored to the VCR. (No setting is 
required for this function.)

Specifying recording length
— Instant Timer Recording (ITR)

During recording, press 

REC

 (

7

) on the VCR repeatedly until the 

recording length you want appears on the display panel. The 
record indicator (

o

) on the display panel starts blinking.

Each time you press the button, recording length increases in 
30-minute intervals (up to 6 hours).

The VCR shuts off after recording is finished.

To cancel an ITR, press 

STOP

 (

8

) on the Remote or 

STOP/EJECT


(

0

) on the VCR.

Watching one program while recording another

During recording...

If you connect the TV and the VCR only using the RF 
connection (

pg. 6) to view pictures from the VCR, press 

TV/

VCR

 on the Remote so that VCR mode indicator goes off from 

the display panel. (The TV broadcast being recorded 
disappears.)

If you are using the AV or S-video connection (

pg. 6) to view 

pictures from the VCR, change the TV’s input mode from AV to 
TV.

Then, select the channel you want to watch, on the TV.

Second Audio Recording

This VCR’s built-in MTS decoder enables reception of 
Multichannel TV Sound broadcast. To record a SAP program 
received, set “2ND AUDIO RECORD” to “ON” (

pg. 20).

S-VHS (Super VHS), S-VHS ET or VHS Recording 
Mode

This VCR can record in S-VHS (Super VHS), S-VHS ET or VHS.

To record in S-VHS:

Set “S-VHS MODE” to “ON” (

pg. 20). Then, insert a cassette 

marked “S-VHS”. The S-VHS indicator lights up on the display 
panel.
The S-VHS recording mode is selected.

To record in S-VHS ET on a VHS cassette:

Set “S-VHS ET” to “ON” (

pg. 19). Then, insert a cassette 

marked “VHS”. The S-VHS indicator lights up on the display 
panel.

To record in VHS:

Insert a cassette marked “VHS”.
Set “S-VHS ET” to “OFF” (

pg. 19).

To record in VHS on an S-VHS cassette:

Insert a cassette marked “S-VHS”. The S-VHS indicator lights up 
on the display panel. Then, set “S-VHS MODE” to “OFF” 
(

pg. 20). The S-VHS indicator goes off.

The VHS recording mode is selected.

NOTE:

When playing back a tape that has been recorded in S-VHS or 
S-VHS ET, the S-VHS indicator lights up on the display panel 
regardless of the “S-VHS ET” or “S-VHS MODE” setting. 
(

pg. 19, 20)

Retake

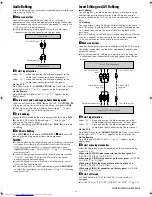
You can cut out unnecessary parts of a TV program while you are 
recording it.

A

During recording, press

 PAUSE

 (

9

) to engage the Record-Pause 

mode.

B

On the VCR

Turn the 

ADVANCED JOG

 dial to the left or right and release it 

at the point where you want to resume recording.

On the Remote

Hold down 

REW

 (

3

) or 

FF

 (

5

), or turn the 

JOG

 dial, and 

release it at the point where you want to resume recording

C

Press 

PLAY

 (

4

) when you wish to resume recording.

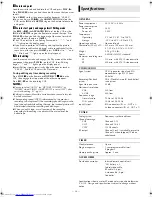
Adjusting recording level

You can adjust the audio recording level manually. 

A

Access Main Menu screen, then 
Recording Level Control screen

Press 

MENU

 on the Remote. Press 

rt

 to 

move the highlight bar (arrow) to “REC 
LEVEL CTL”, then press 

OK

 or 

e

.

B

Adjust recording level

Press 

r

 or 

t

.

Press 

r

 or 

t

 briefly 5 times to move 

audio levels by one division on the scale. 
To move the audio levels faster, press 
and hold 

r

 or 

t

.

Adjust the recording level while 
watching the audio level indicator on the VCR’s display panel. 
Set the level so that maximum volume causes the indicator to 
vary between 0dB to 4dB.

Press 

MENU

 to return to normal screen.

NOTES:

Noise will increase if the recording level is too low, while 
distortion will increase if the level is too high.

When you finished audio recording, be sure to set the level 
control back to its center position.

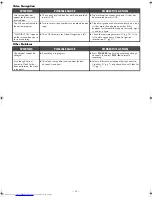
During recording

Pause recording

Press 

PAUSE

 (

9

).

Press 

PLAY

 (

4

) to resume recording.

You can select channel in the recording pause mode.

Stop recording

On the VCR

Press 

STOP/EJECT

 (

0

).

On the Remote

Press 

STOP

 (

8

).

Turn on the VCR and TV, and select the VCR channel (or AV 
mode).

Set the 

VCR/TV/CABLE/DBS

 selector on the Remote to 

“VCR”.

End of program

Beginning of program

Recorded part

Go back to end of program to cut out 
unnecessary part

Program

Program

Unnecessary 

part

Unnecessary 

part

HR-S9911U-EN.fm  Page 13  Monday, April 22, 2002  3:46 PM

Summary of Contents for HR-S9911U - S-VHS Hi-Fi Stereo VCR

Page 1: ...VCR CAUTIONS WARNING TO PREVENT FIRE OR SHOCK HAZARD DO NOT EXPOSE THIS UNIT TO RAIN OR MOISTURE CAUTION This video cassette recorder should be used with AC 120Vd 60Hz only To prevent electric shocks and fire hazards DO NOT use any other power source CAUTION TO PREVENT ELECTRIC SHOCK MATCH WIDE BLADE OF PLUG TO WIDE SLOT FULLY INSERT ATTENTION POUR ÉVITER LES CHOCS ÉLECTRIQUES INTRODUIRE LA LAME L...

Page 2: ...place your obsolete outlet Do not defeat the safety purpose of the grounding type plug 2 Power Sources Operate your product only from the type of power source indicated on the marking label If you are not sure of the type of power supply to your home consult your product dealer or local power company If your product is intended to operate from battery power or other sources refer to the operating ...

Page 3: ...g covers may expose you to dangerous voltage or other hazards Refer all servicing to qualified service personnel 2 Damage Requiring Service Unplug this product from the wall outlet and refer servicing to qualified service personnel under the following conditions a When the power supply cord or plug is damaged b If liquid has been spilled or objects have fallen into the product c If the product has...

Page 4: ...ord B AUDIO VIDEO OUT connectors C AUDIO VIDEO IN connectors D S VIDEO OUT connector E S VIDEO IN connector F JLIP terminal G ANTENNA IN terminal H REMOTE PAUSE AV COMPULINK terminal I CABLE BOX Controller connector J TV OUT terminal Display Panel A Audio level indicator B Start Time Indicator Stop Time Indicator C Symbolic mode indicators D Timer mode indicator E S VHS indicator F Tape speed indi...

Page 5: ...nd RECORD PAUSE if in the Record Pause mode remain on the TV screen B Press OSD or OK again to clear the display The RECORD PAUSE indication remains on the TV screen Remote A VCR TV CABLE DBS selector B TV VCR button C A B button D Number keys Character input buttons E DBS button F CANCEL button C Counter RESET button G STOP button H START button I PROG Program button J SP EP p button K REW 3 butt...

Page 6: ...tuner channels separately 墌 pg 7 8 Depending on area or reception conditions the VCR may not receive the Auto clock setting data from a PBS channel If this function is taking a considerable amount of time it may be necessary to perform the procedure in Semiauto Clock Set 墌 pg 7 or Manual Clock Set 墌 pg 7 What to do if Plug Play setting failed If an incorrect time is displayed on the display panel ...

Page 7: ...o Daylight Saving Time enables automatic adjustment of the VCR s clock at the start and end of Daylight Saving Time Be sure to select the correct time zone manually in step 4 4 4 4 ON Adjustment will be made by the built in clock itself OFF Select when Daylight Saving Time does not apply to you D Select time zone Press OK or e to move the highlight bar to TIME ZONE then press rt repeatedly until A...

Page 8: ... box descrambler and or if you receive satellite channels through DBS Direct Broadcast Satellite receiver The supplied Controller allows the VCR to automatically switch the cable box or DBS receiver s channel during timer recording NOTES For the cable box the Controller is effective for VCR Plus system or Express timer programing For the DBS receiver the Controller is effective only for Express ti...

Page 9: ...ther code C If the channel does not change after going through all the code numbers listed for your model of cable box then try all the other numbers For DBS receiver If the DBS receiver s channel changes to the channel listed below for your brand setting is complete Press OK or e If the DBS receiver s channel does not change as shown above A Press rt to move the highlight bar arrow to NO then pre...

Page 10: ...layback Press PAUSE 9 to pause then press 2 for reverse frame by frame playback or 6 or PAUSE 9 for forward frame by frame playback repeatedly OR Press PAUSE 9 to pause then press JOG SHUTTLE so that the button lights up Turn the JOG dial to the right for forward frame by frame playback or to the left for reverse frame by frame playback Press PLAY 4 to resume normal playback High Speed Picture Sea...

Page 11: ...R within 2 seconds For Automatic Timer Standby Press REW 3 then press TIMER within 2 seconds NOTE It is not possible to select the Automatic Timer Standby function if the cassette s record safety tab is removed Playing back tape repeatedly 100 times Repeat Play During playback press and hold PLAY 4 for more than 5 seconds The play indicator u on the display panel starts blinking slowly To stop pla...

Page 12: ... Digital TBC NR is deactivated when you want to use Video Stabilizer It may be unlawful to record or play back copyrighted material without the consent of the copyright owner Accidental erasure prevention To prevent accidental recording on a recorded cassette remove its record safety tab To record on it later cover the hole with adhesive tape Basic Recording A Load a cassette Make sure the record ...

Page 13: ...record in VHS Insert a cassette marked VHS Set S VHS ET to OFF 墌 pg 19 To record in VHS on an S VHS cassette Insert a cassette marked S VHS The S VHS indicator lights up on the display panel Then set S VHS MODE to OFF 墌 pg 20 The S VHS indicator goes off The VHS recording mode is selected NOTE When playing back a tape that has been recorded in S VHS or S VHS ET the S VHS indicator lights up on the...

Page 14: ... for each station If you have moved to a different area or if a broadcasting station s channel number has been changed perform the following steps to set the correct guide channel and corresponding VCR channel number A Access Main Menu screen then Initial Set screen Press MENU on the Remote Press rt to move the highlight bar arrow to INITIAL SET then press OK or e B Access Guide Channel Set screen...

Page 15: ...OG dial changes the time in 5 minute intervals C Push the ADVANCED JOG dial starts blinking on the display panel Turn the ADVANCED JOG dial to the left or right to set the stop time To set the tape speed press SP EP p D Push the ADVANCED JOG dial Turn the ADVANCED JOG dial to the left or right to select the channel then press 24HR QUICK PROGRAM The VCR turns off automatically and is displayed on t...

Page 16: ... Playback starts automatically after the selected program is located Deactivating Video Navigation If you do not want to store program information you can deactivate the Video Navigation function A Access Main Menu screen then Video Navigation screen Press MENU on the Remote Press rt to move the highlight bar arrow to VIDEO NAVIGATION then press OK or e B Deactivate Video Navigation Press rt to mo...

Page 17: ...rations above then go to the following steps A Select program Press rt to move the highlight bar arrow to the program you want to edit then press OK or e B Enter program title Press the appropriate Number keys on the Remote to enter the title then press OK For details refer to How to enter the characters in the left column C Select category Press rt to select the category you want then press OK or...

Page 18: ...the lists press w or e If the selected cassette has already been loaded playback begins automatically C Load cassette Insert the tape of the selected number Playback begins automatically Finding by recording date First follow steps 1 1 1 1 to 2 2 2 2 in Preparations above then go to the following steps A Access date screen Press rt to move the highlight bar arrow to DATE then press OK or e B Selec...

Page 19: ...ON SET then press OK or e B Select Function Press rt to move the highlight bar arrow to the function you want to set C Change setting Press OK or e The default setting is bold in the table below Press MENU to return to normal screen 䡵 S VHS ET ON OFF When this function is set to ON you can record on VHS cassettes with S VHS picture quality Tapes recorded using this function can be played back on m...

Page 20: ...tal TBC NR 墌 pg 12 cannot be used at the same time If you activate Digital TBC NR when VIDEO STABILIZER is set to ON VIDEO STABILIZER will be automatically set to OFF 䡵 BLUE BACK ON OFF When this function is set to ON the TV screen becomes all blue when receiving a channel not in use NOTE When you want to receive an unstable channel with poor signals set this function to OFF 䡵 2ND AUDIO RECORD ON ...

Page 21: ...BS receiver stops outputting a signal NOTES Be sure not to turn on the DBS receiver before the program starts broadcasting otherwise the VCR will start recording when the DBS receiver is turned on To disengage the Satellite Auto Recording standby mode press REC LINK the REC LINK lamp goes off Depending on the type of DBS receiver Satellite Auto Recording may not be compatible Child Lock You can di...

Page 22: ...he Number keys For some brands you must press ENTER after having pressed the Number keys to enter a channel number To change the cable box s or DBS receiver s channels press TV CH or the Number keys The CH button can be used to change the VCR s channels only To operate the VCR set the VCR TV CABLE DBS selector back to VCR Changing Remote Control Code This Remote is capable of transmitting two diff...

Page 23: ...input connector on the front panel set FRONT AUX INPUT to S VIDEO When using S VIDEO IN connector on the rear panel set REAR AUX INPUT to S VIDEO When using VIDEO input connector on the front panel set FRONT AUX INPUT to VIDEO When using VIDEO IN connector on the rear panel set REAR AUX INPUT to VIDEO E Select edit mode Set PICTURE CONTROL to EDIT 墌 pg 20 F Set AV COMPU LINK mode If your JVC camco...

Page 24: ...r on recording VCR When using this VCR as the recording VCR select the appropriate mode depending on the connector being used 墌 pg 21 When using S VIDEO input connector on the front panel set FRONT AUX INPUT to S VIDEO When using S VIDEO IN connector on the rear panel set REAR AUX INPUT to S VIDEO When using VIDEO input connector on the front panel set FRONT AUX INPUT to VIDEO When using VIDEO IN ...

Page 25: ...k you wish to hear 墌 pg 11 Selecting monitor sound Insert Editing and AV Dubbing Insert Editing You can replace a recorded scene with new scene recorded on another tape or with other material Both the picture and the sound recorded on the Hi Fi sound track are replaced at the same time AV Dubbing You can perform Audio Dubbing and Insert Editing at the same time This means that the picture and the ...

Page 26: ... SP EP is determined by the previous recording to be replaced If the recording speed changes on the tape to be edited while editing the tape the inserted picture will be distorted where the recording speed changes When you edit a tape a small portion of the recording preceding to the editing start point will be erased from the edited tape Specifications shown are for SP mode unless specified other...

Page 27: ... CORRECTIVE ACTION Timer recording will not work The clock and or the timer program have been set incorrectly Set the clock and or timer program correctly The timer is not engaged Press TIMER to engage the timer and make sure that appears on the display panel The VCR has not been set up properly Re perform the set up procedures Make sure you have compensated for guide channel and VCR or cable box ...

Page 28: ...up to its end eject it and try it again MEMORY FULL appears on the screen when you try to start recording The VCR s memory for Video Navigation is full Check the remaining memory 墌 pg 18 If it is full delete unnecessary Video Navigation information 墌 pg 17 SYMPTOM POSSIBLE CAUSE CORRECTIVE ACTION The channel cannot be changed Recording is in progress Press PAUSE 9 to pause the recording change cha...

Page 29: ...N OF JVC AMERICAS CORP Sophisticated electronic products may require occasional service Just as quality is a keyword in the engineering and production of the wide array of JVC products service is the key to maintaining the high level performance for which JVC is world famous The JVC service and engineering organization stands behind our products NATIONAL HEADQUARTERS JVC SERVICE ENGINEERING COMPAN...

Page 30: ...ct to abuse accident alteration modification tampering negligence misuse faulty installation lack of reasonable care or if repaired or serviced by anyone other than a service facility authorized by JVC to render such service or if affixed to any attachment not provided with the products or if the model or serial number has been altered tampered with defaced or removed 2 Initial installation and in...

Page 31: ... 31 Memo ...

Page 32: ...Printed in Malaysia 0502MNVfIDfPJ COPYRIGHT 2002 VICTOR COMPANY OF JAPAN LTD ...

Reviews: