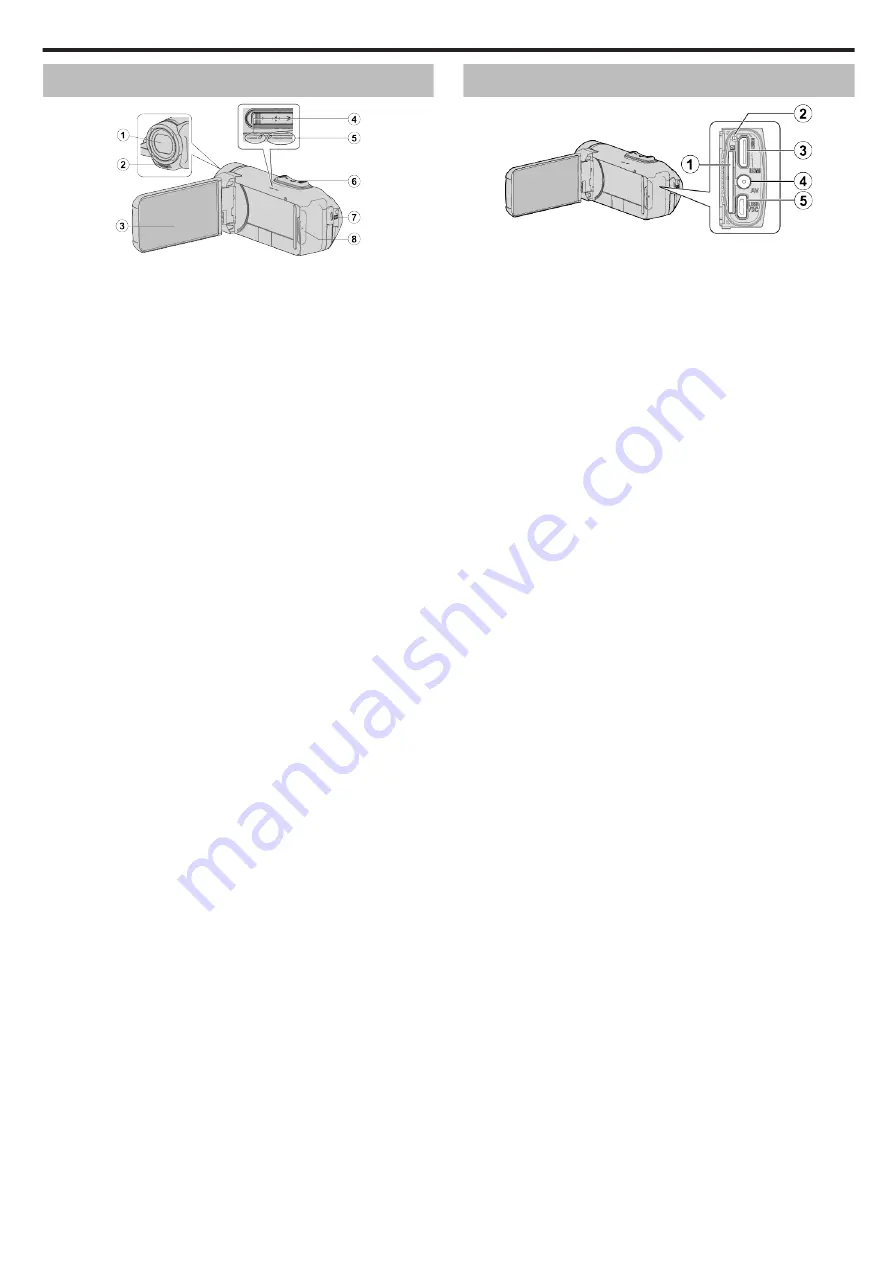
Top/Left/Rear Side
.
A
Lens
0
The lens is protected by a protective glass cover.
0
If the lens is dirty, use a commercially available lens blower to remove
any dust, and a commercially available cleaning cloth to wipe off any
dirt.
0
Do not cover the front of the lens with your fingers during recording.
B
Stereo Microphone
0
Do not cover the microphone with your fingers during video recording.
C
LCD Monitor
D
CHARGE (Charging) Lamp
0
Lights up: Charging in progress
0
Goes off: Charging completed/Beyond temperature range
0
Blinks: Charging error or abnormal temperature
E
POWER/ACCESS (Power/Access) Lamp
0
Lights up/blinks during recording or playback.
Do not remove the SD card or any connecting cables.
F
Zoom/Volume Lever
0
During shooting: Adjusts the shooting range.
0
During playback (index screen): Moves to the next or previous page.
0
During video playback: Adjusts the volume.
G
START/STOP (Video Recording) Button
0
Starts/stops recording of videos/still images.
H
Terminal Cover
Inside Terminal Cover
.
A
SD Card Slot
0
Insert an optional SD card.
B
Reset Button
C
HDMI mini connector
0
Connects to TV using an HDMI mini cable.
D
AV Connector
0
Connects to the AV connector of a TV, etc.
E
USB Connector
0
Connect to the AC adapter to perform charging.
You can also connect to the external device or computer using the USB
cable.
Names of Parts
93
Summary of Contents for GZ-R310
Page 1: ...CAMCORDER C5B5_R315_EU_EN Detailed User Guide GZ R315 GZ R310 ...
Page 109: ......


