


34
Us
e
Configuring the camera settings
Change the camera settings.
1
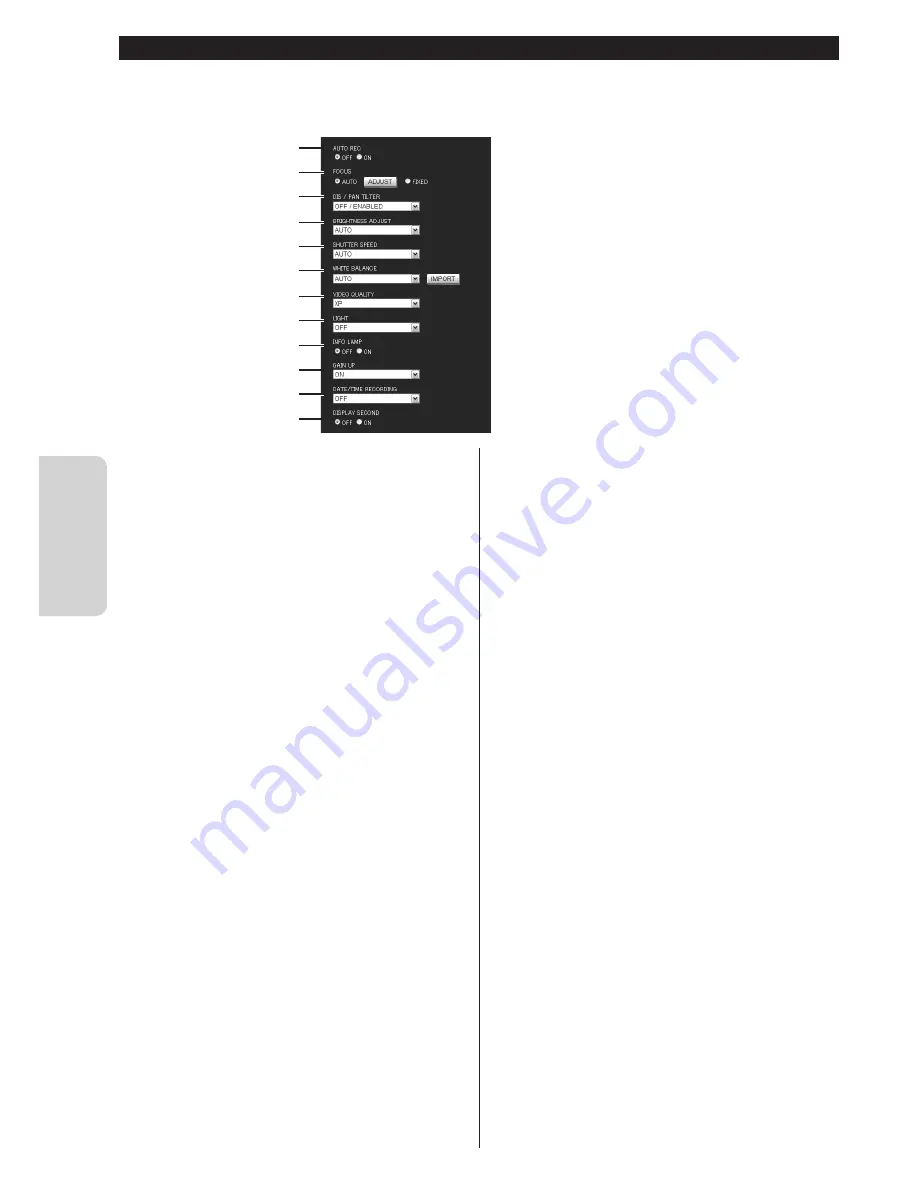
"AUTO REC"
Turn on/off the "AUTO REC" function that records
only when the scene is changed.
When the setting is changed to "ON", the following
settings are automatically changed:
"BRIGHTNESS ADJUST": "AUTO"
"DIS/PAN TILTER": "OFF"
"LIGHT": "OFF"
While set to ON, you cannot start recording, pan/tilt
the camera, or change the "GAIN UP" setting. The
digital zoom is automatically adjusted to the optical
zoom range.
2
"FOCUS"*
Change the focus setting.
"AUTO": Focuses automatically on the subject when
it moves or changes.
"FIXED": Fixes the current focus position.
3
"DIS/PAN TILTER"*
Select "OFF/ENABLED", "SOFT/DISABLED",
"MEDIUM/DISABLED", or "STRONG/DISABLED" for
the image stabilizer.
(example)
"OFF/ENABLED": DIS is set to off and the electronic
pantilter is enabled.
4
"BRIGHTNESS ADJUST"
Select "–6" to "+6" or "AUTO" for the brightness.
5
"SHUTTER SPEED"
Select "1/2" to "1/4000", or "AUTO" for the shutter
speed.
6
"WHITE BALANCE"
Select "AUTO", "FINE", "CLOUD", "HALOGEN",
"MWB" for the control that adjusts the camera's
color sensitivity to best suit the ambient
environment. "MWB" adjusts the white balance
based on the current image you imported by clicking
the "IMPORT" button. (Click the button with a white
sheet of paper shot in full screen.)
7
"VIDEO QUALITY"*
Select "UXP", "XP", "SP", or "EP" for the quality of
videos to be saved to an SD card. For recording
times in each mode, see page 26 .
8
"LIGHT"
Select "OFF", "ON", or "AUTO" for the LED light
status.
9
"INFO LAMP"
Select "OFF" or "ON" for the information lamp.
0
"GAIN UP"*
Select "OFF", "ON", or "AUTO SLOW-SHUTTER" for
how to handle when the image is not bright.
-
"DATE/TIME RECORDING"
Select "OFF" (Not recorded), "UPPER LEFT",
"UPPER RIGHT", "LOWER LEFT", or "LOWER
RIGHT" for the position where the date and time are
recorded.
=
"DISPLAY SECOND"
Select "OFF" or "ON" for the second display for
"DATE/TIME RECORDING".
* Cannot be changed during shooting.
2
1
3
4
6
7
8
9
0
-
=
5
Summary of Contents for GV-LS1 U
Page 15: ...15 For more details refer to the Detailed User Guide at http manual3 jvckenwood com MEMO ...
Page 16: ... 2012 JVC KENWOOD Corporation 1212HO MW VM C2N ...
Page 17: ...LIVE STREAMING CAMERA Detailed User Guide LYT2498 002A GV LS1 U ...
Page 73: ... 2012 JVC KENWOOD Corporation 1012HO MW VM ...
Page 116: ...JVC CAM Control for Android User Guide English LYT2562 002A 0812YMHYH OT ...


