EN
35
USING MENUS FOR DETAILED ADJUSTMENT
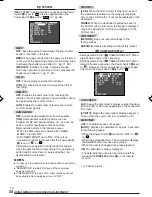
TIME CODE
[OFF]:
Time code is not displayed.
ON:
Time code is displayed on the camcorder and on
the connected TV. Frame numbers are not displayed
during recording.
CLOCK ADJ.
Allows you to set the current date and time (
墌
pg. 10).
DSC
QUALITY , IMAGE SIZE
Refer to “Picture Quality/Image Size Setting”
(
墌
pg. 11).
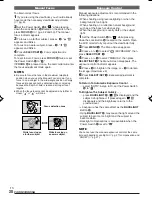
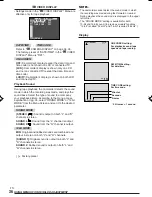
REC SELECT
[
]:
When Snapshot recording is performed
with the
VIDEO/MEMORY
Switch
t
set to “VIDEO”,
still images are recorded only onto the tape.
/
:
When Snapshot recording is
performed with the
VIDEO/MEMORY
Switch
t
set to
“VIDEO”, still images are recorded not only onto the
tape but also on the memory card (640 x 480 pixels).
In this mode, the “SNAP MODE” selection in the
CAMERA Menu is also applicable to memory card
recording.
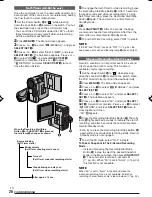
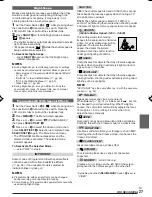
For Playback Menu
The following procedure applies to all except Synchro
Comp (
墌
pg. 43).
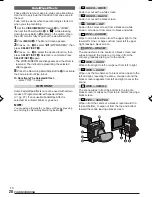
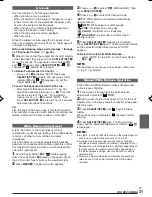
1
Set the
VIDEO/MEMORY
Switch
t
to “VIDEO”,
then set the Power Switch
@
to “
” while pressing
down the Lock Button
$
located on the switch.
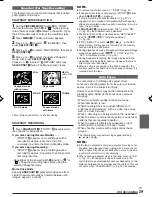
2
Press
MENU
4
. The Menu Screen appears.
3
Press
+
or
–
5
to select the desired function menu,
and press
SELECT/SET
3
.
4
Press
+
or
–
5
to select the desired function, and
press
SELECT/SET
3
to display the Sub Menu.
5
Press
+
or
–
5
to select the desired parameter and
press
SELECT/SET
3
. Selection is complete.
6
Press
+
or
–
5
to select “
RETURN” and press
SELECT/SET
3
twice to close the Menu Screen.
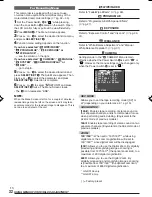
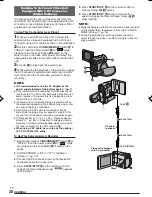
VIDEO
SOUND MODE
........
墌
pg. 36, “Playback Sound”.
12bit MODE
........
墌
pg. 36, “Playback Sound”.
SYNCHRO
........
墌
pg. 43, “For More
Accurate Editing”.
REC MODE
Allows you to set the tape recording mode ([SP] or
LP) depending on your preference (
墌
pg. 10).
It is recommended you use “REC MODE” in the
“
VIDEO” Menu when using this camcorder as a
recorder during dubbing (
墌
pg. 37, 38).
• “REC MODE” can be set when the Power Switch
@
is
set to “
” or “
” (
墌
pg. 10, 32).
COPY
ON:
Enables dubbing of images recorded on a tape
to a memory card (
墌
pg. 23).
[OFF]:
Enables snapshots to be taken during tape
playback.
NAVI. DEL.
Refer to “NAVIGATION Function” (
墌
pg. 21, 22).
S/AV INPUT
A/V IN:
Enables audio/video signal input from the
S/AV connector (
墌
pg. 37).
S IN:
Enables S-Video/audio signal input from the S/
AV connector (
墌
pg. 37).
[OFF]:
Enables audio/video signal output to a TV,
VCR, etc. via the S/AV connector (
墌
pg. 16, 37).
• When “S/AV INPUT” is set to “A/V IN” or “S IN”,
camcorder playback cannot be viewed on the AV
output.
–
RETURN
–
–
DSC
TY
QUAL I
REC SELECT
F I NE
02
1
X7
4
8
6
I MAGE S I ZE
–
–
–
–
–
I
V DEO
M D
O E
SOUND
M D
O E
12 b i t
RO
SYNCH
ODE
REC M
COPY
STEREO
SOUND 1
OF F
O . O
EL .
NAV I . D
– OF F
NPUT
S / AV I
RETURN
MELODY
EEP
B
–
RETURN
AM RESET
C
LCD
R I OR I TY
P
–
ON
EMO MODE
D
–
ON
EMOTE
R
–
ON
AL LY
T
–
S
Y
S
TEM
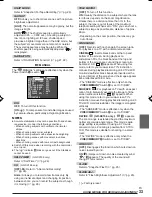
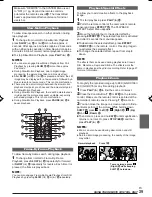
SYSTEM
Each setting is linked with “
SYSTEM”, which
appears when the Power Switch
@
is set to “
”
(
墌
pg. 34).
The parameters are the same as in the description on
pg. 34.
[ ] = Factory-preset
01 DX300,95,75AAGHS_EN 35-44
03.3.20, 6:16 PM
35

