background image

2

Safety Precautions

CAUTION:


To reduce the risk of electric shock. Do 
not remove cover (or back). No user 
serviceable parts inside. Refer servicing 
to qualified service personnel. 

RISK OF ELECTRICAL SHOCK

DO NOT OPEN

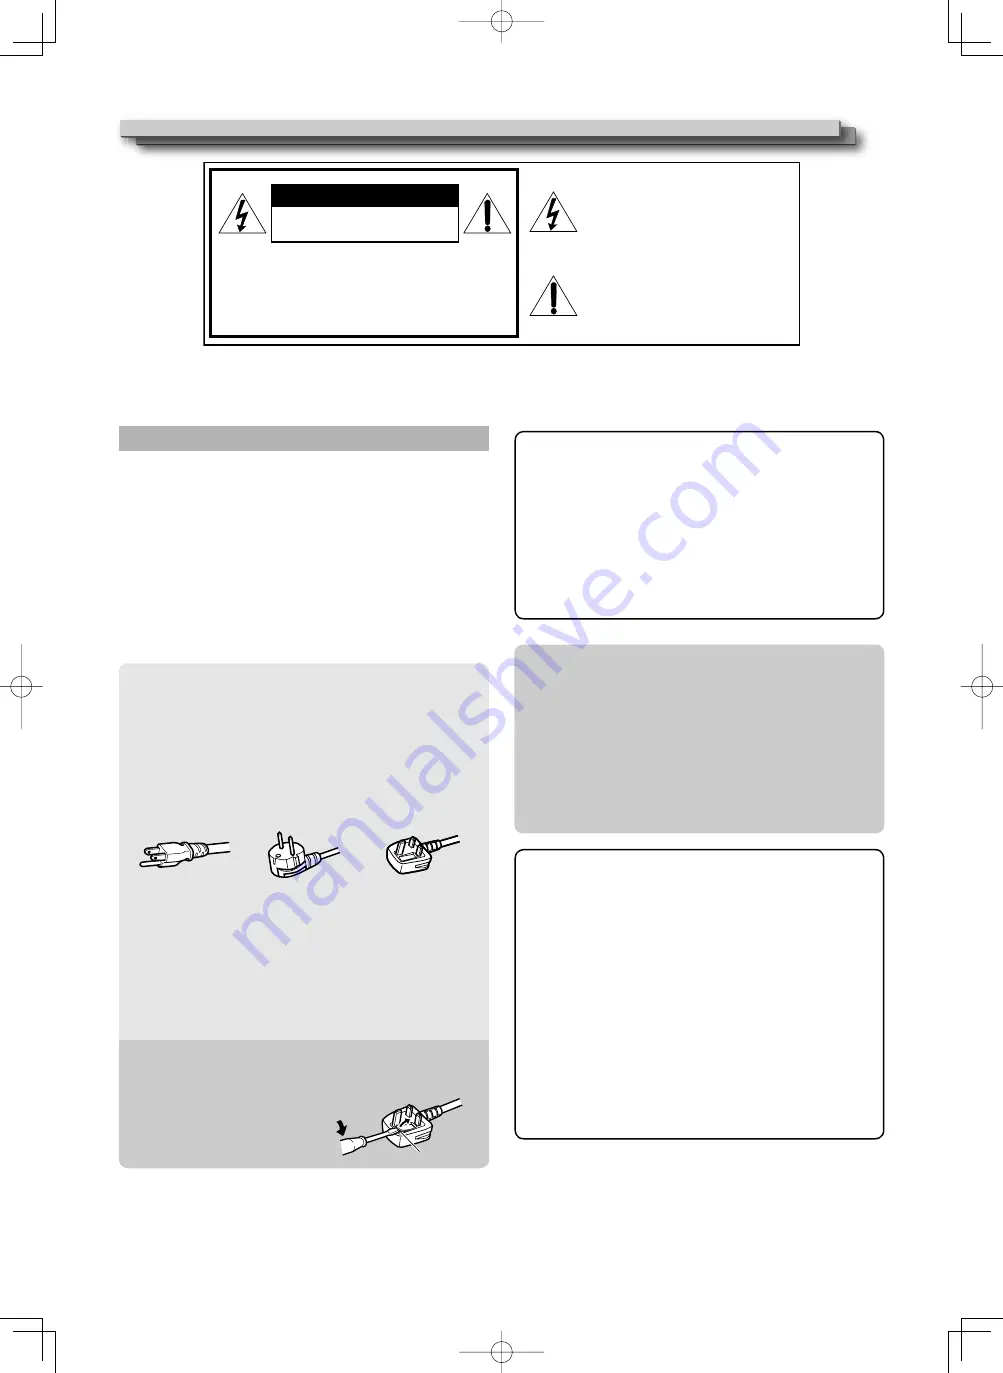
The lightning flash with arrowhead 
symbol, within an equilateral triangle is 
intended to alert the user to the presence 
of uninsulated “dangerous voltage” 
within the product’s enclosure that may 
be of sufficient magnitude to constitute a 
risk of electric shock to persons.  

The exclamation point within an 
equilateral triangle is intended to alert 
the user to the presence of important 
operating and maintenance (servicing) 
instructions in the literature 
accompanying the appliance.  

CAUTION

POWER CONNECTION

The power supply voltage rating of this product is AC 120 V 
(For U.S.A. and Canada) and AC 220 – 240 V (For European 
countries, Asian countries, and United Kingdom).
The power cord attached conforms to the following power supply 
voltage and countries. Use only the power cord designated to 
ensure safety and EMC regulations of each country.

Not all types of power cords are supplied to this product.

For U.S.A. and Canada: 
AC 120 V

For European and 
Asian countries: 
AC 220 – 240 V

For United Kingdom: 
AC 220 – 240 V

This plug will fit only into a grounded power outlet. If you are 
unable to insert the plug into the outlet, contact your electrician to 
install the proper outlet. Do not defeat the safety purpose of the 
grounded plug.

This product should be operated only with the type of power 
source indicated on the label. If you are not sure of the type of 
power supply of your home, consult your product dealer or local 
electric power company.

Warning:

Do not use the same power cord for AC 120 V as for AC 220 – 
240 V. Doing so may cause malfunction, electric shock or fire.

Under the following conditions,
1.  Turn off the power.
2.  Unplug this product from the wall outlet.
3.  Refer service to qualified service personnel.

a)  When the product emits smoke or unusual smell.
b)  When the product exhibits a distinct change in performance

 —for example, no picture or no sound.

c)  If liquid has been spilled, or objects have fallen on the product.
d)  If the product has been exposed to rain or water.
e)  If the product has been dropped or damaged in any way.
f)  When the power supply cord or plug is damaged.

Do not install this product in the following places:

in a damp or dusty room
where the product is exposed to soot or steam, such as 
near the cooking counter or a humidifier 
near heat sources
where condensation easily occurs, such as near the 
window
in a location exposed to direct sunlight or strong light

Do not place this product on an unstable cart, stand, or table. 
The product may fall, causing serious injury to a child or adult, 
and serious damage to the product.
The product should be mounted according to the 
manufacturer’s instructions, and should use a mount 
recommended by the manufacturer.
Do not use this product near water.
Be sure to install the product in the place where proper 
temperature and humidity are kept (

 “Operation environment” 

on page 28).
This product becomes hot during its use. Take enough care 
when handling the product.


Note for United Kingdom power cord only

The plug of United Kingdom power cord has a built-in fuse. When 
replacing the fuse, be sure to use only a correctly rated approved type, 
re-fit the fuse cover. (Consult your dealer or qualified personnel.)

How to replace the fuse

Open the fuse compartment with the 
blade screwdriver, and replace the 
fuse.

Fuse

Warning:

  This is a class A product. In a domestic environment this 

product may cause radio interference in which case the 
user may be required to take adequate measures.

Before connecting other products such as VCR’s and personal 
computers, you should turn off the power of this product for 
protection against electric shock.
Do not use attachments not recommended by the 
manufacturer as they may be hazardous.

When replacement parts are required,

 be sure the service 

technician has used replacement parts specified by the 
manufacturer or equivalents. Unauthorized substitutions may 
result in fire, electric shock, or other hazards.

Upon completion of any service or repairs to this product,


ask the service technician to perform safety checks to 
determine that the product is in proper operating condition.

WARNING:

 TO REDUCE RISK OF FIRE OR ELECTRIC SHOCK, 

DO NOT EXPOSE THIS APPARATUS TO RAIN OR 
MOISTURE. NO OBJECTS FILLED WITH LIQUIDS, SUCH 
AS VASES, SHALL BE PLACED ON THE APPARATUS.

IMPORTANT SAFEGUARDS

Electrical energy can perform many useful functions. This unit has 
been engineered and manufactured to assure your personal safety. 
But 

IMPROPER USE CAN RESULT IN POTENTIAL ELECTRIC 

SHOCK OR FIRE.

 In order not to defeat the safeguards incorporated 

into this product, observe the following basic rules for its installation, 
use, and service. Please read these “IMPORTANT SAFEGUARDS” 
carefully before use.

All the safety and operating instructions should be read before the 
product is operated.
The safety and operating instructions should be retained for future 
reference.
All warnings on the product and in the operating instructions should 
be adhered to.
All operating instructions should be followed.

DTV21G11̲LCT2681.indb   2

DTV21G11̲LCT2681.indb   2

12.2.5   10:16:28 AM

12.2.5   10:16:28 AM

Summary of Contents for DT-V21G11Z

Page 1: ...81 001A For Customer Use Enter below the Serial No which is located on the rear of the cabinet Retain this information for future reference Model No DT V21G11Z Serial No DTV21G11 LCT2681 indb 1 DTV21G11 LCT2681 indb 1 12 2 5 10 16 25 AM 12 2 5 10 16 25 AM ...

Page 2: ... window in a location exposed to direct sunlight or strong light Do not place this product on an unstable cart stand or table The product may fall causing serious injury to a child or adult and serious damage to the product The product should be mounted according to the manufacturer s instructions and should use a mount recommended by the manufacturer Do not use this product near water Be sure to ...

Page 3: ...pillar using durable string Hook and screw M4 x 10 mm not provided Hook not provided VESA mounting holes Slots and openings in the cabinet are provided for ventilation These ensure reliable operation of the product and protect it from overheating These openings must not be blocked or covered Never push objects of any kind into this product through openings as they may touch dangerous voltage point...

Page 4: ...e shielded cable A straight cable with a D sub 9 pin connector 2 0 m RS 485 cable twist pair cable A straight LAN cable 2 0 m REMOTE cable twist pair cable A straight LAN cable 2 0 m The inrush current of this apparatus is 1 76 ampere CAUTION In case where the strong electromagnetic waves or magnetism are near the audio cable or the signal cable the sound or the picture will contain noise In such ...

Page 5: ...orcefully Wipe stains off the screen with a soft cloth Ventilation openings Use a vacuum cleaner to get rid of the dust around the intakes all the openings If a vacuum cleaner is not available use a cloth and wipe it off Leaving the dust around the intakes may prevent proper temperature control and cause damage to the product Cabinet To avoid the deterioration or damages of the cabinet such as its...

Page 6: ...ached to the lower position of the stand body Do not rest your arm on the monitor or lean against the monitor Do not touch the LCD panel when installing the monitor Be sure to install the monitor securely to prevent the monitor from falling over which may cause damage to the monitor or injury Screw silver Approx 144 To detach the stand Lay the monitor on a cloth with the LCD panel facing down to p...

Page 7: ...sition CAUTION Lay the monitor on a cloth with the LCD panel facing down to prevent the LCD panel from being damaged When you change the position of the bottom plate of the stand be sure to install the monitor using screws not provided Screw holes for the rearward position Bottom plate Unit mm inch Screw hole 6 ø 8 233 9 1 4 149 5 7 8 20 6 7 8 53 1 2 1 8 210 8 3 8 140 5 5 8 54 2 1 4 34 1 3 8 Screw...

Page 8: ... all connections are complete Refer also to the user manual of each piece of equipment Attaching the power cord holder The provided power cord holder prevents accidental disconnection of the AC power cord from the AC IN terminal The holder consists of two parts the cord case and the case cover Do not use any screws other than those supplied Push the case cover into the cord case and check that the...

Page 9: ...on page 22 NO EFFECT is displayed when you press a button which is not available for the current input or signal format the lamp lights even when the function does not actually work You cannot use the buttons for the items controlled by the MAKE system REMOTE ON appears and the lamp does not light up 4 MUTING button Turns off the sound when no menu screen is displayed Muting To cancel the function...

Page 10: ...anges the aspect ratio of the picture from 4 3 to 16 9 when the picture of 16 9 aspect ratio is squeezed into 4 3 format signal To return to 4 3 press the button again This function does not work when displaying the picture in the 1 1 mode e SCOPE button lamp Displays hides the indication of the wave form monitor and vector scope SCOPE SETTING on page 17 Each time you press this button the window ...

Page 11: ...isplays the information below Configure the show hide setting of each item in the menu Use the T C button r on page 10 to configure 5 and 6 Select the position of the information display POSITION in INFORMATION on page 21 1 Audio level meter You can check the conditions of the EMBEDDED AUDIO signals when LEVEL METER ch is set to LINE or DIVIDE Not displayed when LEVEL METER ch is set to OFF AUDIO ...

Page 12: ...ith HDCP is input at the end of the indication When no video signal comes in NO SYNC When a noncompliant video signal comes in Out of range 2 Signal format of DVI input On page 20 DVI INPUT SEL Status indication of DUAL LINK 3G SDI signal information DUAL LINK appears when the MAIN MENU SDI DUAL LINK page 14 is set to ON in SDI input and the 3G SDI signal information appears when the MAIN MENU SDI...

Page 13: ...ENT AUTO OFF WAVE DISPLAY WAVE FILTER WAVE OVER LEVEL MARKING LEVEL FUNCTION SETTING PICTURE SUB ADJ SIZE POSI ADJ WHITE BALANCE SET REMOTE SETTING INFORMATION CONTROL LOCK DVI INPUT SEL SDI FORMAT all reset SET UP MENU GAMMA COLOR TEMP R DRIVE G DRIVE B DRIVE R CUT OFF G CUT OFF B CUT OFF sub menu reset 1st START WORK TIME CONTRAST BACK LIGHT OSD CONT SIDE MASK reset EXCUTE SETTING CANCEL STATUS ...

Page 14: ...e DS1 DS2 Selects the data stream from two HD SDI signals multiplexed when a 3G SDI LEVEL B signal comes in The setting value will be invalid if a 3G SDI LEVEL B DUAL LINK signal is input SDI DUAL LINK Setting value OFF ON Activates deactivates the DUAL LINK function of SDI signals DUAL LINK is displayed when the setting is set to ON Status indication of DUAL LINK 3G SDI signal information on page...

Page 15: ...ting the area of the specified aspect ratio OFF ON CENTER MARKER Displays hides the marker indicating the center position of the picture OFF ON LINE BRIGHTNESS Adjust the brightness of the marker HIGH LOW 2 2 R AREA MARKER 3 Display Hide the area marker and select a type 4 OFF LINE HALF HALF L BLK BLK L R MARKER ASPECT 3 Select the aspect ratio of the area marker 4 3 14 9 13 9 2 35 1 1 85 1 1 66 1...

Page 16: ...to 3COLORS The level meter with no audio signal input is displayed in white for 3COLORS and in gray for W 100 You can select the position of the level meter display top or bottom of the screen POSITION in INFORMATION on page 21 When PEAK HOLD is set to ON the maximum level meter value will remain displayed for a set period of time The number of audio channels that are displayed on the level meter ...

Page 17: ...t for the over level 070 109 1 The wave form monitor is not displayed when the input signals are DVI input from a computer The vector scope is not displayed when the input signals are RGB 2 When SIZE is set to LARGE the window is displayed in the center of the screen regardless of the POSITION setting SYNC FUNCTION Settings for the synchronization with signals Item Content Setting value NO SYNC AC...

Page 18: ...WORK TIME Set the time for operating the function 01h 06h CONTRAST Set the reduction of the picture contrast SAVE NORMAL BACKLIGHT Set the reduction of the BACKLIGHT brightness SAVE NORMAL OSD CONT Set the reduction of the OSD display contrast SAVE NORMAL SIDE MASK Set use or nonuse of the side panel The SIDE MASK function can operate irrespective of running cancelling the LCD SAVER function OFF O...

Page 19: ...ent Setting value H SIZE 1 Adjust the horizontal picture size Setting value varies depending on the signals Setting value varies depending on the signals H POSITION 1 Adjust the horizontal picture position V SIZE 1 Adjust the vertical picture size V POSITION 1 Adjust the vertical picture position sub menu Display the sub menu which enables you to adjust the items of SIZE POSI ADJ while viewing the...

Page 20: ...tment knob The ALL LOCK function disables to control the buttons on the front panel But following operations are available Turning on off on standby the monitor Press the button and button to display the SET UP MENU and set CONTROL LOCK to OFF Operate this product by external control When you perform operations other than the above Control lock on appears DVI INPUT SEL Setting value AUTO COMPO RGB...

Page 21: ...are memorized 5 Repeat steps 3 and 4 10 characters at maximum 6 Press MENU button to store the name STATUS DISPLAY Select whether the status of the current input and the setting of MUTING are displayed on the screen On the Status Display on page 12 AUTO OFF ON TIME CODE Select the type of the TIME CODE display VITC 2 LTC 2 D VITC CRC ERROR Select whether the CRC error indication for the input HD S...

Page 22: ... available Consult your dealer if you need it Serial communication PC etc RS 485 IN RS 485 IN or RS 232C RS 485 OUT RS 485 IN RS 485 OUT RS 485 OUT For the details see page 24 Using the MAKE TRIGGER system The MAKE TRIGGER terminal is configured as follows You can assign a function to each pin terminal in REMOTE SETTING PIN1 PIN2 PIN3 PIN4 PIN5 in PARALLEL TYPE on page 20 You cannot change the fun...

Page 23: ...ling with the MAKE system the information is displayed only at the moment of short circuiting 5 While controlling with the MAKE system the level meter is switched between displayed short circuiting and hidden opening When LEVEL METER ch is set to OFF the level meter is not displayed NO EFFECT appears While controlling with the TRIGGER system the pattern of the audio channel display is switched 6 W...

Page 24: ...s of the RS 232C terminal Pin No Signal 1 NC 2 RXD 3 TXD 4 NC 5 GND This is a female terminal 6 NC 7 RTS 8 CTS 9 NC The 7th terminal and the 8th terminal are connected Command outline All commands consist of the following segments Header Monitor ID Command ID Function Data Cr 0Dh On Header Operation commands from the personal computer etc Basic command list on page 25 Reference commands from the p...

Page 25: ...1 input No data 16 1 B I N B Cr Selects SDI 2 input No data 17 1 B I N C Cr Selects DVI input No data 18 1 B D I S P Cr Displays the status 3 No data 19 1 B A M U T E x x 2 Cr Turns muting on off 00 Off 01 On 20 1 B A S P x x 2 Cr Changes the aspect ratio 00 4 3 01 16 9 21 1 B R O P O S I x x x x 2 Cr Configures POSITION settings 999 999 22 1 B R O P U S H x x 2 Cr Configures PUSH SEL settings 00 ...

Page 26: ...t knobs on the front panel Or adjust CONTRAST or BRIGHT of PICTURE SUB ADJ in the SET UP MENU 9 19 Wrong picture position wrong picture size For some signals the picture cannot be displayed fully in the effective screen area There is no sure method to solve this problem Check whether the setting of 1 1 is appropriate Check whether the input signal format is acceptable on the monitor 10 29 30 Some ...

Page 27: ...lamps are flashing 2 Press button to turn off on standby the monitor 3 Turn off the AC power switch on the rear panel 4 Disconnect the AC power cord from the AC outlet 5 Contact your dealer with the information about which lamps were flashed If you turn on the monitor soon after turning it off or after a short term power failure the INPUT SELECT lamps may flash and no image may be displayed When t...

Page 28: ...l 545 mm 21 1 2 Number of pixels displayed 1920 1080 Number of colors displayed 16 70 million Contrast ratio TYP 1000 1 Input output terminals Video DVI D HDCP DVI D signal input compatible with HDCP DVI D connector x 1 compatible with DDC2B E AUDIO 3G SDI HD SDI SD SDI IN 1 Digital signal input compatible with EMBEDDED AUDIO DUAL LINK signals Auto detection 2 line BNC connector x 2 E AUDIO 3G SDI...

Page 29: ...1080 25psf 8 5 5 1 Analog component signals are compatible with Y on sync signals 2 Compatible with EMBEDDED AUDIO signals 3 If there is no payload ID the signal is regarded as 1080 60i and 1080 60i and the status appear 4 If there is no payload ID the signal is regarded as 1080 59 94i and 1080 59 94i and the status appear 5 If there is no payload ID the signal is regarded as 1080 50i and 1080 50i...

Page 30: ...p and bottom of the screen will be hidden Even for a preset signal picture may not be normally displayed depending on the signal timing When a preset signal comes in the signal format is shown on the status display For other signals the resolution is shown Specification of the DVI D HDCP terminal Connect it to the DVI D output terminal on a personal computer Pin No Input signal 1 T M D S Data 2 2 ...

Page 31: ...31 MEMO DTV21G11 LCT2681 indb 31 DTV21G11 LCT2681 indb 31 12 2 5 10 17 24 AM 12 2 5 10 17 24 AM ...

Page 32: ...1211TMH MW MT MULTI FORMAT LCD MONITOR DT V21G11Z 2012 JVC KENWOOD Corporation DTV21G11 LCT2681 indb 32 DTV21G11 LCT2681 indb 32 12 2 5 10 17 25 AM 12 2 5 10 17 25 AM ...

Reviews: