background image

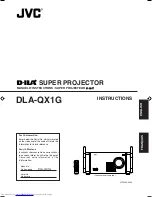
DLA-QX1G

INSTRUCTIONS

 SUPER PROJECTOR

MANUEL D’INSTRUCTIONS : SUPER PROJECTEUR 

LOCK

UNLOCK

HIDE

EXIT

ZOOM

KEYSTONE

SHUTTER

DIGITAL

ZOOM

SHIFT

FOCUS

VIC 1

VIC 2

VIC 3

MENU

ENTER

OPERATE

BACK
LIGHT

T

W

T

W

ON

OFF

RM-MQX1G REMOTE CONTROL UNIT

(Lenses are not supplied.)

LCT0963-002A

For Customer Use:

Enter below the Serial No. which is located
on the side panel of the cabinet. Retain this
information for future reference.

Pour l’utilisateur:

Inscrivez ci-dessous le No de série situé sur
le panneau latéral du coffret de l’appareil.
Conservez cette information à titre
d’information.

Model No.

No de modèle

DLA-QX1G

Serial No.

No de série

ENGLISH

FRAN

Ç

AIS

QX1Cover_f.pm6

02.3.7, 13:39

3

Summary of Contents for DLA-QX1G - D-ila High Resolution Projector

Page 1: ...OTE CONTROL UNIT Lenses are not supplied LCT0963 002A For Customer Use Enter below the Serial No which is located on the side panel of the cabinet Retain this information for future reference Pour l utilisateur Inscrivez ci dessous le No de série situé sur le panneau latéral du coffret de l appareil Conservez cette information à titre d information Model No No de modèle DLA QX1G Serial No No de sé...

Page 2: ......

Page 3: ...SUPER PROJECTOR DLA QX1G INSTRUCTIONS ENGLISH ...

Page 4: ...truction manual may cause harmful interference to radio communications Operation of this equipment in a residential area is likely to cause harmful interference in which case the user will be required to correct the interference at his own expense IMPORTANT INFORMATION About the plug U S A only This projector is equipped with a 3 blade grounding type plug to satisfy FCC rule If you are unable to i...

Page 5: ... or causing possible injury to the operator Unplug this product from the wall outlet and refer service to qualified service personnel under the following conditions a When the power supply cord or plug is damaged b If liquid has been spilled or objects have fallen on the product c If the product has been exposed to rain or water d If the product does not operate normally by following the operating...

Page 6: ...on cords or convenience receptacles on other equipment as this can result in a risk of fire or electric shock Never push objects of any kind into this product through openings as they may touch dangerous voltage points or short out parts that could result in a fire or electric shock Never spill liquid of any kind on the product Do not attempt to service this product yourself as opening or removing...

Page 7: ...ns plug is cut off remove the fuse and dispose of the plug immediately to avoid a possible shock hazard by inadvertent connection to the main supply If a new main plug has to be fitted then follow the instruction given below WARNING THIS APPARATUS MUST BE EARTHED IMPORTANT The wires in the mains lead on this product are coloured in accordance with the following cord Green and Yellow Earth Blue Neu...

Page 8: ...wer 33 2 Selecting the VIC to be Projected 34 3 Adjusting the Screen Size 35 4 Adjusting Focus 35 For Operating Other Functions 36 Turning off the video image HIDE 36 Interrupting the projection light while video image stops SHUTTER 36 Removing the trapezoidal distortion of the image KEYSTONE 37 Setting the amount of lens shifting SHIFT 38 Menu Operations 39 No signal menu mode 39 RGB VIC menu mod...

Page 9: ...focus lens GL MQ1015SG 1 5 1 fixed focus lens GL MQ1020ZG 2 1 1 to 4 9 1 zoom lens GL MQ1023SZG 3 1 to 7 1 zoom lens Video Interface Card VIC PK Q01HAG A board to be used for adding HDTV signal Y Pb and Pr video signal input function to the projector PK Q01HSDG A board to be used for adding HD SDI video signal input function to the projector Protective cap 8 for covering the screw holes ZOOM KEYST...

Page 10: ...s turned on the projector goes into stand by mode and the STAND BY indicator on the control panel comes on ON The main power turns on OFF The main power turns off 7 Remote sensor When operating with the remote control unit aim it at this sensor An additional remote sensor is provided on the control panel of the projector The effective operating distance of the remote control is about 32 8 ft 10 m ...

Page 11: ...he cooling effect causing heat to build up inside which could cause a fire or malfunction For details refer to Cleaning and Replacing the Filters on pages 48 and 49 e Exhaust vent for the light source lamp power supply This vent dischrages warm air from the cooling fan for the light source lamp power supply This fan continues running as long as the MAIN POWER switch is on p q Exhaust vents Vents f...

Page 12: ...set or adjust the value For details on the operations refer to pages 16 and 42 1 2 3 4 5 6 7 8 ZOOM FOCUS T W MENU ENTER EXIT VIC SELECT 1 2 3 KEY STONE OPERATE HIDE STAND BY w e 9 q p 6 MENU button Use this button to enter or exit from the menu mode The menu appears or disappears on the screen For details on the operations refer to Menu Operation Procedure page 42 7 ZOOM T W buttons Use these but...

Page 13: ... STAND BY Indicator On When in stand by mode Blinking While in cool down mode CAUTIONS The cool down mode continues for about 10 minutes At the first 20 seconds of the cool down mode the projection cannot be started again During this period the STAND BY indicator is blinking and 07 appear on the status code display Then 07 changes into 06 on the status code display but the STAND BY indicator is st...

Page 14: ...nput of the following signals Analog RGB signals vertical sync V signals and horizontal sync H signals composite signals Cs Devices which have analog RGB signal output terminals can be connected Input of external sync signals is automatically detected Detection of H V signals or Cs signals causes automatic switching to external sync The priority order is H V Cs The uppermost edge of the image may ...

Page 15: ...up when the HDTV Analog VIC is selected ı Y Pb Pr input terminal BNC x 3 These are Y Pb Pr input terminals for HD signal SMPTE260M 274M 296M HD SDI VIC Å LED This LED lights up when the HD SDI VIC is se lected ı SDI input output through terminal BNC x 2 These are input and output terminals for HD SDI signal SMPTE292M HD SDI VIC IN OUT Å ı HDTV Analog VIC Y Pb Pr ı Å RE MOT E CONTR OL RS 232 C OUT ...

Page 16: ...al seconds Memo t RM MQX1G REMOTE CONTROL UNIT KEYSTON RM MQX1G REMOTE CONTROL UNIT O EX EN LOCK UNLOCK LOCK UNLOCK p r w 6 5 4 3 2 1 7 8 q e MODE EXIT ZOOM KEYSTONE SHUTTER DIGITAL ZOOM SHIFT FOCUS VIC1 VIC2 VIC3 MENU ENTER OPERATE BACK LIGHT T W T W ON OFF 9 y 4 Cursor 5 2 3 ENTER button When using this as the cursor button press it in the 5 2 3 directions to select menu items or adjust settings...

Page 17: ...ed screen size They work only when the lens unit attached to this projector has the zooming function T Tele The projected screen size decreases W Wide The projected screen size increases For details on the operations refer to page 35 e SHIFT buttons Use these buttons to adjust the height of the projection screen when projectors are used in a stack configuration They work only when the lens unit at...

Page 18: ...pe it off with a cloth otherwise the skin could become rough Do not put batteries into fire or try to recharge them Batteries run for six months to one year in normal use But the batteries supplied are for confirming operation and may not run that long When the remote control unit starts failing to work properly replace the batteries with new ones 3 Close the back cover First fit the claw on the b...

Page 19: ...becomes equal to the outside temperature Allowable minimum space required CAUTIONS Since the projector weighs approx 92 kg 203 lbs be sure to have four or more people when lifting or moving it otherwise the projector could possibly drop causing personal injury and or damage to the projector Do not install the projector in the following places There is much water humidity or dust The projector may ...

Page 20: ...jector to the ceiling first install a special shelf and then place the projector on it securely For safety and maintenance purposes a suitable facility is necessary to easily lift and lower the projector from the shelf for mainte nance 305 mm 12 or more Installing the Projector Cont ZOOM FOCUS T W MENU ENTER EXIT VIC SELECT 1 2 3 KEY STONE OPERATE HIDE STAND BY REMOTE CONTROL RS 232C OUT RS 232C I...

Page 21: ...the projector Lift the projector rotate the front adjustable feet and adjust the vertical angle within the range of 0 to 3 5 Leveling the projector Lift the projector rotate the adjustable feet and adjust the horizontal angle until the projector is level 3 5 Extend Shorten 4 5 4 5 Extend Shorten Installing the Projector Cont Adjusting the Inclination of the Projector ...

Page 22: ...ing stack configuration Up to three projectors can be stacked and used together stack configuration Using two or more projectors together high image bright ness can be attained This allows you to project sufficiently bright image in a fairly large auditorium or relatively bright place ZOOM FOCUS T W MENU ENTER EXIT VIC SELECT 1 2 3 KEY STONE OPERATE HIDE STAND BY REMOTE CONTROL RS 232C OUT RS 232C...

Page 23: ...el Function GL MQ1010G Powered focus for rear projection short focal length lens subject ratio 1 1 0 influence GL MQ1015SG Powered focus short focal length lens subject ratio 1 5 1 manual vertical shift function pro vided 0 to 50 influence GL MQ1020ZG Powered zoom powered focus long focal length lens subject ratio 2 1 1 to 4 9 1 0 influence GL MQ1023SZG Powered zoom powered focus long focal length...

Page 24: ...e remote control unit When using the projectors in stack configuration stacked one over another make adjustment so that the picture of each projector overlaps exactly using the lens shift function If the horizontal adjustment is needed consult your dealer For detailed adjustment procedures refer to pages 38 and 46 For maximum amount of shift refer to Maximum amount of shift on page 23 When the len...

Page 25: ...defined as a ratio of the screen width while with the screen height taken as 1 vertical shift is defined as a ratio of the screen height Relational table for maximum shift amounts aspect ratio 16 9 Horizontal screen sized x 100 Vertical screen size y 100 Screen after shifted Screen with zero 0 shift Py Px Py Px Py Px Py Px Py Px Py Px 0 0 32 0 10 0 29 2 20 0 25 8 30 0 21 9 40 0 17 3 1 0 31 7 11 0 ...

Page 26: ...te control unit Connect the supplied remote control cable between the remote control unit and the REMOTE terminal on the connector panel of the projector Using it as a wired remote control unit you do not have to worry about the operable angle of the unit though the operable distance is limited by the length of the remote cable approx 49 2 ft 15 m ZO OM KEYSTONE SH UTTER DIGITAL ZO OM SH IFT FO CU...

Page 27: ... signal Composite sync CS and G on Sync signals cannot be handled depending on the devices connected Analog HD signals The HDTV interlaced signals can be input to the input terminal of the Analog HD VIC NTSC is not available Digital HD signals The digital HD signals can be input to the input terminal of the HD SDI VIC as the SDI format and can be output through Screen resolution Horizontal Vertica...

Page 28: ... can switch the chan nel of the projector automatically by selecting the channel on the dedicated switcher Projector ZOOM FOCUS T W MENU ENTER EXIT VIC SELECT 1 2 3 KEY STONE OPERATE HIDE STAND BY REMOTE CONTROL RS 232C OUT RS 232C IN B G R V H CS RGB Analog VIC RGB switcher not supplied HDTV 2 Computer 1 Computer 2 HDTV 1 Notes Video image played back on devices such as a VCR whose image signal i...

Page 29: ...c player etc To V To H Cs To R To G To B To V To H Cs RGB connection cable not supplied Before connection be sure to turn off both the projector and RGB devices Read the manuals which comes with each device thoroughly Prepare and use separately available RGB connection cable Detection of H V signals or Cs signals causes automatic switch to external sync The priority order is H V Cs ...

Page 30: ... HD devices equipped with the Y Pb and Pr terminals Before connection be sure to turn off both the projector and devices to be connected Read the manual thoroughly which comes with each device to be connected Prepare and use the separately available HD analog connection cable Analog HD devices HDTV Analog VIC To Pr To Pb To Y To Y Pb and Pr To Y Pb and Pr HD Analog connection cable not supplied ...

Page 31: ...th the projector and devices Read the manual thoroughly which comes with each device to be connected Prepare and use the separately available SDI coaxial connection cable Digital HD devices HD SDI VIC To OUT To IN SDI coaxial cable not supplied To OUT To IN Digital HD monitor To IN To IN To OUT The HD SDI VIC has the OUT terminal so you can also connect the digital HD monitor or another device Con...

Page 32: ...h the projector and computer Read the manual thoroughly which comes with each device to be connected Prepare and use the separately available RS 232C connection cable REMOTE CONTROL RS 232C OUT RS 232C IN RS 232C connection cable not supplied When another DLA QX1G is connected to this projector using RS 232C OUT terminal you can enable a computer to control plural DLA QX1Gs at the same time For de...

Page 33: ...fore using the pro jector 1 Remove the power input terminal cover The cover is a screwed type Turn the cover in the direction of the arrow to remove 2 Insert the plug of the supplied power cord into a wall outlet 3 For U S A only Turn the plug to the right to fix 1 Insert the supplied power cord into the power input terminal AC IN of the projector 2 Insert the plug of the supplied power cord into ...

Page 34: ...on the status code display 2 Press the OPERATE button for one second or more either on the control panel or on the remote control unit The OPERATE indicator comes on and 01 appears on the status code display Projector s indicator Notes After the power is turned on the screen may appear jumbled for a few seconds but this is not a malfunction After the OPERATE indicator comes on it can take a minute...

Page 35: ...PERATE STAND BY Projector s indicator Note You cannot cancel the turning off process until 07 changes to 06 or 00 on the status code display ZOOM FOCUS T W MENU ENTER EXIT VIC SELECT 1 2 3 KEY STONE OPERAT E MODE STAND BY OPERATE STAND BY REMO TE CON TRO L RS 2 32C OUT RS 2 32C IN R G B V H C S RGB Anal og VIC Remote control unit OPERATE button 1 1 STAND BY indicator OPERATE indicator Status code ...

Page 36: ...he remote control s VIC 1 2 or 3 button to select the desired VIC VIC SELECT 1 2 3 buttons Remote control unit Projector VIC SELECT 1 2 3 VIC1 VIC2 VIC3 Screen display Line display Note When no signal comes into the projector through the selected VIC No signal menu appears on the screen Refer to page 39 ZOOM FOCUS T W MENU ENTER EXIT VIC SELECT 1 2 3 KEY STONE OPERAT E MODE STAND BY EXIT VIC SELEC...

Page 37: ...usting the screen size with the ZOOM T W buttons on the remote control unit set the LOCKÔUNLOCK switch to the UNLOCK position To reduce the screen size Press the ZOOM T Tele button To enlarge the screen size Press the ZOOM W Wide button Remote control unit ZOOM T W FOCUS LOCK UNLOCK HIDE EXIT ZOOM KEYSTONE SHUTTER DIGITAL ZOOM SHIFT FOCUS VIC1 VIC2 VIC3 MENU ENTER OPERATE BACK LIGHT T W T W ON OFF...

Page 38: ... RGB Anal og VIC HIDE button LOCK UNLOCK HIDE EXIT ZOOM KEYSTONE SHUTTER DIGITAL ZOOM SHIFT FOCUS VIC1 VIC2 VIC3 MENU ENTER OPERATE BACK LIGHT T W T W ON OFF RM MQX1G REMOTE CONTROL UNIT HIDE button SHUTTER ON OFF buttons Interrupting the projection light while video image stops SHUTTER When video image stops you can interrupt the projection completely using the shutter function Press the SHUTTER ...

Page 39: ... corrected as shown in the figure Remote control unit Projector KEYSTONE KEY STONE Notes Before adjusting the trapezoidal distortion adjust the shift setting For details refer to page 38 The trapezoidal distortion keystone can be adjusted within the range of 0 to 127 Adjustable range for correcting trapezoidal distortion keystone is 0 to 15 When Aspect or Panel is selected as the Resize setting se...

Page 40: ...ange of approx 50 to 50 When the lens shift is set to 0 the center of the projection screen is the same height as the center of the lens When the lens shift is set to 50 the bottom edge of the projection screen is at the same height as the center of the lens When the lens shift is set to 50 the upper edge of the projection screen is at the same height as the center of the lens SHIFT LOCK UNLOCK HI...

Page 41: ...30 60 OFF 9600 19200 OFF ON Options Options menu Main Information VIC Slot 1 Switcher Resolution Frequency H Frequency V Lamp time RGB CH 0 1024 x 768 48 5kHz 80 Hz 123 h Menu Image adj Setting VIC menu Options Language Information Right Left rev RS 232C bps Sleep time min Menu Image adj Setting VIC menu Options Language Information Main menu Sub menu 1 Main Language Image adj Setting VIC menu Opt...

Page 42: ...trast Brightness Color temp Gamma Sub brightness Menu Image adj Setting VIC menu Options Language Information Contrast Brightness Color temp Gamma Sub brightness Image adj ENTER 1 2 3 Image adj menu 123 123 ENTER Color temp ENTER 5500K 6500K User 1 User 2 ENTER Color temp menu R G B Sub brightness 123 123 123 Sub brightness menu Setting menu Disp Posi Resize Setting 1 1 Panel Aspect ENTER 3 VIC me...

Page 43: ...Information Main Image adj Contrast Brightness Color temp Gamma Sub brightness Menu Image adj Setting VIC menu Options Language Information Contrast Brightness Color temp Gamma Sub brightness Image adj ENTER 1 2 3 Image adj menu 123 123 ENTER Color temp ENTER 5500K 6500K User 1 User 2 ENTER Color temp menu R G B Sub brightness 123 123 123 Sub brightness menu Setting menu Disp Posi Resize Setting 1...

Page 44: ...When Disp Posi menu is displayed the button works for setting the adjustment When Options 1 in Options 2 menu or VIC menu 1 in VIC menu 2 is selected you can go back to the previous menu by pressing the button To go back to the previous screen Remote control unit Projector When the main menu is displayed you can clear the menu by pressing the button Projector s buttons Remote control unit Menu ope...

Page 45: ...ton or 3 to go to the sub menu The sub menu appears 4 Press 5 to select the item in the sub menu When Language menu is displayed select the desired language in this step Then go to step 6 5 Press 3 2 to adjust the selected item When the item with indication is selected you can go to the next sub menu by pressing the ENTER button Then adjust the item using 3 2 6 Press EXIT to go back to the previou...

Page 46: ...e adjusted Contrast The contrast of the video image being projected is adjusted within the range of 0 to 255 The larger value the higher contrast is 255 Brightness Thebrightnessofthevideoimagebeingprojected is adjusted within the range of 0 to 255 The larger value the brighter the image is 128 Color temp Adjusts the color temperature of the video image being projected Make adjustment when the vide...

Page 47: ... 123 For HDTV HD SDI VIC To alternate between the VIC menu 1 and the VIC menu 2 press the ENTER button while the other menu is selected Tint Adjusts the tint of the video image being projected within the range of 30 to 30 Normally select 0 0 Color Adjusts the color density of the video image being projected within the range of 30 to 30 Normally select 0 0 Sharpness Adjusts the sharpness of the vid...

Page 48: ...ns shift This function takes effect only when the installed lens has the lens shift function Press the ENTER button to go to the next sub menu See Lens shift menu on page 47 Contents of the Menu Cont Menu position Menu display Line display Keystone Options 2 ENTER 5sec OFF 15sec ON Options 1 ENTER ENTER Right Left rev RS 232C bps Sleep time min Back color Lens shift Options 1 ENTER 15 30 60 OFF 96...

Page 49: ...for white within the range of 30 to 30 0 Menu position menu Menu position Selects the display position of the menu from the nine positions on the screen using 5 3 2 Contents of the Menu Cont Keystone menu Keystone Adjusts the trapezoidal distortion of the projected image within the range of 0 to 127 using 3 2 0 User 1 or 2 menu On this screen you can adjust the color of the video image for each R ...

Page 50: ...crews and the other on the front four screws of the projector 3 Remove the filters Pinch the center portion of the filter with your fingers and pull it toward you The filter is held by four tabs The filters should be cleaned periodically to avoid the decline in the cooling efficiency and malfunction If they are heavily stained do not become clean even if cleaned or are damaged replace them with ne...

Page 51: ...e sure to reinstall the filter covers CAUTIONS Put on rubber gloves when using neutral detergent After you have washed the filters in water make sure the filters are completely dry before reinstalling them Otherwise electric shock or malfunction could occur Do not clean the filters using a vacuum cleaner Since the filters are soft it may be sucked into the vacuum cleaner or damaged 4 Clean the fil...

Page 52: ...rk there this could cause injury Move the projector to a place large enough for work and then replace the light source lamp Use a genuine product for the light source lamp If you use other than a genuine product this could cause a malfunction Also never use an old light source lamp This could cause marked degradation in performance or the lamp could even explode possibly damaging the projector and...

Page 53: ...uality on the menu Check if the signal is appropriate scanning frequency etc and input the appropriate signal Check specifications of both signal being input and VIC Check cable connections Probable cause Is the power cord disconnected Is the MAIN POWER switch turned on Is the correct power voltage used Has the breakertripped open Has the lamp protective function activated This can occur if the po...

Page 54: ...much jitter or skew distortion being input from a VCR Is sync signal being input correctly Has the projector been moved Isn t video turned off by pressing the remote control unit s HIDE button Are all video signals being input correctly Is the shift center lock pin for shipment left attached Are batteries installed correctly Are batteries exhausted Is there a shielding object between the remote co...

Page 55: ...l is connected but no signal comes in from the connected device The selected slot number and VIC name are shown in the first line of the massage The frequency of the input video signal is out of range The selected slot number and VIC name are shown in the first line of the massage Though the frequency of the input video signal is within the acceptable range other items such as resolution are out o...

Page 56: ...hing wrong in the light source lamp unit Turn off the MAIN POWER switch and unplug the power cord then consult your dealer Turn off the MAIN POWER switch and unplug the power cord then consult your dealer Cause The temperature of the light source lamp is abnormally high The light source lamp cannot be turned on The side panel of the projector is broken away The internal shutter is activated The la...

Page 57: ...0 2 3 1 140 3 56 9 3 2 84 9 8 3 0 10 2 3 10 10 8 3 3 150 3 81 10 0 3 05 10 5 3 2 10 9 3 32 11 8 3 6 160 4 06 10 7 3 25 11 5 3 5 11 6 3 54 12 5 3 8 170 4 32 11 3 3 45 12 1 3 7 12 3 3 76 13 1 4 0 180 4 57 12 0 3 66 12 8 3 9 13 0 3 98 14 1 4 3 190 4 83 12 7 3 86 13 4 4 1 13 8 4 21 14 8 4 5 200 5 08 13 3 4 06 14 4 4 4 14 5 4 43 15 7 4 8 210 5 33 14 0 4 27 15 1 4 6 15 2 4 65 16 4 5 0 220 5 59 14 7 4 47...

Page 58: ...4 83 12 7 3 86 19 0 5 8 13 8 4 21 20 7 6 3 200 5 08 13 3 4 06 20 0 6 1 14 5 4 43 22 0 6 7 210 5 33 14 0 4 27 21 0 6 4 15 2 4 65 23 0 7 0 220 5 59 14 7 4 47 22 0 6 7 16 0 4 87 24 3 7 4 230 5 84 15 3 4 67 23 0 7 0 16 7 5 09 25 2 7 7 240 6 10 16 0 4 88 23 9 7 3 17 4 5 31 26 2 8 0 250 6 35 16 7 5 08 25 2 7 7 18 1 5 53 27 5 8 4 260 6 60 17 3 5 28 26 2 8 0 18 9 5 76 28 5 8 7 270 6 86 18 0 5 49 27 2 8 3 ...

Page 59: ...3 250 6 35 16 7 5 08 81 0 24 7 35 4 10 8 18 1 5 53 88 5 27 0 38 7 11 8 260 6 60 17 3 5 28 84 3 25 7 36 7 11 2 18 9 5 76 92 1 28 1 40 3 12 3 270 6 86 18 0 5 49 87 5 26 7 38 4 11 7 19 6 5 98 95 7 29 2 41 6 12 7 280 7 11 18 7 5 69 90 8 27 7 39 7 12 1 20 3 6 20 99 0 30 2 43 3 13 2 290 7 37 19 3 5 89 94 1 28 7 41 0 12 5 21 0 6 42 102 6 31 3 44 9 13 7 300 7 62 20 0 6 10 97 4 29 7 42 6 13 0 21 8 6 64 106...

Page 60: ...48 5 14 8 230 5 84 15 3 4 67 106 2 32 4 46 2 14 1 16 7 5 09 115 7 35 3 50 5 15 4 240 6 10 16 0 4 88 110 8 33 8 48 5 14 8 17 4 5 31 121 0 36 9 52 8 16 1 250 6 35 16 7 5 08 115 4 35 2 50 5 15 4 18 1 5 53 125 9 38 4 55 1 16 8 260 6 60 17 3 5 28 120 0 36 6 52 5 16 0 18 9 5 76 130 8 39 9 57 0 17 4 270 6 86 18 0 5 49 124 6 38 0 54 4 16 6 19 6 5 98 136 1 41 5 59 3 18 1 280 7 11 18 7 5 69 129 2 39 4 56 4 ...

Page 61: ... For details refer to page 44 Input output RGB IN RGB input 1 line BNC 5 Analog RGB signal R 0 7V p p 75Ω B 0 7V p p 75Ω G 0 7V p p 75Ω G on sync 1V p p 75Ω negative sync Horizontal sync composite sync signal H Cs H 1V p p to 5V p p high impedance positive negative polarity Cs 1V p p to 5V p p high impedance positive negative polarity Vertical sync signal V V 1V p p to 5V p p high impedance positi...

Page 62: ...ith a very high precision technology allowing 99 99 of the pixels to be effective Only 0 01 or less of the pixels are missing or always illuminated For easy understanding pictures and illustrations are shown by being emphasized omitted or composed and may be more or less different from actual products TRADEMARKS IBM IBM PC and VGA are registered trademarks of International Business Machines Corpor...

Page 63: ...ions Top Front Side 838 33 660 26 720 28 3 8 42 1 11 16 838 33 230 9 1 16 Unit mm inch 720 28 3 8 30 1 3 16 30 1 3 16 φ 50 φ 2 951 37 1 2 42 1 11 16 18 3 4 18 3 4 59 2 3 8 30 1 3 16 30 1 3 16 820 32 5 16 RS 232C terminal Pin number Signal name 1 N C 2 RD 3 TD 4 N C 5 GND Pin number Signal name 6 N C 7 N C 8 N C 9 N C 3 5 6 9 4 8 2 1 7 820 32 5 16 368 14 1 2 420 16 9 16 420 16 9 16 472 18 5 8 59 2 ...

Page 64: ...or When sending a control command use the following data format Header ID SP Command SP Parameter CR Header Designates the head of data and the kind of data 21h Control command to the projector 3Fh Query to the projector Asking command ID 1 fixed SP Designates the delimiter for ID Command and Parameter 20h CR Designates the terminal of the data 0Dh is not necessary for Asking command 2 2 Response ...

Page 65: ...r Hex Meaning 1 30 VIC1 2 31 VIC2 3 33 VIC3 Operation mode parameters Character Hex Meaning 0000 30h 30h 30h 30h Stand by mode 0001 30h 30h 30h 31h Power on mode 0002 30h 30h 30h 32h Cool down mode 0004 30h 30h 30h 34h Warning mode 3 Control command table The control commands that can be sent from the computer are as follows Function Command Asking Kind of data Power ON ELSE Numeric Value ON OFF S...

Page 66: ...Memorandum ...

Page 67: ...SUPER PROJECTEUR DLA QX1G MANUEL D INSTRUCTIONS FRANÇAIS ...

Page 68: ...dio s il n est pas utilisé conformément au mode d emploi L utilisation de cet appareil dans une zone résidentielle peut causer des interférences nuisibles et dans ce cas l utilisateur doit corriger ces interférences à ses propres frais INFORMATIONS IMPORTANTES À propos de la fiche secteur États Unis uniquement Ce projecteur est muni d une fiche à 3 broches avec mise à la terre conforme au règlemen...

Page 69: ...pareil risquant de l endommager ou de blesser l opérateur Débranchez l appareil de la prise secteur murale et contactez un réparateur qualifié dans les conditions suivantes a Quand le cordon ou la fiche d alimentation secteur est endommagé b Si un liquide a coulé ou si un objet est tombé à l intérieur de l appareil c Si l appareil a été exposé à la pluie ou à l eau d Si l appareil ne fonctionne pa...

Page 70: ...s appareils car cela pourrait entraîner un risque d incendie ou d électrocution N insérez jamais d objets d aucune sorte à l intérieur de cet appareil à travers les ouvertures car ils pourraient toucher des points de tension dangereuse ou créer un court circuit qui pourrait entraîner un incendie ou une électrocution Ne versez jamais de liquide d aucune sorte dans l appareil N essayez pas de répare...

Page 71: ... Si néanmoins la fiche secteur était coupée retirez le fusible et débarrassez vous de la fiche immédiatement afin d éviter tout risque d électrocution en cas de connexion accidentelle au secteur Si vous devez fixer une nouvelle fiche suivez les instructions données ci dessous AVERTISSEMENT CET APPAREIL DOIT ÊTRE MIS À LA TERRE IMPORTANT Les fils du cordon d alimentation secteur de cet appareil son...

Page 72: ...4 3 Ajustement de la taille de l écran 35 4 Ajustement de la mise au point 35 Pour utiliser les autres fonctions 36 Mise hors service de l image vidéo HIDE 36 Interruption de l éclairage du projecteur quand l image vidéo est arrêtée SHUTTER 36 Suppression de la distorsion trapézoïdale de l image KEYSTONE 37 Réglage de la valeur du décalage de l objectif SHIFT 38 Utilisation des menus 39 Mode de me...

Page 73: ...if à focale fixe 1 1 GL MQ1015SG Objectif à focale fixe 1 5 1 GL MQ1020ZG Objectif zoom 2 1 1 à 4 9 1 GL MQ1023SZG Objectif zoom 3 1 à 7 1 Carte d interface vidéo VIC PK Q01HAG Une carte permettant l addition de la fonction d entrée de signaux HDTV signaux vidéo Y Pb et Pr au projecteur PK Q01HSDG Une carte permettant l addition de la fonction d entrée de signaux vidéo HD SDI au projecteur Capucho...

Page 74: ...l interrupteur d alimentation principale Quand il est mis sur la position ON le projecteur entre en mode d attente et l indicateur STAND BY s allume sur le panneau de commande ON L appareil est sous tension OFF L appareil est hors tension 7 Capteur de télécommande Pour utiliser la télécommande dirigez la vers ce capteur Un capteur de télécommande supplémentaire se trouve sur le panneau de commande...

Page 75: ...accumulation interne de chaleur qui peut causer un incendie ou un mauvais fonctionnement Pour les détails référez vous à Nettoyage et remplacement des filtres aux pages 48 et 49 e Évent de sortie d air pour l alimentation de la lampe source de lumière Cet évent évacue l air chaud provenant du ventilateur de refroidissement de l alimentation de la lampe source de lumière Ce ventilateur continue de ...

Page 76: ...une valeur Pour les détails référez vous aux pages 16 et 42 1 2 3 4 5 6 7 8 ZOOM FOCUS T W MENU ENTER EXIT VIC SELECT 1 2 3 KEY STONE OPERATE HIDE STAND BY w e 9 q p 6 Touche MENU Utilisez cette touche pour entrer ou sortir du mode de menu Le menu apparaît ou disparaît de l écran Pour les détails référez vous à Procédure d utilisation des menus page 42 7 Touches ZOOM T W Utilisez ces touches pour ...

Page 77: ... d attente Clignotant En mode de refroidissement ATTENTION Le mode de refroidissement continue pendant environ 10 minutes Pendant les 20 premières secondes du mode de refroidissement le projecteur ne peut pas être remis sous tension Pendant cette période l indicateur STAND BY clignote et 07 apparaît sur l affichage du code d état Ensuite 07 change sur 06 sur l affichage du code d état mais l indic...

Page 78: ...ux à sync horizontale H signaux composites Cs Les appareils munis de prises de sortie analogique RVB peuvent être connecté L entrée de signaux de synchronisation extérieure est détectée automatiquement La détection des signaux H V ou Cs provoque la commutation automatique sur la synchronisation extérieure L ordre de priorité est H V Cs Le côté supérieur de l image peut apparaître courbé si l entré...

Page 79: ...and la carte VIC analogique HDTV est choisie ı Prise d entrée Y Pb Pr BNC x 3 Ce sont les prises d entrée Y Pb Pr pour le signal HD SMPTE260M 274M 296M Carte VIC HD SDI Å DEL Ce témoin DEL s allume quand la carte VIC HD SDI est choisie ı Prises d entrée sortie SDI en boucle BNC x 2 Ce sont les prises d entrée et sortie pour le signal HD SDI SMPTE292M HD SDI VIC IN OUT Å ı HDTV Analog VIC Y Pb Pr ı...

Page 80: ...es s éteignent après plusieurs secondes t RM MQX1G REMOTE CONTROL UNIT KEYSTON RM MQX1G REMOTE CONTROL UNIT O EX EN LOCK UNLOCK LOCK UNLOCK p r w 6 5 4 3 2 1 7 8 q e MODE EXIT ZOOM KEYSTONE SHUTTER DIGITAL ZOOM SHIFT FOCUS VIC1 VIC2 VIC3 MENU ENTER OPERATE BACK LIGHT T W T W ON OFF 9 y 4 Touche de curseur 5 2 3 ENTER Lors de l utilisation de la touche de curseur appuyez dans la direction 5 2 3 où ...

Page 81: ...possède une fonction de zoom T Télé La taille d écran projetée diminue W Grand angle La taille d écran projetée augmente Pour les détails référez vous à la page 35 e Touches SHIFT Utilisez ces touches pour ajuster la hauteur de l écran de projection quand plusieurs projecteurs sont utilisés dans une configuration à empilement Elles fonctionnent uniquement quand l objectif attaché au projecteur pos...

Page 82: ...des piles entre en contact avec la peau essuyez le avec un chiffon sinon la peau pourrait devenir rêche Ne mettez pas les piles dans le feu ni n essayez de les recharger Les piles ont une durée de vie de six mois à un an lors d une utilisation normale Mais les piles fournies sont pour vérifier le fonctionnement et risquent de ne pas durer si longtemps Quand la télécommande commence à ne pas foncti...

Page 83: ... température à l intérieur de l espace soit égale à la température extérieure Espace minimum admissible requis ATTENTION Puisque le projecteur pèse environ 92 kg 203 livres assurez vous de le faire soulever ou déplacer par 4 personnes ou plus sinon le projecteur pourrait tomber et blesser quelqu un et ou être endommagé N installez pas le projecteur dans les endroits suivants Où il y a beaucoup d e...

Page 84: ...rojecteur au plafond installez d abord une tablette spéciale et placez le projecteur solidement dessus Pour des raisons de sécurité et d entretien un dispositif permettant de soulever et de descendre le projecteur de la tablette est nécessaire pour son entretien 305 mm 12 pouces ou plus Installation du projecteur suite ZOOM FOCUS T W MENU ENTER EXIT VIC SELECT 1 2 3 KEY STONE OPERATE HIDE STAND BY...

Page 85: ...ecteur Soulevez le projecteur tournez le pied ajustable avant et ajustez l angle dans une plage de 0 à 3 5 Niveau du projecteur Soulevez le projecteur tournez le pied ajustable et ajustez l angle horizontal jusqu à ce que l appareil soit à niveau 3 5 Étendre Réduire 4 5 4 5 Étendre Réduire Installation du projecteur suite Ajustement de l inclinaison du projecteur ...

Page 86: ...ilés les uns sur les autres configuration à empilement Utiliser deux ou trois projecteurs permet d obtenir une image plus lumineuse Cela permet de projeter une image suffisamment lumineuse dans une grande salle ou un endroit relativement lumineux ZOOM FOCUS T W MENU ENTER EXIT VIC SELECT 1 2 3 KEY STONE OPERATE HIDE STAND BY REMOTE CONTROL RS 232C OUT RS 232C IN R G B Y H CS RGB Analog VIC ZOOM FO...

Page 87: ...0G Objectif à mise au point motorisée pour projection arrière et courte distance focale rapport d agrandissement de 1 1 influence 0 GL MQ1015SG Objectif à mise au point motorisée et courte distance focale rapport d agrandissement de 1 5 1 avec fonction de décalage vertical manuel influence de 0 à 50 GL MQ1020ZG Objectif à mise au point zoom motorisé et longue distance focale rapport d agrandisseme...

Page 88: ...rs dans une configuration à empilement les uns sur les autres réalisez un ajustement de façon que l image de projection de chaque projecteur se superpose exactement en utilisant la fonction de décalage de l objectif Si un ajustement horizontal est nécessaire consultez votre revendeur Pour les procédures d ajustement détaillées référez vous aux pages 38 et 46 Pour la valeur maximale du décalage réf...

Page 89: ...ni par le rapport à la largeur de l écran tandis que quand la hauteur de l écran est comptée comme 1 le décalage vertical est défini par le rapport à la hauteur de l écran Tableau des relations pour la valeur maximale du décalage rapport d image 16 9 Taille horizontale de l écran x 100 Taille verticale de l écran y 100 Écran après décalage Écran sans décalage 0 Py Px Py Px Py Px Py Px Py Px Py Px ...

Page 90: ...télécommande fourni entre la télécommande et la prise REMOTE sur le panneau de connexion du projecteur En l utilisant comme télécommande avec fil vous n avez pas besoin de vous inquiéter à propos de l angle de fonctionnement de l appareil bien que la distance de fonctionnement soit limitée par la longueur du câble de télécommande environ 15 m 49 2 pieds ZO OM KEYSTONE SH UTTER DIGITAL ZO OM SH IFT...

Page 91: ...ent ne pas être affichés normalement en fonction du type de signal Les signaux à synchronisation composite CS et à synchronisation sur G V ne peuvent pas être pris en charge en fonction de l appareil connecté Signaux analogique HD Les signaux HDTV entrelacés peuvent être entrés par la prise d entrée de la carte VIC analogique HD Les signaux NTSC ne sont pas disponibles Signaux numériques HD Les si...

Page 92: ...ous pouvez com muter le canal du projecteur automatiquement en choisissant le canal sur le commutateur spécialisé Projecteur ZOOM FOCUS T W MENU ENTER EXIT VIC SELECT 1 2 3 KEY STONE OPERATE HIDE STAND BY REMOTE CONTROL RS 232C OUT RS 232C IN B G R V H CS RGB Analog VIC Commutateur RVB non fourni HDTV 2 Ordinateur 1 Ordinateur 2 HDTV 1 Remarques L image vidéo reproduite par des appareils tels qu u...

Page 93: ... À G À B À V À H Cs Câble de connexion RVB non fourni Avant la connexion assurez vous de mettre hors tension le projecteur et les appareils RVB Lisez attentivement les modes d emploi qui accompagnent chaque appareil Préparez et utilisez des câbles de connexion RVB disponibles séparément La détection des signaux H V ou Cs provoque la commutation automatique sur la synchronisation extérieure L ordre...

Page 94: ...ppareils analogiques HD avec des prises Y Pb et Pr Avant la connexion assurez vous de mettre hors tension le projecteur et les appareils connectés Lisez attentivement les modes d emploi qui accompagnent chaque appareil Préparez et utilisez un câble de connexion analogique HD disponible séparément Appareils analogiques HD Carte VIC analogique HDTV À Pr À Pb À Y À Y Pb et Pr À Y Pb et Pr Câble de co...

Page 95: ...cteur et les appareils connectés Lisez attentivement les modes d emploi qui accompagnent chaque appareil Préparez et utilisez un câble de connexion coaxial SDI disponible séparément Appareils numériques HD Carte VIC HD SDI À OUT À IN Câble coaxial SDI non fourni À OUT To IN Moniteur numérique HD À IN À IN À OUT La carte VIC HD SDI a une prise OUT qui vous permet de connecter un moniteur numérique ...

Page 96: ...ecteur et l ordinateur Lisez attentivement le mode d emploi fourni avec chaque appareil à connecter Préparez et utilisez un câble de connexion RS 232C disponible séparément REMOTE CONTROL RS 232C OUT RS 232C IN Câble de connexion RS 232C non fourni Quand un autre DLA QX1G est connecté à ce projecteur à l aide de la prise RS 232C OUT vous pouvez utiliser l ordinateur pour commander plusieurs DLA QX...

Page 97: ...ntation directement dans une prise murale Ce projecteur nécessite une prise murale à simple phase 3 fils et 200V à 240V Pour utiliser le projecteur Retirez le capuchon d objectif avant d utiliser le projecteur 1 Retirez le couvercle de la prise d entrée d alimentation Le couvercle est de type à vis Tournez le dans la direction de la flèche pour le retirer 2 Insérez la fiche du cordon d alimentatio...

Page 98: ...d état 2 Appuyez sur la touche OPERATE pendant plus d une seconde sur le panneau de commande ou sur la télécommande L indicateur OPERATE s allume et 01 apparaît sur l affichage de code d état Indicateur du projecteur Remarques Après avoir mis l appareil sous tension l écran peut apparaître brouillé pendant quelques secondes mais ce n est pas un mauvais fonctionnement Après que l indicateur OPERATE...

Page 99: ...éteint OPERATE OPERATE Télécommande Projecteur OPERATE STAND BY Indicateur du projecteur Remarque Vous ne pouvez pas annuler le processus de mise hors tension avant que 07 change en 06 ou 00 sur l affichage de code d état ZOOM FOCUS T W MENU ENTER EXIT VIC SELECT 1 2 3 KEY STONE OPERAT E MODE STAND BY OPERATE STAND BY REMO TE CON TRO L RS 2 32C OUT RS 2 32C IN R G B V H C S RGB Anal og VIC Télécom...

Page 100: ... Ou appuyez sur la touche VIC 1 2 ou 3 de la télécommande pour choisir la carte VIC souhaitée Touches VIC SELECT 1 2 3 Télécommande Projecteur VIC SELECT 1 2 3 VIC1 VIC2 VIC3 Affichage de l écran Affichage de la ligne d entrée Remarque Quand aucun signal n entre dans le projecteur par la carte VIC choisie le menu sans signal apparaît sur l écran Référez vous à la page 39 ZOOM FOCUS T W MENU ENTER ...

Page 101: ...n objectif muni de la fonction de zoom Lors de l ajustement la taille de l écran avec les touches ZOOM T W sur la télécommande positionnez le commutateur LOCKÔUNLOCK sur la position UNLOCK Pour réduire la taille de l écran Appuyez sur la touche ZOOM T Télé Pour agrandir la taille de l écran Appuyez sur la touche ZOOM W Grand angle Télécommande ZOOM T W FOCUS LOCK UNLOCK HIDE EXIT ZOOM KEYSTONE SHU...

Page 102: ...B V H C S RGB Anal og VIC Touche HIDE LOCK UNLOCK HIDE EXIT ZOOM KEYSTONE SHUTTER DIGITAL ZOOM SHIFT FOCUS VIC1 VIC2 VIC3 MENU ENTER OPERATE BACK LIGHT T W T W ON OFF RM MQX1G REMOTE CONTROL UNIT Touche HIDE Touches SHUTTER ON OFF Interruption de l éclairage du projecteur quand l image vidéo est arrêtée SHUTTER Quand l image vidéo s arrête vous pouvez interrompre la projection complètement en util...

Page 103: ...marques Avant d ajuster la distorsion trapézoïdale ajustez le réglage de décalage Pour les détails référez vous à la page 38 La distorsion trapézoïdale keystone peut être ajustée dans une plage de 0 à 127 La plage d ajustement pour la correction de la distorsion trapézoïdale keystone est comprise entre 0 et 15 Quand Aspect ou Panneau est choisi pour le réglage Redimension voir page 44 la plage d a...

Page 104: ...est comprise dans une plage approximative de 50 à 50 Quand le décalage de l objectif est réglé sur 0 le centre de l écran de projection est à la même hauteur que le centre de l objectif Quand le décalage de l objectif est réglé sur 50 le bord inférieur de l écran de projection est à la même hauteur que le centre de l objectif Quand le décalage de l objectif est réglé sur 50 le bord supérieur de l ...

Page 105: ...RS 232C bps Veille min 15 30 60 OFF 9600 19200 OFF ON Options Menu Options Menu principal Informations VIC Slot 1 Commutateur Resolution Frequency H Frequency V Temps lampe RGB CH 0 1024 x 768 48 5kHz 80 Hz 123 h Menu Qlt image Réglas Menu VIC Options Language Informations Invers D G RS 232C bps Veille min Menu Qlt image Réglas Menu VIC Options Language Informations Menu principal Sous menu 1 Menu...

Page 106: ...tions Language Informations Menu principal Qlt image Contraste Luminosité Temp couleur Gamma Sous luminosité Menu Qlt image Réglage Menu VIC Options Language Informations Contraste Luminosité Temp couleur Gamma Sous luminosité Qlt image ENTER 1 2 3 Menu Qlt image 123 123 ENTER Temp couleur ENTER 5500K 6500K Utilisateur 1 Utilisateur 2 ENTER Menu Temp couleur R V B Sous luminosité 123 123 123 Menu ...

Page 107: ...e Informations Menu principal Qlt image Contraste Luminosité Temp couleur Gamma Sous luminosité Menu Qlt image Réglage Menu VIC Options Language Informations Contraste Luminosité Temp couleur Gamma Sous luminosité Qlt image ENTER 1 2 3 Menu Qlt image 123 123 ENTER Temp couleur ENTER 5500K 6500K Utilisateur 1 Utilisateur 2 ENTER Menu Temp couleur R V B Sous luminosité 123 123 123 Menu Sous luminosi...

Page 108: ...r à un sous menu Quand le menu Pos affi est affiché la touche fonctionne pour valider l ajustement Quand Options 1 est choisi dans le menu Options 2 ou quand Menu VIC 1 est choisi dans Menu VIC 2 vous pouvez retourner au menu précédent en appuyant sur cette touche Pour retourner à l écran précédent Télécommande Projecteur Quand le menu principal est ajusté vous pouvez le faire disparaître en appuy...

Page 109: ... sous menu apparaît 4 Appuyez sur 5 pour choisir un élément du sous menu Quand le menu Language est affiché choisissez la langue à cette étape Puis passez à l étape 6 5 Appuyez sur 3 2 pour ajuster l élément choisi Quand un élément avec l indication est choisi vous pouvez passer au sous menu suivant en appuyant sur la touche ENTER Puis ajuster l élément en utilisant 3 2 6 Appuyez sur EXIT pour ret...

Page 110: ...ontraste Le contraste de l image vidéo projetée peut être ajusté dans une plage de 0 à 255 Plus la valeur est grande plus le contraste est élevé 255 Luminosité La luminosité de l image vidéo projetée peut être ajustée dans une plage de 0 à 255 Plus la valeur est grande plus l image est lumineuse 128 Temp couleur Permet d ajuster la température de couleur de l image vidéo projetée Réalisez l ajuste...

Page 111: ...mpensation Gain Clamp 1020 12 Menu VIC BP ST ENTER 123 Pour VIC HDTV HD SDI Pour passer du Menu VIC 1 au Menu VIC 2 appuyez sur la touche ENTER quand l autre menu est choisi Teinte Ajuste la teinte de l image vidéo projetée dans une plage de 30 à 30 Normalement choisissez 0 0 Couleur Ajuste la densité de couleur de l image vidéo projetée dans une plage de 30 à 30 Normalement choisissez 0 0 Detail ...

Page 112: ...lorsqu un objectif muni de la fonction de décalage de l objectif est installé Appuyez sur la touche ENTER pour aller au sous menu suivant Voir Menu Changement objectif à la page 47 Contenu des menus suite Position menu Affichage des menus Aff source Keystone Options 2 ENTER 5sec OFF 15sec ON Options 1 ENTER ENTER Invers D G RS 232C bps Veille min Couleur de fond Changement objectif Options 1 ENTER...

Page 113: ...age de 30 à 30 0 Menu Position menu Position menu Choisit la position d affichage du menu à partir des neuf positions possibles sur l écran en utilisant 5 3 2 Contenu des menus suite Menu Keystone Keystone Ajuste la distorsion trapézoïdale de l image projetée dans une plage de 0 à 127 en utilisant 3 2 0 Menu Utilisateur 1 ou 2 Sur cet écran vous pouvez ajuster la couleur de l image vidéo pour chaq...

Page 114: ... six vis et un autre à l avant quatre vis du projecteur 3 Retirez les filtres Pincez la partie centrale du filtre avec vos doigts et tirez vers vous Le filtre est maintenu par quatre languettes Les filtres doivent être nettoyés périodiquement pour éviter tout affaiblissement de l efficacité du refroidissement ou tout mauvais fonctionnement S ils sont très sales ne peuvent plus être nettoyés ou son...

Page 115: ...rcles de filtre ATTENTION Mettez des gants en caoutchouc lors de l utilisation de détergent neutre Après avoir lavé les filtres à l eau assurez vous qu ils sont complètement secs avant de les réinstaller Sinon un choc électrique ou un mauvais fonctionnement risque de se produire Ne nettoyez pas les filtres en utilisant un aspirateur Comme les filtres sont mous ils risquent d être aspirés dans l as...

Page 116: ...cet endroit vous pouvez vous blesser Déplacez le projecteur dans un endroit où il y a suffisamment de place pour travailler et remplacer la lampe source de lumière Utilisez un produit garanti d origine pour la lampe source de lumière Si vous utilisez un autre produit cela pourrait causer un mauvais fonctionnement D autre part n utilisez jamais une lampe source de lumière usée Cela pourrait réduire...

Page 117: ...t correct fréquence de balayage etc et entrez un signal approprié Vérifiez les spécifications du signal entré et de la carte VIC Vérifiez la connexion du câble Cause probable Le cordon d alimentation est il connecté L interrupteur MAIN POWER est il sur ON Une tension correcte est elle utilisée Le disjoncteur est il ouvert La fonction de protection de la lampe est elle en service Cela peut se produ...

Page 118: ...ormation en losange est il entré d un magnétoscope Le signal de synchronisation est il entré correctement Le projecteur a t il été bougé L image vidéo a t elle été coupée en appuyant sur la touche HIDE de la télécommande Tous les signaux vidéo sont ils entrés correctement La broche de verrouillage central du décalage pour l expédition est elle toujours en place Les piles sont elles installées corr...

Page 119: ...pareil est connecté mais aucun signal ne provient de l appareil Le numéro de fente choisi et le nom de la carte VIC sont montrés sur la première ligne du message La fréquence du signal vidéo entré est hors limite Le numéro de fente choisi et le nom de la carte VIC sont montrés sur la première ligne du message Bien que la fréquence du signal vidéo entré se trouve dans une plage acceptable les autre...

Page 120: ...Mettez l interrupteur MAIN POWER sur OFF débranchez le cordon d alimentation et consultez votre revendeur Mettez l interrupteur MAIN POWER sur OFF débranchez le cordon d alimentation et consultez votre revendeur Cause La température de la lampe source de lumière est anormalement élevée La lampe source de lumière ne peut pas être allumée Le panneau latéral du projecteur est cassé Le volet interne e...

Page 121: ... 64 9 2 2 8 9 4 2 88 10 2 3 1 140 3 56 9 3 2 84 9 8 3 0 10 2 3 10 10 8 3 3 150 3 81 10 0 3 05 10 5 3 2 10 9 3 32 11 8 3 6 160 4 06 10 7 3 25 11 5 3 5 11 6 3 54 12 5 3 8 170 4 32 11 3 3 45 12 1 3 7 12 3 3 76 13 1 4 0 180 4 57 12 0 3 66 12 8 3 9 13 0 3 98 14 1 4 3 190 4 83 12 7 3 86 13 4 4 1 13 8 4 21 14 8 4 5 200 5 08 13 3 4 06 14 4 4 4 14 5 4 43 15 7 4 8 210 5 33 14 0 4 27 15 1 4 6 15 2 4 65 16 4 ...

Page 122: ...8 19 7 6 0 190 4 83 12 7 3 86 19 0 5 8 13 8 4 21 20 7 6 3 200 5 08 13 3 4 06 20 0 6 1 14 5 4 43 22 0 6 7 210 5 33 14 0 4 27 21 0 6 4 15 2 4 65 23 0 7 0 220 5 59 14 7 4 47 22 0 6 7 16 0 4 87 24 3 7 4 230 5 84 15 3 4 67 23 0 7 0 16 7 5 09 25 2 7 7 240 6 10 16 0 4 88 23 9 7 3 17 4 5 31 26 2 8 0 250 6 35 16 7 5 08 25 2 7 7 18 1 5 53 27 5 8 4 260 6 60 17 3 5 28 26 2 8 0 18 9 5 76 28 5 8 7 270 6 86 18 0...

Page 123: ...9 25 9 37 0 11 3 250 6 35 16 7 5 08 81 0 24 7 35 4 10 8 18 1 5 53 88 5 27 0 38 7 11 8 260 6 60 17 3 5 28 84 3 25 7 36 7 11 2 18 9 5 76 92 1 28 1 40 3 12 3 270 6 86 18 0 5 49 87 5 26 7 38 4 11 7 19 6 5 98 95 7 29 2 41 6 12 7 280 7 11 18 7 5 69 90 8 27 7 39 7 12 1 20 3 6 20 99 0 30 2 43 3 13 2 290 7 37 19 3 5 89 94 1 28 7 41 0 12 5 21 0 6 42 102 6 31 3 44 9 13 7 300 7 62 20 0 6 10 97 4 29 7 42 6 13 ...

Page 124: ...16 0 4 87 110 8 33 8 48 5 14 8 230 5 84 15 3 4 67 106 2 32 4 46 2 14 1 16 7 5 09 115 7 35 3 50 5 15 4 240 6 10 16 0 4 88 110 8 33 8 48 5 14 8 17 4 5 31 121 0 36 9 52 8 16 1 250 6 35 16 7 5 08 115 4 35 2 50 5 15 4 18 1 5 53 125 9 38 4 55 1 16 8 260 6 60 17 3 5 28 120 0 36 6 52 5 16 0 18 9 5 76 130 8 39 9 57 0 17 4 270 6 86 18 0 5 49 124 6 38 0 54 4 16 6 19 6 5 98 136 1 41 5 59 3 18 1 280 7 11 18 7 ...

Page 125: ... les fréquences de 24 Hz 25 Hz et 30 Hz sont disponibles Pour les détails référez vous à la page 44 Entrée sortie RGB IN Entrée RVB 1 ligne BNC 5 Signal analogique RVB R 0 7V c c 75Ω B 0 7V c c 75Ω V 0 7V c c 75Ω Sync sur V 1V c c 75Ω sync négative Signal à sync horizontale sync composite H Cs H 1V c c à 5V c c haute impédance polarité positive négative Cs 1V c c à 5V c c haute impédance polarité ...

Page 126: ...echnologie de haute précision permettant à 99 99 des pixels d être effectifs Seulement 0 01 ou moins des pixels sont manquants ou toujours allumés Pour faciliter la compréhension les images et les illustrations sont améliorées simplifiées ou composées et peuvent être un peu ou très différentes des produits actuels MARQUES DE COMMERCE IBM IBM PC et VGA sont des marques déposées de International Bus...

Page 127: ...xtérieures Dessus Avant Côté 838 33 660 26 720 28 3 8 42 1 11 16 838 33 230 9 1 16 Unité mm pouces 720 28 3 8 30 1 3 16 30 1 3 16 φ 50 φ 2 951 37 1 2 42 1 11 16 18 3 4 18 3 4 59 2 3 8 30 1 3 16 30 1 3 16 820 32 5 16 Prise RS 232C No de broche Nom du signal 1 N C 2 RD 3 TD 4 N C 5 Masse No de broche Nom du signal 6 N C 7 N C 8 N C 9 N C 3 5 6 9 4 8 2 1 7 820 32 5 16 368 14 1 2 420 16 9 16 420 16 9 ...

Page 128: ...ande de l ordinateur vers le projecteur Lors de l envoi d une commande utilisez le format de données suivant En tête ID SP Commande SP Paramètre CR En tête Désigne la tête des données et le type de données 21h Commande du projecteur 3Fh Interrogation du projecteur Commande d interrogation ID 1 fixé SP Désigne le séparateur pour ID Commande et Paramètre 20h CR Désigne la fin des données 0Dh n est p...

Page 129: ... 33 VIC3 Paramètres de mode de fonctionnement Caractère Hex Signification 0000 30h 30h 30h 30h Mode d attente 0001 30h 30h 30h 31h Mode de mise sous tension 0002 30h 30h 30h 32h Mode de refroidissement 0004 30h 30h 30h 34h Mode d avertissement 3 Tableau des commandes Les commandes qui peuvent être envoyées à l ordinateur sont les suivantes Fonction Commande Interrogation Type de données Power ON E...

Page 130: ...Memorandum ...

Page 131: ......

Page 132: ...DLA QX1G SUPER PROJECTOR 2002 VICTOR COMPANY OF JAPAN LIMITED Printed in Japan 0302 Y M VP VICTOR COMPANY OF JAPAN LIMITED ...

Reviews: