1-24 (No.PA037<Rev.001>)
5.4
MCU FIRMWARE UPDATE
Please carry out the backup of ROM data before the repair of
the projector, the adjustment by all means.
This ROM data contain important data or information such as
lamp time in adjustment data in the factory, system time.
5.4.1 Necessary machine parts
• Windows PC (Windows XP SP2)
• An application complete set for update (MCU Updater tool)
• An MCU file for update (*.hex)
• RS-232C crossing cable
5.4.2 Update procedure
*When it uses it for the first time, please carry out
HexEdit_register.exe.
(1) Pull an AC cable out of a projector (It get ready to be able
to place it immediately).
(2) Connect a projector and a PC with a RS-232C cable.
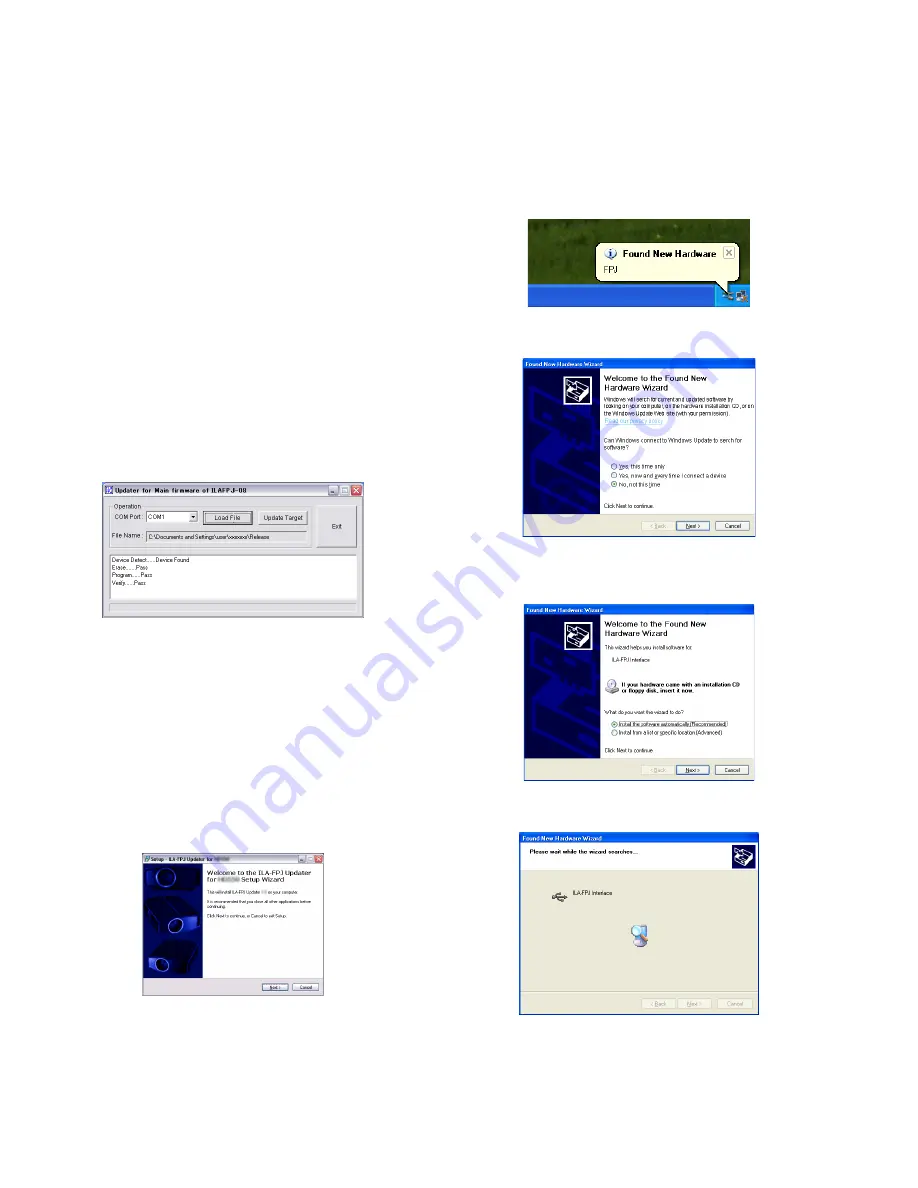
(3) Start up the Updater for Main firmware of ILAFPJ-08.exe
(4) Match Com Port with the communication port of the PC.
(5) Choose the *.hex file which I want to renew in "Load File".
(6) Place an AC cable in a projector within 10 seconds if I push
the "Update Target" button.
(7) If the message of the chart below is displayed, it is success.
5.5
Update for SUB CPU firmware
5.5.1 Necessary machine parts
• Windows PC (Windows XP SP2)
• A USB cable[An A te (the Windows PC side) - mini-B
te (The projector side)]
• Installation file(ILAFPJ_Updater_for_HDxxx_Vx.x.exe) [It
uses it for the installation of the update tool]
5.5.2 Installation procedure of an installation file
(ILAFPJ_Updater_for_HDxxx_Vx.x.exe)
CAUTION : Ii is condition not to connect a projector, and please
perform the installation.
(1) Put an installation file in the suitable place and open by
double click. The window of the chart below appears.
(2) Installation Wizard
• Click a "Next" button four times in total without appoint-
ment in particular and advance a Wizard screen.
• Finally click a "Install" button and wait for a while till in-
stallation is completed afterwards and if a "Completing
the ILA-FPJ Updater Setup Wizard" screen is displayed,
it click a "Finish" button and finish Wizard.
5.5.3 INSTALLATION OF DRIVER
(1) Set the projector to UP DATE mode.(While pressing Stand-
by/On button, then plug the power cord) ALL LED are light-
ed.
(2) Insert the male terminal B side of the USB cable to the USB
terminal of the projector.
(3) Insert the male terminal A side of the USB cable to the USB
terminal of Windows PC.
(4) The pop-up window "Found New Hardware" is displayed.
(5) Then, "Found New Hardware Wizard" is displayed, select
"No, not this time" and click "Next" button.
(6) The menu of selecting the installation method is displayed,
then, select "Install the software automatically [Recomend-
ed]” and clock “Next” button.
(7) The menu of searching the driver's location is displayed
and select "Search for the best driver in these locations".
Summary of Contents for DLA-HD550-BC
Page 27: ... No PA037 Rev 001 1 27 ...


