background image

– 16 –

When playing back CDs and VCD without PBC
function, all loaded discs can be played continuously

When 3 discs are loaded on the disc trays, they are played in one of
the following sequences.
• When DVD1 is pressed : DVD1 

]

 DVD2 

]

 DVD3 (then stops)

• When DVD2 is pressed : DVD2 

]

 DVD3 

]

 DVD1 (then stops)

• When DVD3 is pressed : DVD3 

]

 DVD1 

]

 DVD2 (then stops)

– When only 2 discs are loaded, they are played in the same order,

but the disc tray without a disc is skipped.

– If you change discs during play (see below), the current play will

not stop until all discs you have changed are played.

If “PARENTAL LEVEL” appears on the TV screen

Parental Lock is in use. You cannot play back a DVD containing
violent scenes or those not suitable for your family members.
To play back such a disc, cancel the Parental Lock. (See page 30)

To exchange discs during playback of another disc

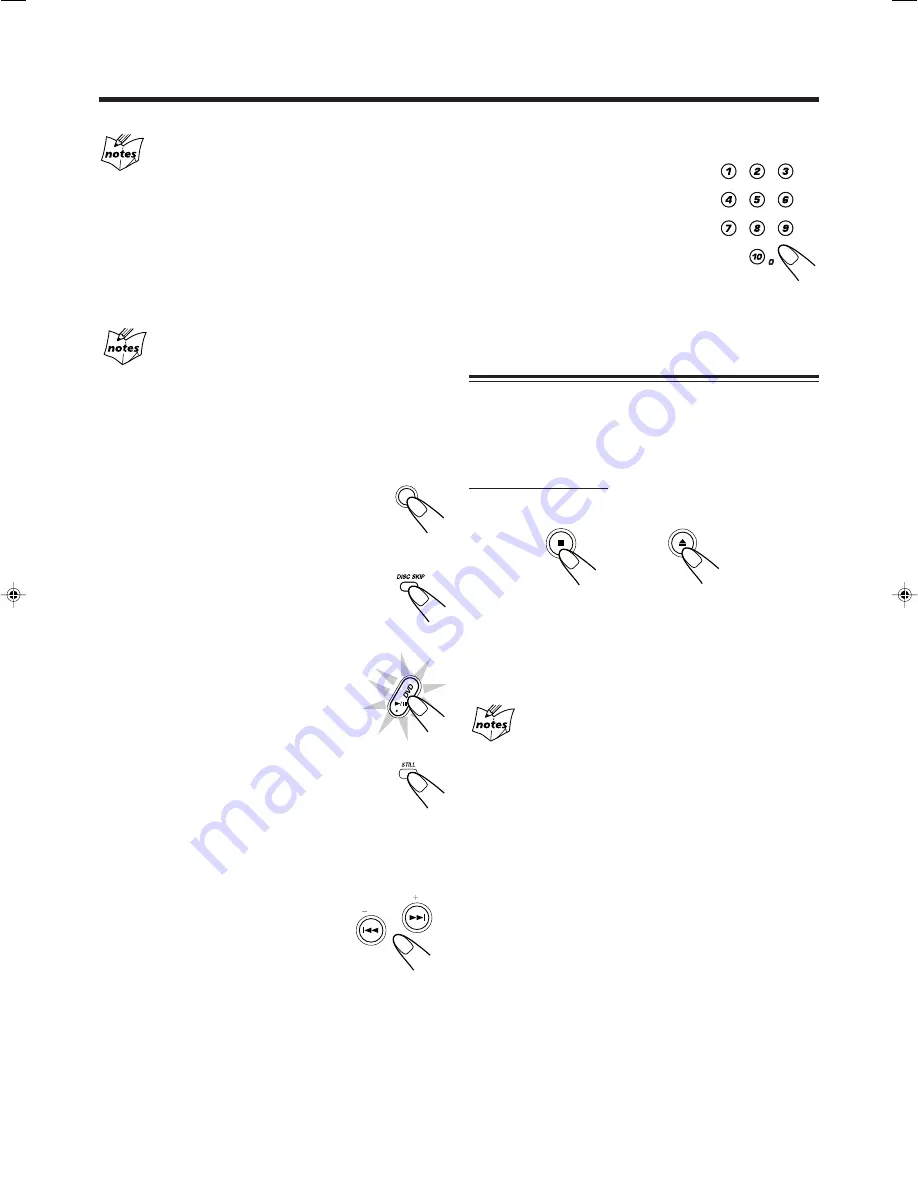
Press DISC CHANGE to change the disc and the
carrousel comes out.
To close the carrousel, press DISC CHANGE
or 

0

.

To skip to another disc in the carrousel

Press DISC SKIP on the remote control.
• Pressing DVD1, DVD2, or DVD3 will also skip

to the selected disc tray.

To stop play for a moment

Press DVD 

6

 (or STILL) while playing a

disc.
While pausing, the elapsed playing time stops
being counted and starts flashing. (If your TV
is turned on, “

8

 PAUSE” also appears on the

TV screen.)
• A still picture appears while playing a DVD or

VCD. You can advance the still picture frame by
frame by pressing the STILL on the remote
control repeatedly. (See page 22 or 27.)

To resume play, press DVD 

6

 again.

To go to another chapter or track

Press 

4

 or 

¢

 repeatedly before or

during playback.

4

: Goes back to the beginning of

the previous chapter or track.

¢

: Skips to the beginning of the

next or succeeding chapter or
track.

\

PRESET

PREV.

NEXT

DISC CHANGE

SELECT

/

To go to another chapter or track directly using the number
buttons

Pressing the number buttons before or
during play allows you to start playing the
chapter or track number you want.
• To select number 1 to 9, simply press the

corresponding number button, and wait
for a few seconds.

• To select number 10, press 1, 0.
• To select number 23, press 2, 3.

Prohibiting Disc Ejection—Tray Lock

You can prohibit disc ejection from the unit and can lock
discs.
• This operation is possible only while the unit is on with

disc selected as the source.

On the unit ONLY:

To prohibit disc ejection, press 

0

 while holding 

7

.

“LOCKED” appears for a while, and the carrousel is locked.

To cancel the prohibition and unlock the discs, press 

0

while holding 

7

.

“UNLOCKED” appears for a while, and the carrousel is
unlocked.

If you try to eject discs

“LOCKED” appears to inform you that the Tray Lock is in use.

EN14-22MX-DVA5[J]_f

01.8.21, 8:51 PM

16

Summary of Contents for CA-MXDVA5

Page 1: ...the rear bottom or side of the cabinet Retain this information for future reference Model No Serial No LVT0701 001A J INSTRUCTIONS SP MXDVA5 SP MXDVA5 CA MXDVA5 CLOCK TIMER DISPLAY PHONES REPEAT SELECT REC START STOP CD REC START DUBBING TUNING TAPE B DISC CHANGE SOUND MODE SUBWOOFER LEVEL TAPE A STANDBY ON STANDBY COMPACT DIGITAL VIDEO CD R RW PLAYBACK ...

Page 2: ... limits for a Class B digital device pursuant to part 15 of the FCC Rules These limits are designed to provide reasonable protection against harmful interference in a residential installation This equipment generates uses and can radiate radio frequency energy and if not installed and used in accordance with the instructions may cause harmful interference to radio communications However there is n...

Page 3: ...le Canada THIS DIGITAL APPARATUS DOES NOT EXCEED THE CLASS B LIMITS FOR RADIO NOISE EMISSIONS FROM DIGITAL APPARATUS AS SET OUT INTHE INTERFERENCE CAUSING EQUIPMENT STANDARD ENTITLED DIGITAL APPARATUS ICES 003 OF THE DEPARTMENT OF COMMUNICATIONS CET APPAREIL NUMERIQUE RESPECTE LES LIMITES DE BRUITS RADIOELECTRIQUES APPLICABLES AUX APPAREILS NUMIRIQUES DE CLASSE B PRESCRITES DANS LA NORME SUR LE MA...

Page 4: ...unit Leave sufficient distance between the unit and the TV Keep the speakers away from the TV to avoid interference with TV DO NOT install the unit in a location near heat sources or in a place subject to direct sunlight excessive dust or vibration We would like to thank you for purchasing one of our JVC products Before operating this unit read this manual carefully and thoroughly to obtain the be...

Page 5: ...r Point 20 Various Speed Forward Search 20 Various Speed Reverse Search 20 Repeating Playback 20 Repeat Play 20 A B Repeat 20 Programming the Playing Order of the Chapters Program Play 21 DVD Special Effect Playback 22 Still Picture Frame by Frame Playback 22 Slow Motion Playback 22 Zoom 22 VCD CD Playback 23 Showing the On Screen Bar 23 Disc Menu Driven Playback Only for VCD 23 Moving to a Partic...

Page 6: ...ntrols on your unit Front Panel CLOCK TIMER DISPLAY PHONES REPEAT REC START STOP CD REC START DUBBING TUNING TAPE B DISC CHANGE SOUND MODE SUBWOOFER LEVEL TAPE A STANDBY ON STANDBY SELECT CD R RW PLAYBACK 1 6 7 8 q w r 5 f d a k u y i s j h g o 2 3 4 e t p COMPACT DIGITAL VIDEO 9 ...

Page 7: ...sing one of these buttons also turns on the unit i DISC CHANGE button 15 16 o Remote sensor DVD VIDEO lamp 10 30 a SOUND MODE control 12 Continued s PRESET buttons 13 4 reverse skip forward skip buttons 10 16 34 36 PREV previous NEXT buttons 23 d SUBWOOFER LEVEL control 11 f VOLUME control 11 g TUNING buttons 13 1 fast left fast right buttons 31 h TAPE A button 31 TAPE B button 30 31 j Recording b...

Page 8: ...E 2 3 button 10 31 Pressing this button also turns on the unit s FM AM button 10 13 Pressing this button also turns on the unit d DVD 6 button 10 15 16 21 23 26 27 Pressing this button also turns on the unit f 7 stop button 15 21 23 32 g VOLUME button 11 h ENTER button 19 21 22 24 26 30 j FM MODE SLOW button 13 22 27 k FADE MUTING button 11 l SUBWOOFER LEVEL buttons 11 3D SOUND button 12 When usin...

Page 9: ...t types of batteries together DO NOT expose batteries to heat or flame DO NOT leave the batteries in the battery compartment when you are not going to use the remote control for an extended period of time Otherwise it will be damaged from battery leakage UM 4 AAA IEC R03 Continued 2 Connecting Antennas FM antenna 1 Attach the FM antenna to the FM 75 Ω coaxial terminal 2 Extend the FM antenna 3 Fas...

Page 10: ... from metallic parts of the unit connecting cords and the AC power cord AM antenna Vinyl covered wire not supplied AM loop antenna supplied Connecting Speakers Speaker cord red black 2 From left main speaker terminals Speaker cord red black Speaker cord blue black 1 Press and hold the clamp of the speaker terminal on the rear of the unit 2 Insert the end of the speaker cord into the terminal Match...

Page 11: ...upplied S VIDEO OUT VIDEO OUT To composite video input To S video input Using an S video cord gives you better quality pictures To connect other audio components 7 Analog components Be sure that the plugs of the audio cords are color coded White plugs and jacks are for left audio signals and red ones for right audio signals For playing the other equipment through this unit connect between the audi...

Page 12: ... optical digital input Protective plug About sounds reproduced through the rear terminals Through the LINE OUT L R jacks and MAIN SPEAKERS SUBWOOFER terminals Analog stereo signals are output When playing a source encoded with Dolby Digital multichannel signals are mixed to the left and right front channel signals then output You cannot reproduce the sound encoded DTS Digital Surround Through the ...

Page 13: ...correct the hour after pressing SET press CANCEL DEMO The hour digits start flashing again 3 Press or 4 to adjust the minute then press SET To check the clock time Press DISPLAY while playing a source Each time you press the button the source indication and the clock time alternate on the display To adjust the clock again If you have adjusted the clock before you need to press CLOCK TIMER repeated...

Page 14: ...can damage your hearing speakers and or headphones when you turn on the unit or start playing any source next time REMEMBER you cannot adjust the volume level while the unit is on standby SUBWOOFER LEVEL Reinforcing the Bass Sound This function only affects the playback sound but does not affect your recording Turn the SUBWOOFER LEVEL control clockwise to increase the subwoofer sound or counterclo...

Page 15: ...play Surround elements are added to the SEA elements to create a being there feeling in your room When one of these modes is selected the SOUND MODE indicator lights up as While one of the SEA modes SEA elements without surround elements is selected the SOUND MODE indicator lights up as When using the remote control press SOUND MODE repeatedly Each time you press the button the sound modes change ...

Page 16: ... preset 30 FM and 15 AM stations In some cases test frequencies have been already memorized for the tuner since the factory examined the tuner preset function before shipment This is not a malfunction You can preset the stations you want into memory by following the presetting method There is a time limit in doing the following steps If the setting is canceled before you finish start from step 2 a...

Page 17: ...its own track number On some discs each track may also be divided by Indexes When playing back a VCD with Playback Control PBC function you can select what to view using the menu shown on the TV screen While operating a Video CD using the menu some of the functions such as Repeat and Variable Speed Search may not work IMPORTANT Before performing any operations make sure of the following Check the ...

Page 18: ...ou can play a disc s If a menu appears while playing a DVD or VCD with PBC function see page 19 for DVD or page 23 for VCD 1 Load a disc s 2 Press one of the disc number buttons DVD1 DVD2 and DVD3 for the disc you want to play WAIT appears on the display for a while no operations will be accepted during this period then disc play starts from the first chapter or track of the selected disc 7 When p...

Page 19: ...eing counted and starts flashing If your TV is turned on 8 PAUSE also appears on the TV screen A still picture appears while playing a DVD or VCD You can advance the still picture frame by frame by pressing the STILL on the remote control repeatedly See page 22 or 27 To resume play press DVD 6 again To go to another chapter or track Press 4 or repeatedly before or during playback 4 Goes back to th...

Page 20: ...r You can show the following information on the TV screen while a disc is loaded On the remote control ONLY To show the disc information press ON SCREEN Each time you press the button the following on screen bar appears in sequence Some DVDs contain several audio languages subtitles and multi angle views When you find the following marks on the DVD or its package you can select these elements reco...

Page 21: ...wn on the TV screen See page 28 On the remote control ONLY To select the subtitle language press SUBTITLE repeatedly The on screen bar appears on the TV screen Each time you press the button the subtitle language changes Selecting the Audio Languages While playing a disc containing audio languages sound tracks you can select the audio language sound track to listen to You can set your favorite aud...

Page 22: ...rectly You can move to another title chapter or particular scene in the chapter directly On the remote control ONLY 1 Press GO TO during play or pause Each time you press the button the following indication appears on the TV screen TITLE Select this to move to another title CHAPTER Select this to move to another chapter TIME Select this to move to a particular scene 2 Press the number buttons to s...

Page 23: ...You can search for a particular portion while playing a disc Variable Speed Forward Reverse Search No sound comes out during Variable Speed Forward Reverse Search 7 7 7 7 7 Variable Speed Forward Search To fast forward the chapter press during play Each time you press the button the search speed changes as follows 7 7 7 7 7 Variable Speed Reverse Search To reverse the chapter press 1 during play E...

Page 24: ... press DVD 6 while this screen is shown the unit starts program play To exit from program mode press PLAY MODE The PROGRAM MENU screen goes off and the opening screen appears The program you made is still kept in memory If you press DVD 6 while this screen is shown the unit starts normal playback To erase the stored program eject the carrousel by pressing 0 If you perform the following operations ...

Page 25: ... Playback 7 7 7 7 7 Still Picture Frame by Frame Playback You can advance the still picture frame by frame while playing a DVD On the remote control ONLY 1 Press STILL or DVD 6 once during play A still picture appears on the TV screen 2 Press STILL repeatedly to advance the picture frame by frame Each time you press the button the picture advances frame by frame To resume normal play Press DVD 6 7...

Page 26: ... alternately VCD CD Playback For basic disc operations such as inserting discs starting playback and moving to another tracks see Basic Disc Operations on pages 15 and 16 Appears only when a VCD is loaded When a menu appears select a desired item on the disc menu When a list of items is displayed on the screen press the number buttons to select an item To use the number buttons see To go to anothe...

Page 27: ...o input time 09 45 press 9 4 5 then wait for about 5 seconds or press ENTER To cancel a mis entry press CLEAR Each time you press the button the last entry will be erased Continued Canceled TRACK TIME TIME FAST PLAY PLAY Normal play SCAN FORWARD 1 4x 2x SCAN FORWARD 2 8x PLAY Normal play FAST BACK PLAY 2x SCAN BACKWARD 1 SCAN BACKWARD 2 4x 8x Searching for a Particular Point You can search for a p...

Page 28: ...portion you want to repeat A B repeat may not be used on some VCDs with the PBC function Example REP A REP A B REP A REP AB REP OFF Repeating Playback 7 7 7 7 7 Repeat Play Repeat play cannot be used on a VCD with the PBC function To repeat playback press REPEAT repeatedly during play Each time you press the button repeat mode changes as follows REP ONE Current track will be repeated The REPEAT 1 ...

Page 29: ... SETUP FINISH PROGRAM MENU RETURN DVD Video CD CD PLAYER Track numbers you can select in the next step Programming the Playing Order of the Tracks Program Play You can arrange the track playback order before you start playing You can program up to 20 steps Before making a program make sure that the TV is turned on and the correct input is selected on the TV On the remote control ONLY 1 Load a disc...

Page 30: ...een If you press the button during play the program play will stop To modify the program You can modify the program while the PROGRAM MENU screen is shown on the TV screen To erase a step press Cursor or 5 to select highlight an unwanted program step then press CLEAR To modify a step press Cursor or 5 to select highlight a program step you want to modify then perform step 4 on page 26 Before enter...

Page 31: ...etup menu language shown on the TV screen AUDIO Select the audio language you listen to while watching a DVD SUBTITLE Select the subtitle language you read while watching a DVD MENU LANGUAGE Select the disc menu language recorded a DVD which you use while operating a DVD s own menu Languages you can select on this menu You can select the following languages separately for each listed item on the m...

Page 32: ...suitable for your family members See page 30 for detailed operations DIGITAL OUTPUT You can select the format of digital signals output through the DIGITAL OUT OPTICAL terminal See page 39 for detailed information BITSTREAM Select when connecting an amplifier or a decoder compatible with Dolby Digital and with DTS Digital Surround LPCM Select when connecting an amplifier or a decoder incompatible ...

Page 33: ...sted on the pop up window If it is not shown pressing Cursor repeatedly will show it in the pop up window 3 Press the number buttons to enter a new password 4 digits then ENTER Your new password is now stored To erase the Setup menu press SETUP 7 7 7 7 7 To reset the password You can reset the password to the initial setting 7890 REMEMBER all the other preset settings such as the clock preset stat...

Page 34: ...ically stops if the Reverse Mode is canceled See To play both sides repeatedly Reverse Mode To stop during play press 7 To operate the other deck press TAPE A or TAPE B or TAPE A B on the remote control then TAPE 2 3 To fast wind to the left or to the right press 1 or The tape direction indicator 2 or 3 starts flashing quickly on the display To remove the cassette press 0 EJECT for deck A or EJECT...

Page 35: ...it may be unlawful to re record pre recorded tapes records or discs without the consent of the owner of copyright in the sound or video recording broadcast or cable programme and in any literary dramatic musical or artistic embodied therein The recording level is automatically set correctly so it is not affected by the VOLUME control the SOUND MODE control and the SUBWOOFER LEVEL control Thus duri...

Page 36: ...a song in the forward direction 3 the last song will be recorded again at the beginning of the reverse side 2 To cancel Reverse Mode press the button again so that the Reverse Mode indicator lights up as You cannot start CD Synchronized Recording from the reverse direction 2 Even you try to start recording from the reverse direction 2 the unit automatically changes the direction and start recordin...

Page 37: ... unit automatically turns on set the volume level to the preset level gradually and starts playing the specified source when the on time comes the indicator flashes while the timer is operating Then when the off time comes the unit automatically turns off stands by Daily Timer works every day until you cancel it There is a time limit in doing the following steps If the setting is canceled before y...

Page 38: ...n the display in sequence for your confirmation Using Recording Timer With Recording Timer you can make a tape of a radio broadcast automatically You can set the timer whether the unit is on or off How Recording Timer actually works The unit automatically turns on tunes into the specified station sets the volume level to VOL MIN and starts recording when the on time comes the indicator flashes whi...

Page 39: ...cial attention to the shut off time 4 Set the on time you want the unit to turn on 1 Press 4 or to set the hour then press SET 2 Press 4 or to set the minute then press SET OFF TIME appears for 2 seconds then the unit enters off time setting mode 5 Set the off time you want the unit to turn off on standby 1 Press 4 or to set the hour then press SET 2 Press 4 or to set the minute then press SET The...

Page 40: ... sunlight or heat In moist areas Near a magnet Handling discs Remove the disc from its case by holding it at the edge while pressing the center hole lightly Do not touch the shiny surface of the disc or bend the disc Put the disc back in its case after use to prevent warping Be careful not to scratch the surface of the disc when placing it back in its case Avoid exposure to direct sunlight tempera...

Page 41: ...aying a disc with DTS Digital Surround The built in microprocessor may malfunction due to external electrical interference Power supply from the AC power cord has been cut off while the tape was running Small tabs on the back of the cassette are removed Display demonstration has not been canceled yet The built in microprocessor may malfunction due to external electrical interference The path betwe...

Page 42: ... DTS Digital Surround Linear PCM This is a digital recording format that is used for audio CDs Playback Control PBC When a VCD has the PBC Playback Control function you can enjoy menu driven operations and high resolution still pictures Sampling Frequency Quantization Bits When analog signals are converted into digital signals they are divided into many points and digitized This dividing method is...

Page 43: ...000 Hz Dynamic range 85 dB Signal to noise ratio 85 dB Cassette deck Frequency response Normal type I 50 Hz 14 000 Hz Wow and flutter 0 15 WRMS General Power requirement AC 120 V 60 Hz Power consumption 180 W at operation 17 W on standby Dimensions approx 270 mm x 317 mm x 447 mm W H D 1011 16 in x 121 2 in x 175 8 in Mass approx 9 9 kg 21 9 lbs Supplied accessories See page 6 Speaker section SP M...

Page 44: ...rvicer or visit our website at www JVC com Remember to retain your Bill of Sale for Warranty Service Do not service the television yourself Caution To prevent electrical shock do not open the cabinet There are no user serviceable parts inside Please refer to qualified service personnel for repairs Accessories To purchase accessories for your JVC product please call toll free 1 800 882 2345 or on t...

Page 45: ...that occurs in shipment due to act of God and cosmetic damage 5 Signal reception problems and failures due to line power surge 6 Video Pick up Tubes CCD Image Sensor Cartridge Stylus Needle are covered for 90 days from the date of purchase 7 Accessories 8 Batteries except that Rechargeable Batteries are covered for 90 days from the date of purchase There are no express warranties except as listed ...

Page 46: ...EN J VC 0801KSMMDWSAM VICTOR COMPANY OF JAPAN LIMITED ...

Page 47: ...s information for future reference Model No Serial No LVT0701 002A C INSTRUCTIONS MANUEL D INSTRUCTIONS SP MXDVA5 SP MXDVA5 CA MXDVA5 CLOCK TIMER DISPLAY PHONES REPEAT SELECT REC START STOP CD REC START DUBBING TUNING TAPE B DISC CHANGE SOUND MODE SUBWOOFER LEVEL TAPE A STANDBY ON STANDBY COMPACT DIGITAL VIDEO CD R RW PLAYBACK Consists of CA MXDVA5 and SP MXDVA5 Composé du CA MXDVA5 et SP MXDVA5 ...

Page 48: ...NO USER SERVICEABLE PARTS INSIDE REFER SERVICING TO QUALIFIED SERVICE PERSONNEL RISK OF ELECTRIC SHOCK DO NOT OPEN The lightning flash with arrowhead symbol within an equilateral triangle is intended to alert the user to the presence of uninsulated dangerous voltage within the product s enclosure that may be of sufficient magnitude to constitute a risk of electric shock to persons The exclamation ...

Page 49: ... THIS DIGITAL APPARATUS DOES NOT EXCEED THE CLASS B LIMITS FOR RADIO NOISE EMISSIONS FROM DIGITAL APPARATUS AS SET OUT INTHE INTERFERENCE CAUSING EQUIPMENT STANDARD ENTITLED DIGITAL APPARATUS ICES 003 OF THE DEPARTMENT OF COMMUNICATIONS CET APPAREIL NUMERIQUE RESPECTE LES LIMITES DE BRUITS RADIOELECTRIQUES APPLICABLES AUX APPAREILS NUMIRIQUES DE CLASSE B PRESCRITES DANS LA NORME SUR LE MATERIEL BR...

Page 50: ...the unit Leave sufficient distance between the unit and the TV Keep the speakers away from the TV to avoid interference with TV DO NOT install the unit in a location near heat sources or in a place subject to direct sunlight excessive dust or vibration We would like to thank you for purchasing one of our JVC products Before operating this unit read this manual carefully and thoroughly to obtain th...

Page 51: ...cular Point 20 Various Speed Forward Search 20 Various Speed Reverse Search 20 Repeating Playback 20 Repeat Play 20 A B Repeat 20 Programming the Playing Order of the Chapters Program Play 21 DVD Special Effect Playback 22 Still Picture Frame by Frame Playback 22 Slow Motion Playback 22 Zoom 22 VCD CD Playback 23 Showing the On Screen Bar 23 Disc Menu Driven Playback Only for VCD 23 Moving to a Pa...

Page 52: ...d controls on your unit Front Panel CLOCK TIMER DISPLAY PHONES REPEAT REC START STOP CD REC START DUBBING TUNING TAPE B DISC CHANGE SOUND MODE SUBWOOFER LEVEL TAPE A STANDBY ON STANDBY SELECT CD R RW PLAYBACK 1 6 7 8 q w r 5 f d a k u y i s j h g o 2 3 4 e t p COMPACT DIGITAL VIDEO 9 ...

Page 53: ...Pressing one of these buttons also turns on the unit i DISC CHANGE button 15 16 o Remote sensor DVD VIDEO lamp 10 30 a SOUND MODE control 12 Continued s PRESET buttons 13 4 reverse skip forward skip buttons 10 16 34 36 PREV previous NEXT buttons 23 d SUBWOOFER LEVEL control 11 f VOLUME control 11 g TUNING buttons 13 1 fast left fast right buttons 31 h TAPE A button 31 TAPE B button 30 31 j Recordi...

Page 54: ... TAPE 2 3 button 10 31 Pressing this button also turns on the unit s FM AM button 10 13 Pressing this button also turns on the unit d DVD 6 button 10 15 16 21 23 26 27 Pressing this button also turns on the unit f 7 stop button 15 21 23 32 g VOLUME button 11 h ENTER button 19 21 22 24 26 30 j FM MODE SLOW button 13 22 27 k FADE MUTING button 11 l SUBWOOFER LEVEL buttons 11 3D SOUND button 12 When ...

Page 55: ...erent types of batteries together DO NOT expose batteries to heat or flame DO NOT leave the batteries in the battery compartment when you are not going to use the remote control for an extended period of time Otherwise it will be damaged from battery leakage UM 4 AAA IEC R03 Continued 2 Connecting Antennas FM antenna 1 Attach the FM antenna to the FM 75 Ω coaxial terminal 2 Extend the FM antenna 3...

Page 56: ...away from metallic parts of the unit connecting cords and the AC power cord AM antenna Vinyl covered wire not supplied AM loop antenna supplied Connecting Speakers Speaker cord red black 2 From left main speaker terminals Speaker cord red black Speaker cord blue black 1 Press and hold the clamp of the speaker terminal on the rear of the unit 2 Insert the end of the speaker cord into the terminal M...

Page 57: ...ot supplied S VIDEO OUT VIDEO OUT To composite video input To S video input Using an S video cord gives you better quality pictures To connect other audio components 7 Analog components Be sure that the plugs of the audio cords are color coded White plugs and jacks are for left audio signals and red ones for right audio signals For playing the other equipment through this unit connect between the ...

Page 58: ...h an optical digital input Protective plug About sounds reproduced through the rear terminals Through the LINE OUT L R jacks and MAIN SPEAKERS SUBWOOFER terminals Analog stereo signals are output When playing a source encoded with Dolby Digital multichannel signals are mixed to the left and right front channel signals then output You cannot reproduce the sound encoded DTS Digital Surround Through ...

Page 59: ... to correct the hour after pressing SET press CANCEL DEMO The hour digits start flashing again 3 Press or 4 to adjust the minute then press SET To check the clock time Press DISPLAY while playing a source Each time you press the button the source indication and the clock time alternate on the display To adjust the clock again If you have adjusted the clock before you need to press CLOCK TIMER repe...

Page 60: ...und can damage your hearing speakers and or headphones when you turn on the unit or start playing any source next time REMEMBER you cannot adjust the volume level while the unit is on standby SUBWOOFER LEVEL Reinforcing the Bass Sound This function only affects the playback sound but does not affect your recording Turn the SUBWOOFER LEVEL control clockwise to increase the subwoofer sound or counte...

Page 61: ... display Surround elements are added to the SEA elements to create a being there feeling in your room When one of these modes is selected the SOUND MODE indicator lights up as While one of the SEA modes SEA elements without surround elements is selected the SOUND MODE indicator lights up as When using the remote control press SOUND MODE repeatedly Each time you press the button the sound modes cha...

Page 62: ... can preset 30 FM and 15 AM stations In some cases test frequencies have been already memorized for the tuner since the factory examined the tuner preset function before shipment This is not a malfunction You can preset the stations you want into memory by following the presetting method There is a time limit in doing the following steps If the setting is canceled before you finish start from step...

Page 63: ...has its own track number On some discs each track may also be divided by Indexes When playing back a VCD with Playback Control PBC function you can select what to view using the menu shown on the TV screen While operating a Video CD using the menu some of the functions such as Repeat and Variable Speed Search may not work IMPORTANT Before performing any operations make sure of the following Check ...

Page 64: ...cs You can play a disc s If a menu appears while playing a DVD or VCD with PBC function see page 19 for DVD or page 23 for VCD 1 Load a disc s 2 Press one of the disc number buttons DVD1 DVD2 and DVD3 for the disc you want to play WAIT appears on the display for a while no operations will be accepted during this period then disc play starts from the first chapter or track of the selected disc 7 Wh...

Page 65: ...ps being counted and starts flashing If your TV is turned on 8 PAUSE also appears on the TV screen A still picture appears while playing a DVD or VCD You can advance the still picture frame by frame by pressing the STILL on the remote control repeatedly See page 22 or 27 To resume play press DVD 6 again To go to another chapter or track Press 4 or repeatedly before or during playback 4 Goes back t...

Page 66: ...n Bar You can show the following information on the TV screen while a disc is loaded On the remote control ONLY To show the disc information press ON SCREEN Each time you press the button the following on screen bar appears in sequence Some DVDs contain several audio languages subtitles and multi angle views When you find the following marks on the DVD or its package you can select these elements ...

Page 67: ... shown on the TV screen See page 28 On the remote control ONLY To select the subtitle language press SUBTITLE repeatedly The on screen bar appears on the TV screen Each time you press the button the subtitle language changes Selecting the Audio Languages While playing a disc containing audio languages sound tracks you can select the audio language sound track to listen to You can set your favorite...

Page 68: ...n Directly You can move to another title chapter or particular scene in the chapter directly On the remote control ONLY 1 Press GO TO during play or pause Each time you press the button the following indication appears on the TV screen TITLE Select this to move to another title CHAPTER Select this to move to another chapter TIME Select this to move to a particular scene 2 Press the number buttons ...

Page 69: ...int You can search for a particular portion while playing a disc Variable Speed Forward Reverse Search No sound comes out during Variable Speed Forward Reverse Search 7 7 7 7 7 Variable Speed Forward Search To fast forward the chapter press during play Each time you press the button the search speed changes as follows 7 7 7 7 7 Variable Speed Reverse Search To reverse the chapter press 1 during pl...

Page 70: ... you press DVD 6 while this screen is shown the unit starts program play To exit from program mode press PLAY MODE The PROGRAM MENU screen goes off and the opening screen appears The program you made is still kept in memory If you press DVD 6 while this screen is shown the unit starts normal playback To erase the stored program eject the carrousel by pressing 0 If you perform the following operati...

Page 71: ...fect Playback 7 7 7 7 7 Still Picture Frame by Frame Playback You can advance the still picture frame by frame while playing a DVD On the remote control ONLY 1 Press STILL or DVD 6 once during play A still picture appears on the TV screen 2 Press STILL repeatedly to advance the picture frame by frame Each time you press the button the picture advances frame by frame To resume normal play Press DVD...

Page 72: ...ears alternately VCD CD Playback For basic disc operations such as inserting discs starting playback and moving to another tracks see Basic Disc Operations on pages 15 and 16 Appears only when a VCD is loaded When a menu appears select a desired item on the disc menu When a list of items is displayed on the screen press the number buttons to select an item To use the number buttons see To go to an...

Page 73: ...ER To input time 09 45 press 9 4 5 then wait for about 5 seconds or press ENTER To cancel a mis entry press CLEAR Each time you press the button the last entry will be erased Continued Canceled TRACK TIME TIME FAST PLAY PLAY Normal play SCAN FORWARD 1 4x 2x SCAN FORWARD 2 8x PLAY Normal play FAST BACK PLAY 2x SCAN BACKWARD 1 SCAN BACKWARD 2 4x 8x Searching for a Particular Point You can search for...

Page 74: ...t a portion you want to repeat A B repeat may not be used on some VCDs with the PBC function Example REP A REP A B REP A REP AB REP OFF Repeating Playback 7 7 7 7 7 Repeat Play Repeat play cannot be used on a VCD with the PBC function To repeat playback press REPEAT repeatedly during play Each time you press the button repeat mode changes as follows REP ONE Current track will be repeated The REPEA...

Page 75: ...NEXT PLAY SETUP FINISH PROGRAM MENU RETURN DVD Video CD CD PLAYER Track numbers you can select in the next step Programming the Playing Order of the Tracks Program Play You can arrange the track playback order before you start playing You can program up to 20 steps Before making a program make sure that the TV is turned on and the correct input is selected on the TV On the remote control ONLY 1 Lo...

Page 76: ... screen If you press the button during play the program play will stop To modify the program You can modify the program while the PROGRAM MENU screen is shown on the TV screen To erase a step press Cursor or 5 to select highlight an unwanted program step then press CLEAR To modify a step press Cursor or 5 to select highlight a program step you want to modify then perform step 4 on page 26 Before e...

Page 77: ...t the Setup menu language shown on the TV screen AUDIO Select the audio language you listen to while watching a DVD SUBTITLE Select the subtitle language you read while watching a DVD MENU LANGUAGE Select the disc menu language recorded a DVD which you use while operating a DVD s own menu Languages you can select on this menu You can select the following languages separately for each listed item o...

Page 78: ...those not suitable for your family members See page 30 for detailed operations DIGITAL OUTPUT You can select the format of digital signals output through the DIGITAL OUT OPTICAL terminal See page 39 for detailed information BITSTREAM Select when connecting an amplifier or a decoder compatible with Dolby Digital and with DTS Digital Surround LPCM Select when connecting an amplifier or a decoder inc...

Page 79: ...EW PASSWORD then ENTER NEW PASSWORD is the last item listed on the pop up window If it is not shown pressing Cursor repeatedly will show it in the pop up window 3 Press the number buttons to enter a new password 4 digits then ENTER Your new password is now stored To erase the Setup menu press SETUP 7 7 7 7 7 To reset the password You can reset the password to the initial setting 7890 REMEMBER all ...

Page 80: ...omatically stops if the Reverse Mode is canceled See To play both sides repeatedly Reverse Mode To stop during play press 7 To operate the other deck press TAPE A or TAPE B or TAPE A B on the remote control then TAPE 2 3 To fast wind to the left or to the right press 1 or The tape direction indicator 2 or 3 starts flashing quickly on the display To remove the cassette press 0 EJECT for deck A or E...

Page 81: ...hat it may be unlawful to re record pre recorded tapes records or discs without the consent of the owner of copyright in the sound or video recording broadcast or cable programme and in any literary dramatic musical or artistic embodied therein The recording level is automatically set correctly so it is not affected by the VOLUME control the SOUND MODE control and the SUBWOOFER LEVEL control Thus ...

Page 82: ...ing a song in the forward direction 3 the last song will be recorded again at the beginning of the reverse side 2 To cancel Reverse Mode press the button again so that the Reverse Mode indicator lights up as You cannot start CD Synchronized Recording from the reverse direction 2 Even you try to start recording from the reverse direction 2 the unit automatically changes the direction and start reco...

Page 83: ... The unit automatically turns on set the volume level to the preset level gradually and starts playing the specified source when the on time comes the indicator flashes while the timer is operating Then when the off time comes the unit automatically turns off stands by Daily Timer works every day until you cancel it There is a time limit in doing the following steps If the setting is canceled befo...

Page 84: ...wn on the display in sequence for your confirmation Using Recording Timer With Recording Timer you can make a tape of a radio broadcast automatically You can set the timer whether the unit is on or off How Recording Timer actually works The unit automatically turns on tunes into the specified station sets the volume level to VOL MIN and starts recording when the on time comes the indicator flashes...

Page 85: ...e pay special attention to the shut off time 4 Set the on time you want the unit to turn on 1 Press 4 or to set the hour then press SET 2 Press 4 or to set the minute then press SET OFF TIME appears for 2 seconds then the unit enters off time setting mode 5 Set the off time you want the unit to turn off on standby 1 Press 4 or to set the hour then press SET 2 Press 4 or to set the minute then pres...

Page 86: ...rect sunlight or heat In moist areas Near a magnet Handling discs Remove the disc from its case by holding it at the edge while pressing the center hole lightly Do not touch the shiny surface of the disc or bend the disc Put the disc back in its case after use to prevent warping Be careful not to scratch the surface of the disc when placing it back in its case Avoid exposure to direct sunlight tem...

Page 87: ...e playing a disc with DTS Digital Surround The built in microprocessor may malfunction due to external electrical interference Power supply from the AC power cord has been cut off while the tape was running Small tabs on the back of the cassette are removed Display demonstration has not been canceled yet The built in microprocessor may malfunction due to external electrical interference The path b...

Page 88: ...with DTS Digital Surround Linear PCM This is a digital recording format that is used for audio CDs Playback Control PBC When a VCD has the PBC Playback Control function you can enjoy menu driven operations and high resolution still pictures Sampling Frequency Quantization Bits When analog signals are converted into digital signals they are divided into many points and digitized This dividing metho...

Page 89: ...000 Hz Dynamic range 85 dB Signal to noise ratio 85 dB Cassette deck Frequency response Normal type I 50 Hz 14 000 Hz Wow and flutter 0 15 WRMS General Power requirement AC 120 V 60 Hz Power consumption 180 W 210 VA at operation 17 W on standby Dimensions approx 270 mm x 317 mm x 447 mm W H D 1011 16 in x 121 2 in x 175 8 in Mass approx 9 9 kg 21 9 lbs Supplied accessories See page 6 Speaker secti...

Page 90: ...EN FR J VC 0901KSMMDWSAM VICTOR COMPANY OF JAPAN LIMITED ...

Reviews: