background image

No. 52084

AV-29BF11ENS

AV-29BF11EPS

AV-29BF11EES

11

SERVICE ADJUSTMENTS

ADJUSTMENT PREPARATION

1.  You can make the necessary adjustments for this unit with

either the Remote Control Unit or with the adjustment tools
and parts as given below.

2. Adjustment with the Remote Control Unit is made on the

basis of the initial setting values, however, the new setting
values which set the screen to its optimum condition may
differ from the initial settings.

3.  Make sure that AC power is turned on correctly.
4.  Turn on the power for set and test equipment before use, and

start the adjustment procedures after waiting at least 30 minutes.

5.  Unless otherwise specified, prepare the most suitable reception

or input signal for adjustment.

6.  Never touch any adjustment parts which are not specified in the

list for this adjustment - variable resistors, transformers,
condensers, etc.

7.  Presetting before adjustment.


Unless otherwise specified in the adjustment instructions, preset
the following functions with the remote control unit.


BRIGHTNESS
CONTRAST
COLOUR
SHARPNESS

CENTER

ADJUSTMENT EQUIPMENT

1.  DC voltmeter (or digital voltmeter)
2.  Signal generator (Pattern generator)

PAL/SECAM/NTSC

3. Remote control unit

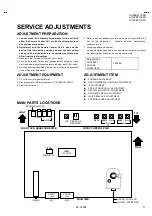
ADJUSTMENT ITEM

!

 SCREEN 

ADJUSTMENT

!


OSD HORIZONTAL POSITION ADJUSTMENT

!

 IF 

ADJUSTMENT

!


AGC AUTOMATICALLY ADJUSTMENT

!


DEFLECTION CIRCUIT ADJUSTMENT

!


GEOMETRY MENU ADJUSTMENT

!

 WHITE 

BALANCE 

ADJUSTMENT

!


TXT BRIGHTNESS ADJUSTMENT


IC501

MICOM

IC500

MEMORY IC

TUNER

AV-1

AV-2

FBT

UPPER : FOCUS VR
LOWER : SCREEN VR

VOL

(+)

(+)

(+)

(+) (-)

(-)

(-)

(-)

PROG

/Ch.

(+)

(+)

(+)

(+) (-)

(-)

(-)

(-)

MENU

LED REMOCON

RECEIVER

FRONT

TOP

FRONT

AUDIO.

VIDEO R

L

HEADPHONE JACK

SCART

jack

SCART

jack

MAIN PARTS LOCATIONS

FRONT AV & HEADPHONE PWB

FRONT CONTROL PWB

MAIN PWB

Summary of Contents for AV-29BF11EES

Page 1: ...N LTD Sep 2002 AV 29BF11ENS AV 29BF11EPS AV 29BF11EES CONTENTS SPECIFICATIONS 2 SAFETY PRECAUTIONS 4 FEATURES 5 MAIN DIFFERENCE LIST 5 SPECIFIC SERVICE INSTRUCTIONS 6 SERVICE ADJUSTMENTS 11 PARTS LIST 23 OPERATING INSTRUCTIONS STANDARD CIRCUIT DIAGRAM 2 1 SERVICE MANUAL COLOUR TELEVISION ...

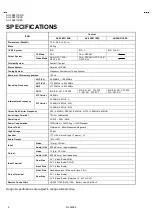
Page 2: ...L 32 9MHz 6 0MHz D K Intermediate Frequency SIF Carrier 33 4MHz 5 5MHz B G Colour Sub Carrier Frequency PAL 4 43MHz SECAM 4 43MHz NTSC 3 58MHz 4 43MHz Aerial Input Terminal 75 Ohm Unbalanced Power Input AC 220 240V 50Hz Power Consumption 135W Max 120W Avg 4W Standby Picture Tube Visible size 68cm Measured diagonally High Voltage 29 6kV Speaker 77 128 mm oval type Tweeter 2 Audio Output 10W 10W Vid...

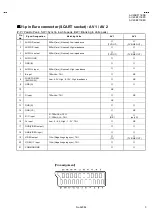
Page 3: ...tput 500mV rms Nominal Low impedance TV OUT TV LINE OUT 4 AUDIO GND 5 GND B 6 AUDIO L input 500mV rms Nominal High impedance 7 B input 700mVB W 75Ω NC 8 FUNCTON SW SLOW SW Low 0 3V High 8 12V High impedance NC 9 GND G 10 NC 11 G input 700mVB W 75Ω NC 12 NC 13 GND R 14 GND YS NC 15 R C input R 700mVB W 75Ω C 300mV P P 75Ω R C only C 16 Ys input Low 0 0 4 High 1 3V 75Ω NC 17 GND VIDEO output 18 GND ...

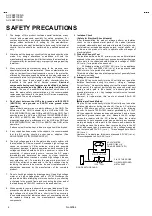
Page 4: ...eplacements or alternatives approved by the manufacturer of the complete product 7 Do not check high voltage by drawing an arc Use a high voltage meter or a high voltage probe with a VTVM Discharge the picture tube before attempting meter connection by connecting a clip lead to the ground frame and connecting the other end of the lead through a 10kΩ 2W resistor to the anode button 8 When service i...

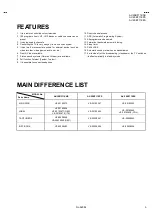
Page 5: ... Toptext 9 It is possible to connect headphone 10 Direct channel access 11 APS Automatic Programming System 12 All programs can be named 13 Forward or backward automatic tuning 14 Sleep timer 15 Child LOCK 16 Automatic sound mute when no transmission 17 5 minutes after the broadcasting closedown the TV switches itself automatically to stand by mode MAIN DIFFERENCE LIST MODEL No Parts Name AV 29BF1...

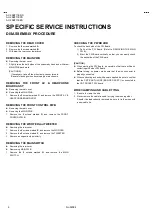
Page 6: ...g the rear cover 1 Remove the 4 screws marked E and remove the WOOFER 2 Remove the 2 screws marked F and remove the TWEETER 3 Remove an opposite side similarly REMOVING THE MAIN SWITCH Removing the rear cover Removeing MAIN PWB 1 Remove the 2 screws marked G and remove the MAIN SWITCH CHECKING THE PW BOARD To check the back side of the PW Board 1 Pull out the PW Board Refer to REMOVING THE MAIN PW...

Page 7: ...o 52084 AV 29BF11ENS AV 29BF11EPS AV 29BF11EES 7 REAR COVER SPEAKER WOOFER MAIN PWB FRONT CABINET FRONT AV HEADPHONE PWB FRONT CONTROL PWB B 4 SPEAKER TWEETER A 8 E 4 E 4 F 2 F 2 C 2 D 3 MAIN SWITCH G 2 ...

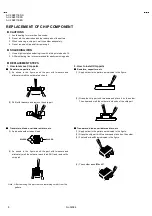
Page 8: ...ft with tweezers and remove the chip part Transistors diodes variable resistors etc 1 Apply extra solder to each lead 2 As shown in the figure push the part with tweezers and alternately melt the solder at each lead Shift and remove the chip part Note After removing the part remove remaining solder from the pattern 2 How to install Chip parts Resistors capacitors etc 1 Apply solder to the pattern ...

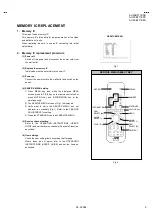
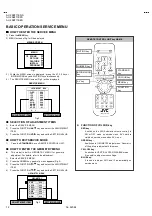
Page 9: ...e the displayed MENU screen press 4 7 2 5 key on the remote control unit or press MUTING key and INFORMATION key at the simultaneously 2 The SERVICE MENU screen of Fig 1 is displayed 3 Verify what to set in the SERVICE MENU and set whatever is necessary Fig 1 Refer to the SERVICE ADJUSTMENT for setting 4 Press the STANDARD key to exit SERVICE MENU 5 Receive channel setting Refer to the OPERATING I...

Page 10: ...ed when APS bit in Service menu is set The procedure for setting APS bit is described bellow FINE TUNING PICTURE MODE AUTO STORE Refer to the INSTRUCTION BOOK SETTING APS BIT IN SERVICE MENU 1 Enter service menu in TV mode by pressing INFORMATION and MUTING keys simultaneously Service Menu will appear 2 Select TX1 TELETEXT OPTION by pressing Up Down keys on remote control unit 3 Press the 7 key on...

Page 11: ...touch any adjustment parts which are not specified in the list for this adjustment variable resistors transformers condensers etc 7 Presetting before adjustment Unless otherwise specified in the adjustment instructions preset the following functions with the remote control unit BRIGHTNESS CONTRAST COLOUR SHARPNESS CENTER ADJUSTMENT EQUIPMENT 1 DC voltmeter or digital voltmeter 2 Signal generator P...

Page 12: ...ess the FUNCTION key and select the ADJUSTMENT ITEM 4 Press the FUNCTION key and set the SETTING VALUE MENU SCREEN Fig 1 MENU SOUND PICTURE FEATURE INSTALL PROGRAM JVCAK30 37 B04 OSD IF1 IF2 IF3 IF4 AGC VLIN RGBH VSOF VPOF 0 1 059 004 065 004 065 033 044 005 05 01 SERVICE MENU Fig 2 ADJUSTMENT ITEM SETTING VALUE Fig 3 VSIZ 038 VPOS 022 VSCO 005 VCCO 007 HSIZ 009 HPOS 030 HPIN 014 GEOMETRY GEOMETRY...

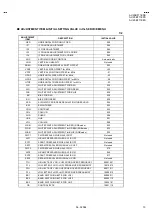
Page 13: ...029 APR AUTOMATIC RGB PEAK REGULATION THRESHOLD 004 BRI BRIGHTNESS 032 CON CONTRAST 033 COL COLOUR 030 SHR SHARP 006 HUE HUE 031 VOL VOLUME 009 WR R WHITE POINT ADJUSTMENT for RED RGBmode 022 WG R WHITE POINT ADJUSTMENT for GREEN RGBmode 032 WB R WHITE POINT ADJUSTMENT for BLUE RGBmode 022 FMP1 FM PRESCALER WHEN AVL IS OFF Not used NIP1 NICAM PRESCALER WHEN AVL IS OFF Not used SCP1 SCART PRESCALER...

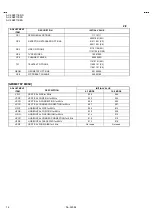
Page 14: ...RY OPTIONS 00100000 OP8 PIP PRESET CHANGE 00000100 GEOMETRY MENU INITIAL VALUE ADJUSTMENT ITEM DESCRIPTION 4 3 MODE 16 9 MODE VSIZ VERTICAL SIZE for 50Hz 038 009 VPOS VERTICAL POSITION for 50Hz 022 025 VSCO VERTICAL S CORRECTION for 50Hz 005 005 VCCO VERTICAL CORNER CORRECTION for 50Hz 007 007 HSIZ HORIZONTAL SIZE for 50Hz 009 013 HPOS HORIZONTAL POSITION for 50Hz 030 030 HPIN HORIZONTAL PINCUSHIO...

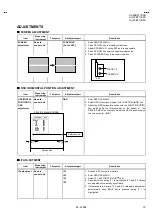
Page 15: ...UNCTION key 3 Adjust the OSD horizontal position with the FUNCTION key which shifts the reference bar on the bottom of the SERVICE MENU horizontally so that the OSD is positioned on the screen center X X IF ADJUSTMENT Item Measuring instrument Test point Adjustment part Description IF adjustment Remote control unit IF 1 IF 2 IF 3 IF 4 1 Receive a PAL colour bar pattern 2 Enter SERVICE MENU 3 Selec...

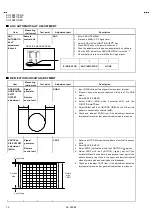
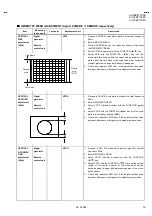
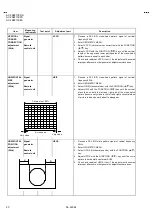
Page 16: ... MENU 4 Select RGBH RGB mode horizontal shift with the FUNCTION key 5 Adjust RGBH with the FUNCTION key until the circle pattern is horizontally centered A B 6 Check and readjust RGBH item if the adjustment becomes improper after some other geometric adjustments are done VERTICAL SIZE OFFSET adjustment 60Hz Signal generator Remote control unit VSOF 1 Receive a NTSC M cross hatch pattern of vertica...

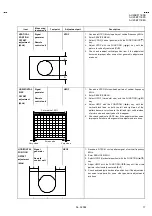
Page 17: ...RVICE MENU 3 Select HSOF Horizontal size with the FUNCTION key 4 Adjust HSOF with the FUNCTION key until the vertical black lines on both the left and right part of the pattern become very close to the left and right vertical sides of picture size and nearly about to disappear 5 Check and readjust a HSOF item if the adjustment becomes improper after some other geometric adjustments are done HORIZO...

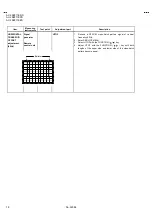
Page 18: ...OID OFFSET adjustment 60Hz Signal generator Remote control unit HTOF 1 Receive a NTSC M cross hatch pattern signal of vertical frequency 60Hz 2 Enter SERVICE MENU 3 Select HTOF with the FUNCTION key 4 Adjust HTOF with the FUNCTION key until both lengths of the upper side and lower side of the closs hatch pattern become equal Pallalel ...

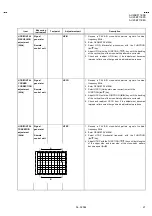
Page 19: ...TICAL POSITION adjustment 50Hz Signal generator Remote control unit VPOS 1 Receive a PAL B G circle pattern signal of vertical frequency 50Hz 2 Enter GEOMETRY MENU 3 Select VPOS Vertical position with the FUNCTION key 4 Adjust VPOS with the FUNCTION key until the circle pattern is vertically centered A B 5 Check and readjust VPOS item if the adjustment becomes improper after some other geometric a...

Page 20: ...te control unit HSIZ 1 Receive a PAL B G cross hatch pattern signal of vertical frequency 50Hz 2 Enter GEOMETRY MENU 3 Select HSIZ Horizontal size with the FUNCTION key 4 Adjust HSIZ with the FUNCTION key until the vertical black lines on both the left and right part of the cross hatch pattern become very close to the left and right horizontal sides of picture tube and nearly about to disappear HO...

Page 21: ...ustment 50Hz Signal generator Remote control unit HCCO 1 Receive a PAL B G cross hatch pattern signal of vertical frequency 50Hz 2 Enter GEOMETRY MENU 3 Select HCCO Horizontal corner correction with the FUNCTION key 4 Adjust HCCO with the FUNCTION key until the bending of the vertical line of the cross hatch pattern are corrected 5 Check and readjust HCCO item if the adjustment becomes improper af...

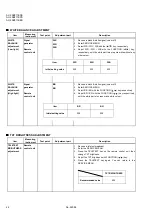
Page 22: ... 1 Receive a black white signal colour off 2 Enter SERVICE MENU 3 Select BR BG with the FUNCTION key respectively 4 Adjust BR BG with the FUNCTION key respectively until the white part of screen make white colour TXT BRIGHTNESS ADJUSTMENT Item Measuring instrument Test point Adjustment part Description TELETEXT BRIGHTNESS adjustment Remote control unit 1 Receive a teletext broadcast 2 Enter the SE...

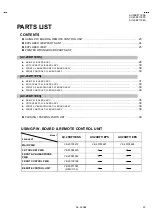
Page 23: ...W BOARD ASS Y 30 FRONT AV HEADPHONE P W BOARD ASS Y 30 FRONT CONTROL P W BOARD ASS Y 30 MAIN P W BOARD ASS Y 35 CRT SOCKET P W BOARD ASS Y 30 FRONT AV HEADPHONE P W BOARD ASS Y 30 FRONT CONTROL P W BOARD ASS Y 30 PACKING PACKING PARTS LIST 39 USING P W BOARD REMOTE CONTROL UNIT Model PWB ASS Y AV 29BF11ENS AV 29BF11EPS AV 29BF11EES MAIN PWB VE 20103272 VE 20103267 VE 20103265 CRT SOCKET PWB VE 200...

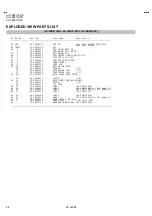
Page 24: ...82371 BUTTON FUNCTION 11 VE 40009351 SPONGE 2 12 VE 30001950 SPEAKER 8R 15W 2 13 VE 30001947 TWEETER 8R 15W 2 14 VE 20097423 BACK COVER REAR COVER 15 VE 35004572 SCREW 8 16 VE 20067720 BACK DOOR TERMINAL BOARD 17 VE 35000211 SCREW 4 18 VE 40009154 JVC LOGO 19 VE 20103656 LABEL AV 29BF11ENS 19 VE 20103677 LABEL AV 29BF11ENS for GER models 19 VE 20103679 LABEL AV 29BF11ENS for ITA models 19 VE 20103...

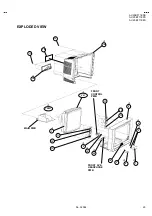
Page 25: ...No 52084 AV 29BF11ENS AV 29BF11EPS AV 29BF11EES 25 EXPLODED VIEW MAIN PWB V01 13 7 FRONT AV HEADPHONE PWB FRONT CONTROL PWB 8 5 3 4 6 11 12 14 11 12 13 15 16 17 1 TR601 19 20 18 9 10 ...

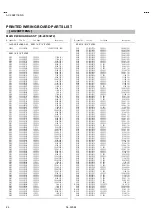
Page 26: ...16W 27K J R442 VE 30000466 CF RES 1 4W 1K J R446 VE 30012714 SMD RES 1 16W 820R J Symbol No Part No Part Name Description RESISTOR R447 VE 30012714 SMD RES 1 16W 820R J R448 VE 30012683 SMD RES 1 16W 330K J R450 VE 30012702 SMD RES 1 16W 560R J R458 VE 30012510 SMD RES 1 16W 100R J R459 VE 30012668 SMD RES 1 16W 220R J R460 VE 30012668 SMD RES 1 16W 220R J R461 VE 30012668 SMD RES 1 16W 220R J R44...

Page 27: ...E 30000345 EL CAP 10UF 50V M Symbol No Part No Part Name Description CAPACITOR C162 VE 30012573 SMD CAP 47PF 50V J C164 VE 30012692 SMD RES 1 16W 4 7K J C165 VE 30000413 EL CAP 4 7UF 50V M C201 VE 30000400 EL CAP 47UF 50V M C205 VE 30000345 EL CAP 10UF 50V M C206 VE 30012610 SMD CAP 10NF 50V J C207 VE 30012610 SMD CAP 10NF 50V J C230 VE 30016654 SMD CAP 100NF 16V K R C246 VE 30000295 CER CAP 100NF...

Page 28: ...0V M FOR 28 C810 VE 30000387 EL CAP 33UF 50V M C811 VE 30000161 MKP CAP 47NF 630V J C812 VE 30007708 CER CAP 1NF 1KV K PULSE C816 VE 30000440 CER CAP 2 2NF 4KV M C817 VE 30000198 CER CAP 120PF 500V J SL C818 VE 30012590 SMD CAP 47NF 50V K C819 VE 30012590 SMD CAP 47NF 50V K C822 VE 30007308 CER CAP 220PF 1KV K PULSE C826 VE 30000406 EL CAP 47UF 250V M HR C827 VE 30000411 EL CAP 4700UF 16V M C828 V...

Page 29: ...E 30001318 DIODE D894 VE 30001285 DIODE D897 VE 30001329 DIODE TRANSISTOR Q104 VE 30001457 TR Q106 VE 30001457 TR Q141 VE 30001457 TR Q142 VE 30001457 TR Q307 VE 30001457 TR Q316 VE 30001458 TR Q403 VE 30001457 TR Q404 VE 30001457 TR Q503 VE 30001457 TR Q504 VE 30001458 TR Q600 VE 30001435 TR Q601 VE 30001441 TR Q602 VE 30001429 TR Q603 VE 30001458 TR Q604 VE 30001457 TR Q605 VE 30001458 TR Q700 V...

Page 30: ...54 TR IC IC900 VE 30008721 IC OTHERS PL900 VE 30001855 CRT SOCKET SG901 VE 30000428 SPARK GAP 300V SG902 VE 30000428 SPARK GAP 300V SG903 VE 30000428 SPARK GAP 300V SG904 VE 30000428 SPARK GAP 300V VE 20000954 HE ASY CONTAINS HEATSINK IC900 FRONT AV HEADPHONE P W BOARD ASS Y VE 20083646 Common to all models Symbol No Part No Part Name Description RESISTOR R107 VE 30000594 CF RES 1 4W 22K J R108 VE...

Page 31: ... 4W 1K J R439 VE 30012657 SMD RES 1 16W 1K J R440 VE 30012714 SMD RES 1 16W 820R J Symbol No Part No Part Name Description RESISTOR R441 VE 30012674 SMD RES 1 16W 27K J R442 VE 30000466 CF RES 1 4W 1K J R446 VE 30012714 SMD RES 1 16W 820R J R447 VE 30012714 SMD RES 1 16W 820R J R448 VE 30012683 SMD RES 1 16W 330K J R450 VE 30012702 SMD RES 1 16W 560R J R458 VE 30012510 SMD RES 1 16W 100R J R459 VE...

Page 32: ... CAP 100PF 50V J Symbol No Part No Part Name Description CAPACITOR C157 VE 30012560 SMD CAP 100PF 50V J C159 VE 30000352 EL CAP 100UF 16V M C160 VE 30000345 EL CAP 10UF 50V M C161 VE 30000345 EL CAP 10UF 50V M C162 VE 30012573 SMD CAP 47PF 50V J C164 VE 30012692 SMD RES 1 16W 4 7K J C165 VE 30000413 EL CAP 4 7UF 50V M C201 VE 30000400 EL CAP 47UF 50V M C205 VE 30000345 EL CAP 10UF 50V M C206 VE 30...

Page 33: ...094 MKT CAP 220NF AC275V M C803 VE 30000433 CER CAP 1NF 1KV M B C804 VE 30000433 CER CAP 1NF 1KV M B C808 VE 30012590 SMD CAP 47NF 50V K C809 VE 30000421 EL CAP 220UF 400V M FOR 28 C810 VE 30000387 EL CAP 33UF 50V M C811 VE 30000161 MKP CAP 47NF 630V J C812 VE 30007708 CER CAP 1NF 1KV K PULSE C816 VE 30000440 CER CAP 2 2NF 4KV M C817 VE 30000198 CER CAP 120PF 500V J SL C818 VE 30012590 SMD CAP 47N...

Page 34: ...7 VE 30001329 DIODE TRANSISTOR Q104 VE 30001457 TR Q106 VE 30001457 TR Q141 VE 30001457 TR Q142 VE 30001457 TR Q307 VE 30001457 TR Q316 VE 30001458 TR Q402 VE 30001457 TR Q403 VE 30001457 TR Q404 VE 30001457 TR Q503 VE 30001457 TR Q504 VE 30001458 TR Q600 VE 30001435 TR Q601 VE 30001441 TR Q602 VE 30001429 TR Q603 VE 30001458 TR Q604 VE 30001457 TR Q605 VE 30001458 TR Q700 VE 30001458 TR Q801 VE 3...

Page 35: ...16W 27K J R442 VE 30000466 CF RES 1 4W 1K J R446 VE 30012714 SMD RES 1 16W 820R J Symbol No Part No Part Name Description RESISTOR R447 VE 30012714 SMD RES 1 16W 820R J R448 VE 30012683 SMD RES 1 16W 330K J R450 VE 30012702 SMD RES 1 16W 560R J R458 VE 30012510 SMD RES 1 16W 100R J R459 VE 30012668 SMD RES 1 16W 220R J R460 VE 30012668 SMD RES 1 16W 220R J R461 VE 30012668 SMD RES 1 16W 220R J R44...

Page 36: ... 30000345 EL CAP 10UF 50V M Symbol No Part No Part Name Description CAPACITOR C162 VE 30012573 SMD CAP 47PF 50V J C164 VE 30012692 SMD RES 1 16W 4 7K J C165 VE 30000413 EL CAP 4 7UF 50V M C201 VE 30000400 EL CAP 47UF 50V M C205 VE 30000345 EL CAP 10UF 50V M C206 VE 30012610 SMD CAP 10NF 50V J C207 VE 30012610 SMD CAP 10NF 50V J C230 VE 30016654 SMD CAP 100NF 16V K R C246 VE 30000295 CER CAP 100NF ...

Page 37: ...0000421 EL CAP 220UF 400V M FOR 28 C810 VE 30000387 EL CAP 33UF 50V M C811 VE 30000161 MKP CAP 47NF 630V J C812 VE 30007708 CER CAP 1NF 1KV K PULSE C816 VE 30000440 CER CAP 2 2NF 4KV M C817 VE 30000198 CER CAP 120PF 500V J SL C818 VE 30012590 SMD CAP 47NF 50V K C819 VE 30012590 SMD CAP 47NF 50V K C822 VE 30007308 CER CAP 220PF 1KV K PULSE C826 VE 30000406 EL CAP 47UF 250V M HR C827 VE 30000411 EL ...

Page 38: ...001457 TR Q141 VE 30001457 TR Q142 VE 30001457 TR Q307 VE 30001457 TR Q316 VE 30001458 TR Q403 VE 30001457 TR Q404 VE 30001457 TR Q503 VE 30001457 TR Q504 VE 30001458 TR Q600 VE 30001435 TR Q601 VE 30001441 TR Q602 VE 30001429 TR Q603 VE 30001458 TR Q604 VE 30001457 TR Q605 VE 30001458 TR Q700 VE 30001458 TR Q801 VE 30001386 TR Q802 VE 30001457 TR Q804 VE 30001454 TR IC IC301 VE 30016113 IC IC403 ...

Page 39: ...48 CUSHION ASSY 4 pcs in 1 set 3 VE 50026637 POLY BAG 1250 1000 4 VE 70000587 POLY BAG 5 VE 30017763 REMOTE CONTROL UNIT RM C1100 6 VE 50028493 INST BOOK AV 29BF11ENS 6 VE 50028296 INST BOOK AV 29BF11EPS 6 VE 50028326 INST BOOK AV 29BF11EES 7 BT 54013 2TK WARRANTY CARD 8 VE 20103656 LABEL AV 29BF11ENS 8 VE 20103677 LABEL AV 29BF11ENS for GER models 8 VE 20103679 LABEL AV 29BF11ENS for ITA models 8...

Page 40: ...4 Printed in Japan 0209 WPC DP205851 VICTOR COMPANY OF JAPAN LIMITED HOME AV NETWORK BUSINESS UNIT 12 3 chome Moriya cho Kanagawa ku Yokohama Kanagawa prefecture 221 8528 Japan ...

Page 41: ...02 VICTOR COMPANY OF JAPAN LTD AV 29BF11ENS AV 29BF11EPS AV 29BF11EES AV 29BF11ENS AV 29BF11EPS AV 29BF11EES NOTE ON USING CIRCUIT DIAGRAMS SEMICONDUCTOR SHAPES BLOCK DIAGRAM CIRCUIT DIAGRAMS PATTERN DIAGRAMS 2 1 2 2 2 3 2 5 2 21 CD ROM No SML200209 CONTENTS RM C1100TV ...

Page 42: ...and the ISOLATED NEUTRAL side GND Therefore care must be taken for the following points 1 Do not touch the LIVE side GND or the LIVE side GND and the ISOLATED NEUTRAL side GND simultaneously If the above caution is not respected an electric shock may be caused Therefore make sure that the power cord is surely removed from the receptacle when for example the chassis is pulled out 2 Do not short bet...

Page 43: ...N DIAGRAMS MAIN PWB CIRCUIT DIAGRAM FRONT AV HEADPHONE PWB CIRCUIT DIAGRAM FRONT CONTROL PWB CIRCUIT DIAGRAM CRT SOCKET PWB CIRCUIT DIAGRAM SEMICONDUCTOR SHAPES TRANSISTOR BOTTOM VIEW FRONT VIEW TOP VIEW CHIP TR IC BOTTOM VIEW FRONT VIEW TOP VIEW CHIP IC TOP VIEW 1 N N 1 OUT E IN IN OUT E 1 N N 1 N N N 1 N E C B E C B C B E B C E G D S E C B E C B 2 21 2 23 2 23 MAIN PWB PATTERN FRONT AV HEADPHONE...

Page 44: ...R STV2248C 150 B CONTROLLER ST92195 I2 C SERVICE CONNECTOR EEPROM KEYPAD IR SENSOR STEREO SOUND MSP34X0D G VIRTUAL DOLBY QSS HP AMP TDA1308 AUDIO AMP TDA7269A L R SMPS MC44608 14V 14V 8V 5V VIDEO SWITCHING CIRCUITS IF SCART1 SCART2 SVHS FAV BAV HOR DRIVE BU2508 VER AMP STV9306 RGB AMP TDA6108 FBT VER DEFL HOR DEFL L R MONO 5V STBY SUB AMP TDA7261 SUBW MSP 3411G ...

Page 45: ...VE 20103266 IC 24C08 T37386110B101213012 J VE 20103268 IC 24C08 T37487110A101213012 J IC501 VE 20093395 PR IC 37 7PG TXT ST92195C 64K VE 20104642 PR IC 30 7 7P STR 92195C 64K S VE 20093395 PR IC 37 7PG TXT ST92195C 64K Z401 VE 30001705 FILTER SAW OFWG9353M VE 30013163 FILTER SAW K9356 VE 30012545 FILTER SAW K9656M Z402 VE 30015591 FILTER SAW G3967 VE 30014261 FILTER SAW K3958M VE 30014261 FILTER S...

Page 46: ...V 7 8V 2 2V 2 8V 2 4V 2 4V 2 3V 3V 2 5V 2 4V 2 4V 2 2V 1 9V 0V 3 8V 1 1V 3V 0V 4 8V 4V 3 9V 4V 0 9V 0 8V 5 5V 5 7V 4 4V 2 9V 2 3V 3 8V 3 8V 7 9V 3 5V 0 1V 3 1V 2 5V 3 1V 7 9V 4V 0V 3 9V 2 3V 4 1V 0V 4 1V 1 6V 3 8V 2 4V 1 7V 2 4V 0V 0 1V 4 3V 2 5V 2 5V 2 5V 4 3V IC403 32 IC403 31 IC403 30 3 5 4 4 IC403 48 IC403 47 2 6 MAIN PWB 2 6 VE 20103272 AV 29BF11ENS VE 20103267 AV 29BF11EPS VE 20103265 AV 29B...

Page 47: ...BF11EPS AV 29BF11EES AV 29BF11ENS AV 29BF11EPS AV 29BF11EES 2 9 2 10 MAIN PWB CIRCUIT DIAGRAM 3 6 4 9V 4V 4 8V 7 9V 3 3V 2 2V 7 9V 0 1V 0V 7 9V 0 1V 0V MAIN PWB 3 6 VE 20103272 AV 29BF11ENS VE 20103267 AV 29BF11EPS VE 20103265 AV 29BF11EES ...

Page 48: ... 9V 3 3V 5 5V 26 3V 1 4V 0V 12 6V 26 9V 1 2V 12 6V 3 1V 12 6V 4 3V 0V 5 5V 5 5V 193V 0 1V 0V 0V 0V 11 8V 14 7V 0 1V 0V 0V 5 8V 3 6V 13 6V 7 4V 6 8V IC601 2 3 IC601 5 30 IC601 6 2 IC601 7 60 Q601 B 2 TR601 4 300 TR601 5 250 TR601 6 120 TR601 8 25 TR601 9 65 1300 MAIN PWB 4 6 VE 20103272 AV 29BF11ENS VE 20103267 AV 29BF11EPS VE 20103265 AV 29BF11EES ...

Page 49: ...AV 29BF11EPS AV 29BF11EES 2 13 2 14 MAIN PWB CIRCUIT DIAGRAM 5 6 1 1V 0 1V 4 9V 107 5V 12 5V 2 5V 281V 2 5V 0V 12 5V 4 9V 12 2V 11 1V 0V 0 6V 0V 0 1V 2 3V 12 2V 4 9V 9 4V 4 9V 12 2V 7 9V MAIN PWB 5 6 VE 20103272 AV 29BF11ENS VE 20103267 AV 29BF11EPS VE 20103265 AV 29BF11EES ...

Page 50: ...V 2 5V 3 7V 0V 4 9V 1 4V 1 4V 1 4V 0V 2 4V 2 4V 4V 3 2V 0 1V 4 9V 0V 0V 0V 1 6V 1 6V 1 7V 2 3V 1 5V 3 7V 3 7V 0V 3 7V 3 7V 0V 3 7V 3 7V 0V 0 1V 0 1V 0 1V 0V 4 9V 3 7V 3 7V 0V 3 7V 3 7V 6 1V 7 9V 6 8V 0V 3 6V 0 1V 0 1V 0 1V 0 1V 0 1V 0V 2V 2V 4 8V 0V 4 9V 4 8V 4 2V MAIN PWB 6 6 VE 20103272 AV 29BF11ENS VE 20103267 AV 29BF11EPS VE 20103265 AV 29BF11EES ...

Page 51: ...AV 29BF11EPS AV 29BF11EES AV 29BF11ENS AV 29BF11EPS AV 29BF11EES CRT SOCKET PWB CIRCUIT DIAGRAM 2 17 2 18 3 8V 0V 2 5V 2 5V 2 5V 0V 4 8V 201V 132V 145V 133V 0 9V 195V IC900 7 IC900 8 IC900 9 150 140 160 CRT SOCKET PWB VE 20094670 PL902 ...

Page 52: ...V 29BF11ENS AV 29BF11EPS AV 29BF11EES AV 29BF11ENS AV 29BF11EPS AV 29BF11EES FRONT CONTROL PWB CIRCUIT DIAGRAM FRONT AV HEADPHONE PWB CIRCUIT DIAGRAM 2 19 2 20 FRONT AV HEADPHONE PWB VE 20083646 FRONT CONTROL PWB VE 20100168 ...

Page 53: ...No 52084 No 52084 12 AV 29BF11ENS AV 29BF11EPS AV 29BF11EES AV 29BF11ENS AV 29BF11EPS AV 29BF11EES PATTERN DIAGRAMS MAIN PWB PATTERN FRONT 2 21 2 22 ...

Page 54: ...Printed in Japan 0209 WPC DP 8080 VICTOR COMPANY OF JAPAN LIMITED HOME AV NETWORK BUSINESS UNIT 12 3 chome Moriya cho Kanagawa ku Yokohama Kanagawa prefecture 221 8528 Japan ...

Reviews: