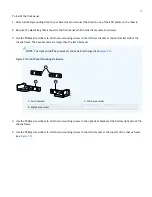


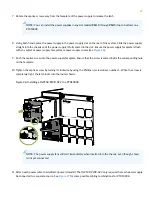


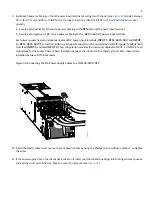


15. Verify that the INP1 and INP2 LEDs on the power supply faceplate are lit and are on steadily.
16. Press the power switch to the on (|) position.
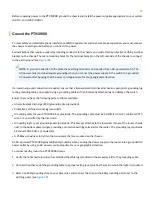
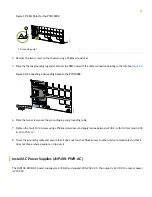
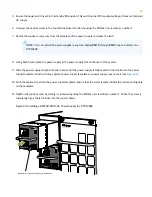
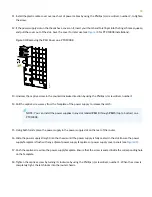
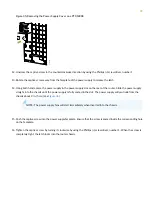
Install DC Power Supplies (JNP10K-PWR-DC)
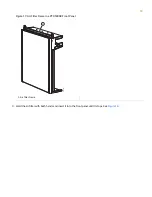
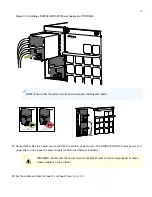
The JNP10K-PWR-DC power supply in a PTX10008 chassis is a hot-removable and hot-insertable field-replaceable unit
(FRU). You can install up to 6 JNP10K-PWR-DC power supplies in a PTX10008 router chassis. All power supplies install
in the rear of the chassis in the slots along the left side of the chassis.
Before you install a JNP10K-PWR-DC power supply in the chassis, ensure that you have followed all safety warnings and
cautions:
CAUTION:
Use the same type of power supply in all slots. Do not mix power supply models in the
same chassis.
WARNING:
Before performing DC power procedures, ensure that power is removed from the DC
circuit. To ensure that all power is off, locate the circuit breaker on the panel board that services the
DC circuit, switch the circuit breaker to the OFF position, and tape the switch handle of the circuit
breaker in the OFF position.
CAUTION:
Before you connect power to the router, a licensed electrician must attach a cable lug to
the grounding and power cables that you supply. A cable with an incorrectly attached lug can damage
the router (for example, by causing a short circuit).
CAUTION:
To meet safety and electromagnetic interference (EMI) requirements and to ensure proper
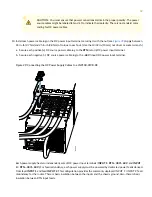
operation, you must connect PTX10000 routers to earth ground before you connect them to power.
For installations that require a separate grounding conductor to the chassis, use the protective earthing
terminal on the router chassis to connect to earth ground. For instructions on connecting a PTX10000
router to ground using a separate grounding conductor, see
“Ground the PTX10008” on page 20
.
NOTE:
The battery returns of the JNP10K-PWR-DC power supply must be connected as an isolated DC return
(DC-I).
•
Ensure that you have the following parts and tools available to install a JNP10K-PWR-DC power supply:
29