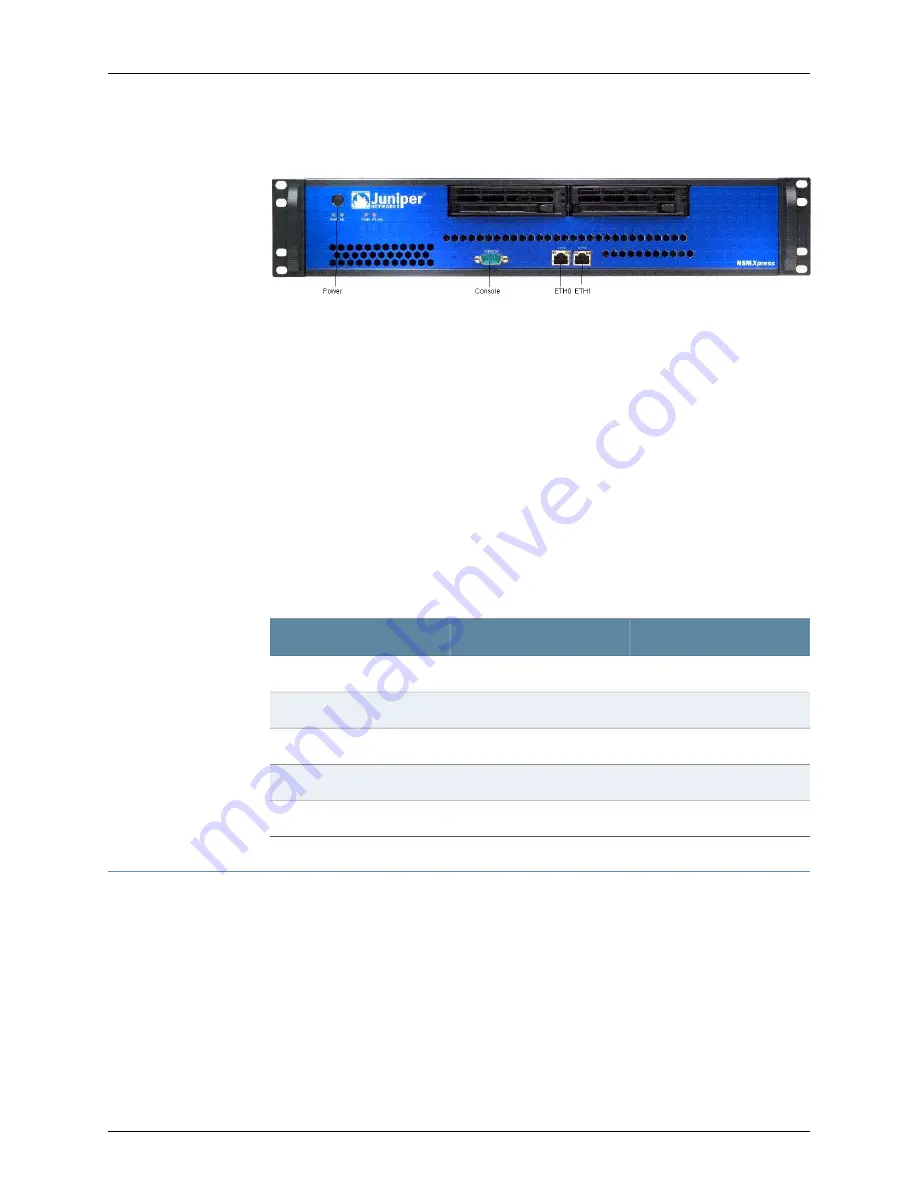
Figure 1: Front Panel of NSMXpress
7.
Plug the null modem serial cable into the console port. See Figure 1 on page 6.
This cable was shipped with your NSMXpress. If you do not have this cable, use any
other null modem serial cable.
8.
Push the power button in the upper left corner of the front panel.
The green LED below the power button turns on. The NSMXpress hard disk LED turns
on whenever the appliance reads data from or writes data to an NSMXpress hard disk.
The internal port uses two LEDs to indicate the LAN connection status, which is
described in Table 2 on page 6.
Hardware installation is now complete. The next step is to set up the software, as
described in “Initial Setup Configuration” on page 6.
Table 2 on page 6 provides LED information for the ETH0 and ETH1 ports.
Table 2: Ethernet Port LEDs
LED2
LED 1
LAN Status
Off
Off
10 Mbps connection
Off
Green
100 Mbps connection
Off
Orange
1000 Mbps connection
Blinking
Orange, Green, or Off
Data is being transferred
Off
Off
No connection
Initial Setup Configuration
When you first turn on an unconfigured NSMXpress appliance, you need to enter basic
network and machine information through the serial console to make your appliance
accessible to the network. After entering these settings, you can continue configuring
the appliance using the CLI or the Web interface. You are not prompted for the initial
setup information again.
Copyright © 2010, Juniper Networks, Inc.
6
NSMXpress Quick Start


