Chapter 2 Standard Features
13
4. An image on the battery compartment label shows the
correct location and orientation for the SD card (slot
on the right). Push the card into the slot to insert it. To
remove the SD card, pull it out.
5. Replace the battery pack, and attach the battery door.
6. Power up the handheld.
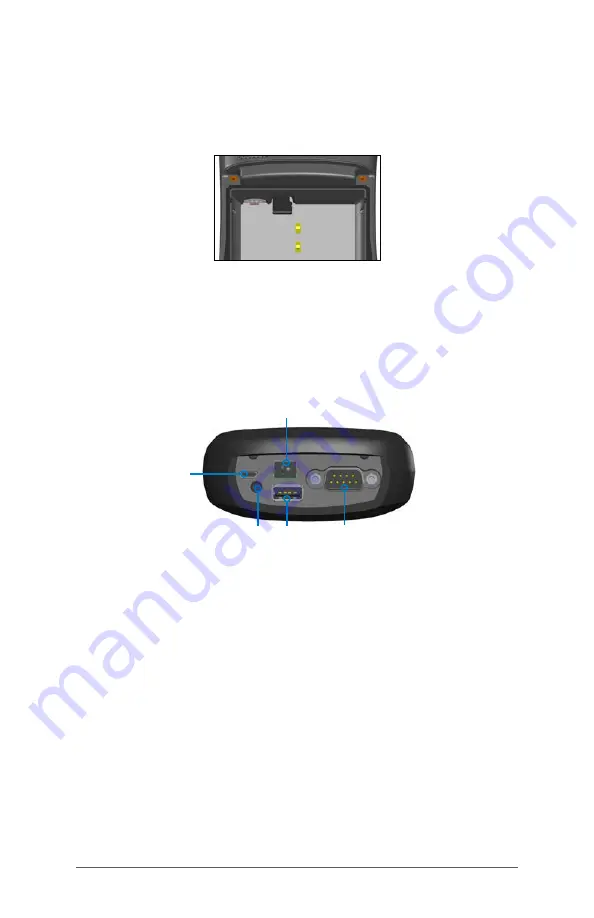
Connector I/O Module
The Archer 3 connector I/O module has the following jacks
and connectors:
1. USB client, micro B
2.
Audio jack: 3.5mm; supports speaker, microphone or
stereo output (pin detect)
3. USB host, full size A
4. COM1: RS-232C 9-pin D-sub connector, 5 V @500 mA
available on pin 9 (ring in) under program control
5. Power input jack: 12 to 24 VDC for power input and
battery charging
The connector module is user-replaceable. Contact our
sales department or your supplier for details.
Note: The connectors are sealed and do not require a
connector protector to prevent water ingress.
2
3
4
5
1
Summary of Contents for Archer 3
Page 1: ...o w n e r s m a n u a l archer3...
Page 4: ...iv Archer 3 Rugged Handheld Owner s Manual...
Page 5: ...1 Getting Started...
Page 11: ...2 Standard Features...
Page 22: ...18 Archer 3 Rugged Handheld Owner s Manual...
Page 23: ...A Storage Maintenance and Recycling...
Page 27: ...B Warranty and Repair Information...
Page 33: ...C Warnings and Regulatory Information...
Page 40: ...36 Archer 3 Rugged Handheld Owner s Manual...
Page 41: ...D Specifications...
Page 49: ...Index...


