1. Set the rear wheels
of the mower to
maximum cutting
height.
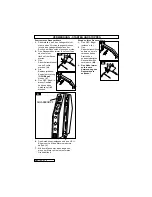
2. Attach the lower
section of the
handlebar as
illustrated. (C1 &
C2)
3. Insert the bolts
from the inside and
tighten the nuts
from the outside.
NOTE: don’t forget
washers.
4. Attach the upper
handlebar. Insert
the bolts from the
inside (C3). NOTE:
place washer
between wing nut
and handlebar.
5. Fit cable clips to
lower handle. (C4)
Grass Collector
Assembly
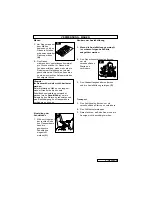
1. Insert steel frame
into grass collector
bag (D1). Fasten
plastic rails to the
steel frame.
2. Fit the right and left
hand pegs of the
grass collector
frame into their
respective ears on
the front section of
the collector.
Secure with “R”
clips. (D2)
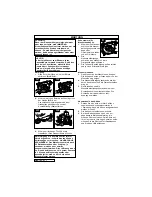
3. Raise the safety
flap. Place the
grass collector over
the ejection chute.
Lower the grass
collector until it is
supported by the
lower handle
sections and place
the safetly flap over
the front of the
collector. (D3)
4. To empty the grass
collector, remove
from lawnmower,
open flap and tip
out grass. (D4)
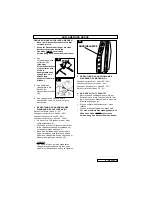
PRODUCT RATING LABEL
English - 3
Your product is uniquely identified by a
silver and black product rating label. To
ensure you have full product information
when obtaining spares or advice from one
of our approved service centres or if you
need to contact our customer service
department you should make a note in the
space provided of the information shown in
Fig B
Product Number . . . . . . . . . . . . . .
Model Number . . . . . . . . . . . . . . . .
Serial Number . . . . . . . . . . . . . . . .
Date of Purchase . . . . . . . . . . . . . .
Place of Purchase . . . . . . . . . . . . .
•PLEASE KEEP PROOF OF PURCHASE•
B
ASSEMBLY INSTRUCTIONS
C1
C2
C3
C4
D1
D3
D4
D2


