Installing the Outer Plate to an Ulterra
Power Cables
Power Cables
1
Deployed
Deployed
Stowed
Stowed
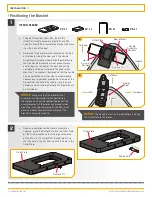
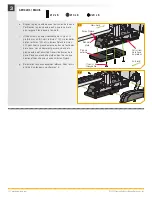
a. Place the mount on an elevated, level surface such
as a workbench or the tailgate of a pickup. The
motor should be in the stowed position.
WARNING
Make sure that the Power Cables from the battery are
disconnected, or that the breaker, if equipped, is “off.”
b. Using a #2 Phillips Screwdriver, remove the
Sideplates to access the Mounting Slots by removing
the two screws that hold each sideplate in place.
Left Sideplate
Left Sideplate
Right Side
Right Side
plate
plate
2
2b
2b
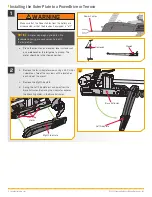
c. Under the Left Sideplate, the Extension Damper
obstructs access to the left front Mounting Hole.
d. Using a small Screw Driver, remove the two
5/16" e-clips holding the Extension Damper in
place. Once the e-clips are removed, slide the
Extension Damper off the Damper Pins to expose
the left rear Mounting Hole. Set the two e-clips
and Extension Damper in a safe place so they are
not misplaced before they are reassembled later in
the installation.
E-clips
E-clips
Extension
Extension
Damper
Damper
Damper Pins
Damper Pins
Extension
Extension
Damper
Damper
E-clip
E-clip
E-clip
E-clip
Mounting Hole
Mounting Hole
3
3c
3d
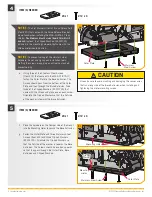
WARNING
Do not deploy the motor until it is fully mounted to the boat.
Illustrations are for reference only. Deploying your motor before
it is mounted to the boat may cause injury.
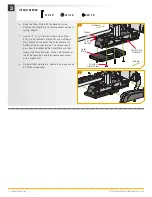
NOTICE:
Ulterra installation will use hardware that was
included with the Ulterra motor. The hardware needed
will be six Clipped Washers (#2201725) from the Ulterra
bag assembly (#2994917).
NOTICE:
A motor may weigh up to 65lbs. We
recommend having a second person help with
the installation.
7 | minnkotamotors.com
©2021 Johnson Outdoors Marine Electronics, Inc.


