


Johnny Vac V1 (14-10)
23
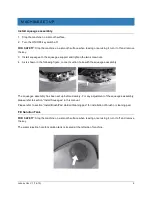
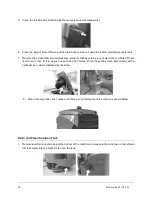
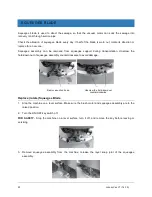
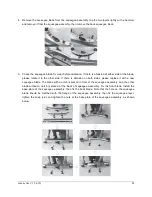
4. Remove the squeegee blade from the squeegee assembly, tap the two layers lightly with a hammer
and remove it from the squeegee assembly, then remove the back squeegee blade.
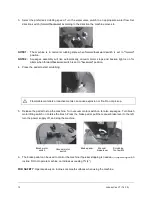
5. Check the squeegee blade for wear before utilization. If there is abrasion at either side of the blade,
please rotate it to the other side. If there is abrasion on both sides, please replace it with a new
squeegee blade. The blade with a notch is placed in front of the squeegee assembly, and the other
blade without a notch is placed at the back of squeegee assembly. Fix the front blade, install the
base-plate of the squeegee assembly, then fix the back blade. Note that the hole on the squeegee
blade should be matched with the flange of the squeegee assembly, then fix the squeegee layer,
tighten the snap joint, and tighten the nuts at the base-plate of the squeegee assembly, as shown
below: