58
6.3
REPLACING AND TENSING THE BELT
Follow these steps to check the tension of the belt or to replace it:
1) Turn the machine off at the main switch and disconnect the power cable.
2) Unscrew the 6 screws fastening the “motor casing” and remove it. The screws are on the right
and left sides, the upper and lower sections.
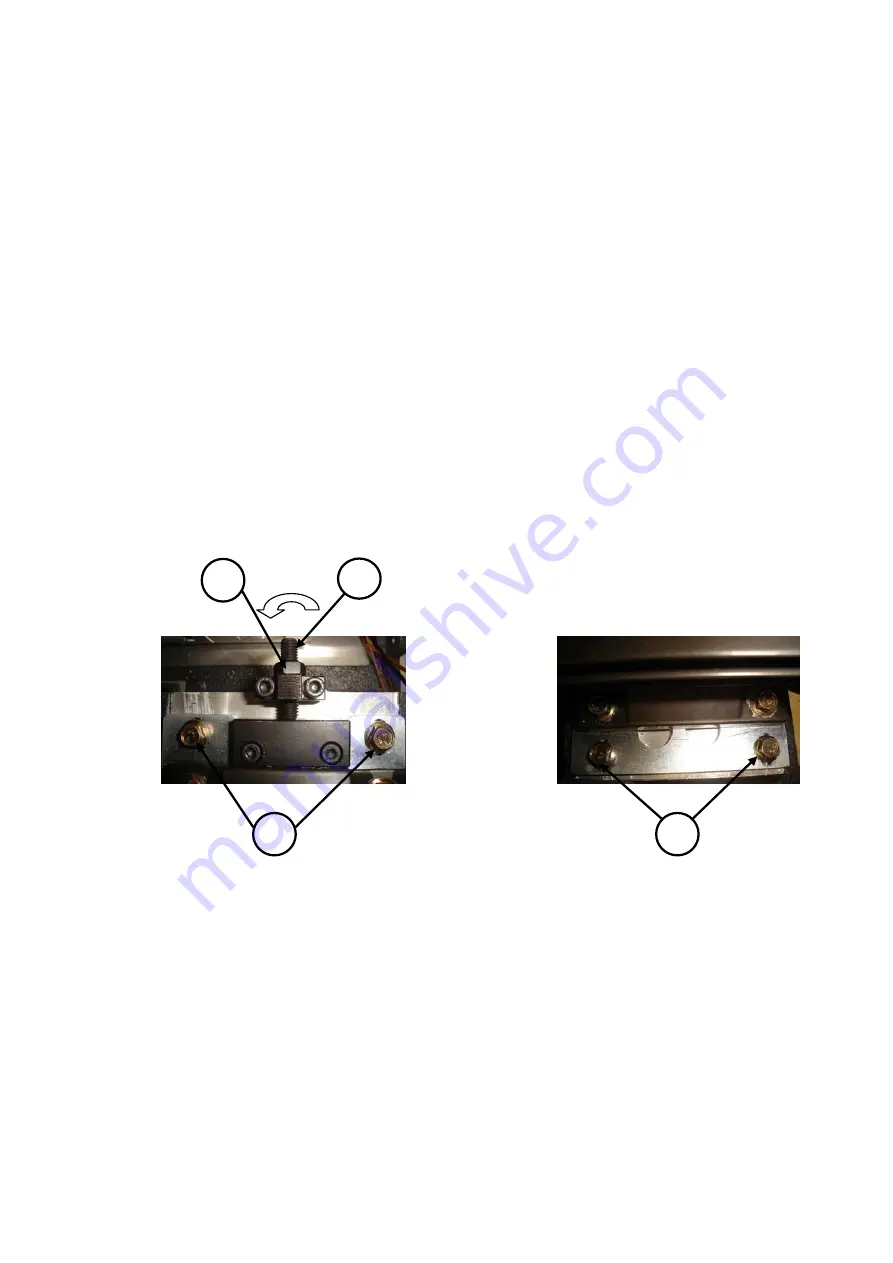
3) Loosen but do not release the 4 screws (T16) supporting the motor. (Fig.43, Fig.44).
4) Loosen the nut acting as a locknut (T17).
Tensing: Turn the setscrew (T18) (Fig.43) to move the machine motor. When you see that the belt
has the right tension, tighten the screw acting as the locknut again (T17) and fasten the 4 screws
(T16) supporting the motor.
Replacement: Turn the setscrew (T18) anticlockwise to loosen the belt. Remove the broken belt
and replace with a new one. Once you have changed the belt, tighten the setscrew (T18) until you
can see that the belt has the correct tension. Then fasten the locknut (T17) and the 4 screws (T16)
supporting the motor.
5) Replace and fasten the “head shield”.
T18
T16
T17
T16
Fig.43 Fig.44
Summary of Contents for AVANTCODE
Page 1: ...ELECTRONIC AVANTCODE USER GUIDE Version 0 0...
Page 6: ...3 This is a versatile machine that can be used both with standard clamps or the key feeder...
Page 21: ...15 Fig 15...
Page 27: ...21 T7 Fig 26 T6 P4 Fig 25 T8 Fig 27 T9 Fig 28...
Page 56: ...50 Saving information...
Page 67: ...61 T26 Fig 51...
Page 72: ...1 MP1 AVN 195 AVN 194 AVN 193 AVN 160 AVN 171 AVN 2 AVN 1 AVN 6 AVN 7...
Page 73: ...2 MP1 MPAT AVN 196 AVN 198 AVN 197 AVN 193 AVN 195 AVN 197 AVN 174...


