


JRV210
12
SIRIUS RADIO OPERATION
NOTE: Access to Sirius® satellite radio requires installation of a separate Sirius tuner
and antenna. Listeners can subscribe to Sirius radio on the internet by visiting
www.sirius.com, or by calling (888) 539-SIRIUS. Customers should have their Sirius ID
ready (Sirius ID is located on the Sirius tuner, sold separately). Customers can listen to
music samples by tuning to channel 184.
Switching to SIRIUS Mode
Press the
MODE
button (4) to change the mode to Sirius Satellite Radio mode.
Activating Sirius Satellite Radio
Before you listen to Sirius Radio, you must subscribe to the service using your radio's
identification number. To display the Radio ID, press the
SEEK /\
or
SEEK \/
button (20, 19) to
access channel “000”. The screen displays "SID" followed by an 12 figure ID number.
Selecting a Band
In Sirius mode, press the
BAND
button (16) to access the Sirius user-preset channel groups in
the following order: SIR1, SIR2, SIR3.
Tuning a Channel
Rotate the
TUNE/ENTER
control (22) clockwise or counter-clockwise to tune up or down in
one step increments.
The channel information display can be changed to emphasize either Artist or Song Title by
pressing the
INFO DISP
button (14).
Storing Preset Channels
The preset buttons (27) can be used to store 6 channels per band (SIR1, SIR2 and SIR3),
allowing convenient access to your favorite channels.
Programming Channels
1.
Select the channel you want to store in memory.
2.
Press and hold
a preset button (27) until the corresponding preset button number appears
on the screen.
3.
Repeat steps 1 and 2 to program additional channels.
Recalling a Preset Channel
Press one of the six preset buttons (27) within a selected band to tune a preset channel
directly.
Preset Scan
Press the
AS/PS/FAV
button (15) to preview each stored preset channel in SIR1, SIR2 and
SIR3 for 10 seconds. Press the
AS/PS/FAV
button again to stop scanning and play the current
channel.
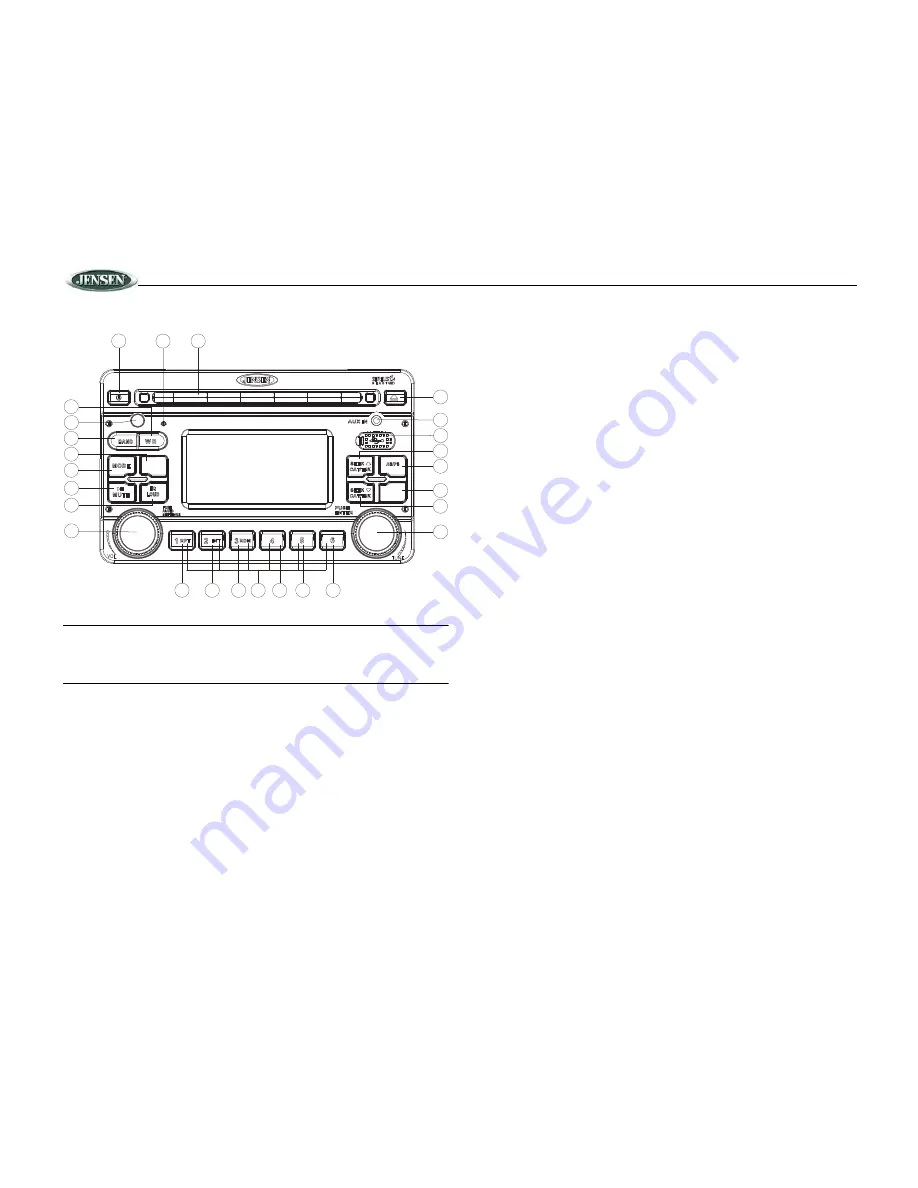
3
2
4
5
11
6
12
7
13
8
14
15
9
16
10
17
18
19
26
1
24
20
22
23
21
27
JRV210
FAV
PTY/CAT
MENU
PTY/CAT
MENU
INFO
DISP
INFO
DISP


