background image

32

soaked only long enough to achieve the desired look. It’s important not to hold the project at
these temperatures for a long period of time, or you run the risk of devitrification (a visible
clouding of the glass surface due to crystallization).

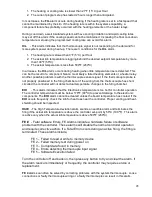
Fast Cooling (1500

°

F to 1100

°

F range):

After the finished look has been achieved, it’s

important to cool the inside of the kiln and the glass as quickly as possible to stop the firing
action so that it “freezes”. During the fast cooling stage, the surface of the glass is cooler and it
has contracted more than the heated center which remains expanded, thus introducing stress
into the glass piece.

Annealing (1100

°

F to 700

°

F range):

At the beginning of the annealing stage, it’s necessary to

heat soak the glass for an extended period of time to allow the glass to equalize in temperature
throughout and release the stress that’s in the glass. This makes the glass more stable. Then
the glass is slowly cooled through the annealing temperature range to better ensure the glass
piece is free of internal stresses and is physically stronger. NEVER OPEN THE KILN DURING
THIS STAGE!

Cooling to Room Temperature (700

°

F to room temperature range):

After the glass

temperature has cooled below the annealing temperature zone, the kiln can be turned off to
allow it to cool at it’s own pace to around 150°F – 200°F. Again, to avoid thermal shock, do not
open the kiln until it has cooled down to at least 200°F. Even at this temperature, the glass is
very hot, so do not attempt to pick it up in your bare hands. Simply open up the lid of your kiln
and allow the glass and the kiln shelf to cool down to room temperature.

Factors to consider before selecting a firing schedule

First envision what you want your finished piece to look like and ask yourself the following
questions:

What is the size (diameter) of the piece? How many layers thick will it be?

What is the desired finished look?

Will it be a full fuse, a more textural tack fuse, a combination of both?

Will it be slumped or draped to become a more 3 dimensional and possibly functional
piece?

Will it be embellished with any surface decorations like enamels or metallic paints?

The size of your project is defined by both the diameter of the piece as well as the number of
layers of glass. Glass as a material is a very poor heat conductor. The larger or thicker your
project is, the more slowly it needs be fired so that the glass has more time to heat or cool
evenly all of the way through.

Imagine that you are going to bake a cake. You have set your oven on preheat to heat it up
quickly, put the cake into the oven to bake, and forgot to change the dial setting to bake. When
the timer goes off, you look in the oven and discover that the cake is overcooked and possibly
burned on the edges, yet the center is still sunken and uncooked.

It’s just the same for glass. If you heat the glass too quickly, the edges may be fused to the
desired finish you like, but the center hasn’t finished fusing. One solution would be to soak the
piece at the process temperature for a longer period of time, but you are also taking the risk that
devitrification (visible clouding due to crystallization) on the surface or that the edges will over
fire and have an unusual appearance.

Summary of Contents for AF3P

Page 1: ...annealing kiln and will only have the BEAD setting turned on The AF3P Bead Annealer with flip door will have all of the above turned on except the Cone feature because the kiln cannot fire that hot AF3P Pre programmed One Smart Controller Operating Manual CONE Ceramic Cones 022 to 6 4 Extra Set for Limits of kiln BEAD Small Moretti Large Moretti Batch Anealing Borosilicate 4 Extra USER 6 User Defi...

Page 2: ...dures It is not intended to replace a fusing class or comprehensive fusing instructional media The products you put in the kiln to fire will come with or have available firing schedules for these products Jen Ken Kilns wants you to have this controller to get you firing sooner and to see sample programs that you can use or modify the programs to match the one s for the items you are firing ...

Page 3: ...m mode 21 User program mode 22 Other program notes 23 Delay Start Option 23 Thermocouple offset option 24 Program Review 24 Options Menu 24 Skip Step 25 Add Hold Time 25 Changing Heating Cooling Temperatures 25 Threshold alarm 25 Flow diagram for options menu 26 Power fail recovery 26 Status Display Codes 27 Alarm Display Codes 27 Wiring Diagram 29 Beginner Instructions 30 Fused Glass Project 30 W...

Page 4: ...area Do not allow your kiln to get wet Fumes from the ware should be vented to the outside Never use your kiln outside Avoid moisture o Always keep children and unsupervised personnel away Surface will get hot and a burn could result o Fire glass only to the manufacturers recommended firing temperature Improper fire temperatures could result in damage to your kiln Do not operate glass kilns over t...

Page 5: ... relays It will click more if a slow rate of rise in temperature is used and less if the kiln is told to fire quickly Your Jen Ken Kiln has one relay in the single coil kilns and separate relays for the top and side elements models to increase the life of the relays Glass kilns that are small have one side coil that will fire the piece well because small pieces of glass do not care where the heat ...

Page 6: ... inside for your kiln Shelves are sized a few inches smaller than the inside diameter of the kiln so that they can be placed in and out of the kiln more easily They are made of refractory material so that they should be handled carefully Should a crack appear in a shelf break the shelf along the crack and use it as two separate pieces A good coat of kiln wash should ALWAYS be maintained on top of ...

Page 7: ...e To take some dry kiln wash and with a little small holed kitchen strainer scoop some mixed dry kiln wash and tap a thin dust coating on the shelf The glass you then fire on it will sit on the powder and uses this dry kiln wash to fire on and not to kiln wash that wash painted on the shelf This will usually extend the life of the kiln wash that has been brushed on the shelf from a few firing to d...

Page 8: ... 14 15 5 15R Bead Annealer 11 9 w or w o 4 Flip Door 120 13 14 15 5 15R 11 6 120 13 14 15 5 15R Crucible 11 240 17 12 20 6 20R Crucible 18 240 30 8 40 6 50R ____ 11 E 120 17 12 20 5 20R ____ 18 E 240 20 10 30 6 30R ____ 18 E 15 240 26 10 30 6 30R ____ 21 E 240 25 10 30 6 30R ____ 24 E 240 23 10 30 6 30R ____ 24 E 15 240 26 10 30 6 30R ____ 28 E 240 38 8 50 6 50R ____ 28 E 15 240 45 6 50 6 50R OVAL...

Page 9: ...2 20 5 20R 15 9 120 17 12 20 5 20R 1811 240 20 10 30 6 30R 1822 240 26 8 30 6 30R 1829 240 39 6 50 6 50R 2122 240 30 8 40 6 50R 2422 240 36 6 50 6 50R 2431 240 45 6 50 6 50R 2829 240 45 OR 55 6 50 OR 60 6 50R OR DW Oval 27 240 55 6 60 Direct Wire JK 22 240 40 6 50 6 50R JK 29 240 45 OR 55 6 50 OR 60 6 50R OR DW ...

Page 10: ...kiln to a higher level Solid bricks transfer heat through to the floor and should not be used Air must always be allowed to circulate under the kiln so that heat can dissipate and not build in temperature o Air circulation and ventilation are needed to remove heat and vapors that may be released from the firing In a larger room the exterior of the kiln will stay cooler than in a very small room If...

Page 11: ...ture element failure o Vacuum out the interior of your kiln and along the grooves in the lid to remove any debris that may come loose when you close the lid or during firing o Carefully brush kiln wash on the floor of your kiln This is preventive maintenance in case glass ends up the floor of the kiln Do not brush kiln wash on either the sides or lid of the kiln Do not get kiln wash on any heating...

Page 12: ...ess the Program button to select the desired configuration The display will return to the IdLE Temp indication To select the firing program Press the Program button to display the current firing program Press the Increase button to scroll to the desired firing program for your project FUSE tAC SLP POL or user programs PR01 04 Press the Decrease button to select the desired program The small LED be...

Page 13: ...for specific program settings During a firing use this button for special firing options including Skip Step This button is used to change the display values for specific program settings It is also used to activate the Program Review feature When using the Increase and Decrease buttons to change number settings the values will change more rapidly if the button is held in Status Indicator Lights 3...

Page 14: ...controls temperature from a single Type K thermocouple sensor The thermocouple probe extends into the firing chamber to measure the temperature Use caution to avoid damage to the system thermocouple If the probe is damaged the controller may not function properly Temperature Control The controller heats the firing chamber by turning relays on and off at the appropriate rate to maintain the program...

Page 15: ...ance for most projects You may need to modify this part of the firing schedule if you have a special project Target or Set Point Temperature After the ramp rate has been set the target hold temperature is then selected Once again the built in temperatures are suitable for a typical project by may need to be modified for certain special projects Hold Soak Time Hold or soak times are important parts...

Page 16: ...leave it as a user program or use the new program as a reference to go back and modify the preset program In all instances keep a log of your firings especially when you make changes so you ll be able to track and or troubleshoot when you have unexpected results A log sheet is included in this manual Changing Program Modes All program edits and custom firing schedules are saved in the controller m...

Page 17: ... it can to 950F and holds this temperature for 1 00 hour Then cools at 100ºF hour to 700ºF with 0 hold and shuts off Slump Displayed as SLP This program heats at 200ºF hour to 1000ºF and holds this temperature for 0 minutes Then heats at 500ºF hour to 1280ºF and holds this temperature for 20 minutes Then heats at Full Power fast as it can to 950ºF and holds this temperature for 1 00 hour Then cool...

Page 18: ...r glass forming and 4 optional User Programs for creating custom firing schedules The 4 preset programs are recommended firing schedules that can also be customized if necessary These programs provide the various heating and cooling steps for easy selection Full Fuse Displayed as FUSE This program heats at 300ºF hour to 1000ºF and holds this temperature for 0 minutes Then heats at Full Power fast ...

Page 19: ... 00 00 15 00 30 Pr01 User Pr02 User Pr03 User Pr04 User The preset Small Piece programs can be edited Each program segment can be changed by the operator To restore the factory values enter a zero value for the first rA1 segment of each program and press the Program button In addition to the Small Piece preset programs the Small Piece provides 4 User defined programs for custom firing schedules Ea...

Page 20: ... temperature for 0 minutes 1 Beads Large Moretti Displayed as bd 2 Ramp and Hold Working Program This program heats at Full Power fast as it can to 960ºF and holds this temperature for 4 hours Then heats at Full Power fast as it can to 960F and holds this temperature for 1 hour Then heats at 100ºF hour to 500ºF and holds this temperature for 0 minutes Batch Anneal Moretti Displayed as bd 3 Batch A...

Page 21: ... for creating custom firing schedules The 5 preset programs are recommended firing schedules that can also be customized if necessary These programs provide the various heating steps for easy selection PMC Fast Displayed as P FS This program heats as fast as possible to 1650 F and holds this temperature for 10 minutes PMC Slow Displayed as P SL This program heats at 1500 F hour to 1470 F and holds...

Page 22: ...med Rate of temperature increase or decrease This is the speed of the heat up or cool down These rate values are selected as Degrees per Hour Degrees per hour rate can be determined by dividing the total amount of temperature change by the number of hours required to achieve the temperature change For Example If you want to heat the kiln to 900 F from room temperature 72 F in 2 hours time The heat...

Page 23: ...o stay at the previously determined heating or cooling temperature Hold time is also referred to as Soak or Dwell time Hold Time is entered in Hours Minutes format The middle decimal point light on the controller display is used to separate Hours from Minutes For Example a 1 hour hold time should be set like 01 00 while a 1 hour and 30 minute hold time would be 01 30 If no hold time is desired the...

Page 24: ... the controller accuracy if the thermocouple probe is aged or if the firing results appear to be slightly under or over fired This offset allows you to make minor adjustments to the firing temperatures without changing the programmed heating or cooling temperatures Prior to the active start of any firing the controller display will show a Start prompt of Strt This appears after the firing program ...

Page 25: ...d the controller display returns to the normal firing mode If the Decrease button is pressed the Skip function is canceled and the controller display returns to the normal firing mode The Skip function can be used to end a Hold time early or to skip from any heating cooling step to the next heating cooling step The Skip function does nothing during the final program step To end a final program ste...

Page 26: ... alarm value is set to 32 F 0ºC The alarm value can be reset or changed many times during a single firing To silence an active alarm simply press any button The maximum programmable value for the alarm is 2400ºF 1316ºC If the controller does not allow you to program alarm temperatures up to 2400 F 1316 C it has been factory set by the supplier to a lower safety temperature This is often necessary ...

Page 27: ...his alarm will appear when the kiln is idle and indicates that the thermocouple sensor is no longer detected The controller can not operate without a thermocouple signal In most cases the thermocouple has failed and will need replacement or the electrical connections for the thermocouple may be loose or damaged Check the wiring for the thermocouple and the physical condition of the probe inside th...

Page 28: ...mocouple has short circuited the controller will not detect actual temperature changes in the firing chamber EtH This alarm indicates that the Electronics temperature is too hot for controller operation The controller temperature must be below 176ºF 80ºC to prevent damage to the electronic components The EtH alarm cannot be cleared unless the board temperature has cooled If the EtH occurs frequent...

Page 29: ... been brought to well above freezing The probe inside the kiln needs to be warmer than the outside temperature You may see an alarm code TcR thermocouple reversed when you attempt to run a new firing You can put a match or lighter only on the thermocoupler in the kiln to warm it up a few degrees The controller can be set to read in ºF or ºC There is a small black shunt on the back of the controlle...

Page 30: ...etween your workspace and the kiln easier you can use water soluble glue Use glue very sparingly on the backside of the glass Allow the glue to completely dry before you try to move your piece Before setting up your glass projects on the kiln shelf first place the kiln shelf in the kiln If you are planning to fire more than one piece at a time make sure to position your glass projects no closer th...

Page 31: ...o as the firing process for the purpose of a selecting a firing schedule Full Fuse The glass has been completely melted together into one solid piece of glass that is smooth on the surface and all of the edges are well rounded Tack Fuse Glass has a textural feel on the surface All the edges of the surface pieces are well rounded and fully attached to the base glass Slumping The glass has been plac...

Page 32: ...ur bare hands Simply open up the lid of your kiln and allow the glass and the kiln shelf to cool down to room temperature Factors to consider before selecting a firing schedule First envision what you want your finished piece to look like and ask yourself the following questions What is the size diameter of the piece How many layers thick will it be What is the desired finished look Will it be a f...

Page 33: ...l also have Hanovia gold added as accents and be slumped into a 10 bowl mold Seldom can a fused piece be finished in one firing It s usually necessary to fire your piece multiple times in order to achieve the finished look that you have envisioned With this in mind make a list of the steps that you will need to do to create this piece then organize them in order by process temperature from the hot...

Page 34: ...hollow or very delicate in composition will need support while firing so they don t collapse Pour alumina hydrate or vermiculite into an unglazed ceramic bisque bowl and carefully place the metal clay pieces onto the alumina hydrate vermiculite Again they can be positioned closely together but they shouldn t touch FIRING THE KILN Begin in the IDLE mode To begin programming the kiln it must be in t...

Page 35: ...iln has completed firing the display will show CPLt and this message will alternate with the temperature display and the total firing time from start to finish DO NOT open the kiln until it has completely cooled and the temperature shows room temperature Keeping a log There is no one program fits all firing schedule for kilns Even supposedly identical kilns behave slightly differently Plugging the...

Page 36: ...ºF Hld3 Min Min Min Min Min Min Seg 4 Ra4 ºF Hr ºF Hr ºF Hr ºF Hr ºF Hr ºF Hr ºF4 ºF ºF ºF ºF ºF ºF Hld4 Min Min Min Min Min Min Seg 5 Ra5 ºF Hr ºF Hr ºF Hr ºF Hr ºF Hr ºF Hr ºF5 ºF ºF ºF ºF ºF ºF Hld5 Min Min Min Min Min Min Seg 6 Ra6 ºF Hr ºF Hr ºF Hr ºF Hr ºF Hr ºF Hr ºF6 ºF ºF ºF ºF ºF ºF Hld6 Min Min Min Min Min Min Seg 7 Ra7 ºF Hr ºF Hr ºF Hr ºF Hr ºF Hr ºF Hr ºF7 ºF ºF ºF ºF ºF ºF Hld7 Min ...

Page 37: ... do not touch each other Glazed surfaces should not touch the shelf use shelf paper or stilts for best results FIRING YOUR CERAMICS PROJECT To ensure success when firing ceramics use the clay or glaze manufactures firing directions These directions will help yield the results that you wish Below shows the programming of the controller for the cone mode that fires the preprogrammed schedules to the...

Page 38: ... 6 Strt is displayed 7 Press to start the firing CONE Programs CONE Program Rate Target Hold CONE 022 6 SLO or MEDFAST Variable Variable Pr01 User Pr02 User Pr03 User Pr04 User In addition to the bead preset programs the CONE mode provides 4 User defined programs for custom firing schedules Each user defined program can be up to 8 steps The User programs are Program Rate Temp Hold___ PrO1 Undefine...

Page 39: ... 3 324 1022 153 1112 162 1890 108 2106 4 324 1022 153 1112 162 1908 108 2124 5 324 1022 153 1112 162 1951 108 2167 6 324 1022 153 1112 162 2016 108 2232 Low Fire Degrees C Cone Ramp 1 Setpoint 1 Ramp 2 Setpoint 2 022 220 526 60 586 021 220 540 60 600 020 220 566 60 626 019 220 618 60 678 018 220 655 60 715 017 220 678 60 738 016 220 712 60 772 015 220 731 60 791 014 220 747 60 807 013 220 777 60 8...

Page 40: ...nd will be subject to service and shipping and handling fees If the Warranted Components are not in good working order as warranted above Buyer s sole remedy shall be repair or replacement of the Warranted Components as provided above TO THE EXTENT PERMITTED BY LAW ALL EXPRESS AND IMPLIED WARANTIES FOR THE WARRANTED COMPONENTS INCLUDING THE WARRANTIES OF MERCHANTABILITY AND FITNESS FOR A PARTICULA...

Page 41: ...bility of the purchaser The purchaser should notify JEN KEN KILNS 863 648 0585 prior to shipping We will advise the best shipping method and if it is necessary to return the whole kiln or only certain parts Factory warranty work will be performed within 30 days after the defective part is returned to the factory 3 JEN KEN KILN reserves the right as its option to replace the entire kiln or any part...

Reviews: