Die Set Installation and Bending Procedure
There are two types of forming dies provided for the Model 3 Bender. Those with drive holes and those without. The drive holes
are the five 1" holes drilled in a circular pattern around the forming die's center hole. A 7/8" diameter pin inserts through the drive
links and through the forming die's drive holes when in operation. The drive holes are drilled 1/8" oversize to provide easier pin
installation. To prepare for bending, follow the steps below depending on the type of die set.
WITH DRIVE HOLES:
Place the forming die into the bender using the 1"
frame pin. If bending square tubing, thoroughly lubricate
the forming die's groove. However, if bending round tubing
or pipe, NEVER lubricate the forming die's groove. If you
do, the tube will tend to slip backwards in the die while
bending, which in turn causes the tubing to kink or wrinkle.
Place the tube into the forming Die. Install the U-Strap
with the shorter 7/8" U-strap pin. If necessary, tighten the
U-strap bolt to prevent the tube from slipping through the
die will bending. It's a good idea to cut a slice out of a
bigger piece of tubing place it between the bolt and tubing
to prevent the bolt from dimpling the tubing. If bending
thin wall tubing (.065" or thinner) you must always use
the U-strap bolt.
Next, using the 7/8" Followbar Pin, place the Followbar
into the bender. See page 5 for the correct way to install
the Followbar. Lightly spray some lubricant on the outside
of the tubing so that the tubing will slide through the Followbar easily. Any spray lubricant works well. If you are bending tubing
with a wall thickness of .065" or thinner you may want to skip the lube entirely. This will help the followbar stick to the tubing during
ratchet repositioning and generally helps prevent wrinkling.
Make sure all pins are completely seated in their holes. Failure
to do this may cause damage to the bender links or worse yet the operator may slip and fall.
Rotate the Ratchet Lever fully counter-clockwise. Engage the Ratchet onto the outer 3/4" drive link spacer tube. Lightly pull
on the handle to preload the tubing. Do not pull hard enough to actually bend the tubing. Using a free hand, loosen the degree
plate nut. Rotate the degree plate until the die's pointer is at 0 degrees and then hand tighten the nut to secure it into position.
Now you're ready to bend. Pull on the handle in a clockwise direction until the Ratchet Lever cannot rotate any further. Return the
Ratchet Lever to the starting position. Initially release the Ratchet easily so as not to move the tubing and minimize spring back.
Reengage the ratchet and pull again. When the last Ratchet tooth is reached, return the Ratchet Lever to its starting position.
Remove the 7/8" Drive Pin and rotate the Drive Links counter-clockwise until the Drive Pin may be reinstalled through another
hole in the Bending Die. Be careful not to move the tube. Now repeat the above bending sequence until the desired degree of
bend is obtained. To release the tubing from the bender, remove the handle from the Ratchet Lever. Insert it diagonally through
the 3/4" drive link spacer tubes and pull counter-clockwise. The Followbar will release its grip and the tubing may be removed.
WITHOUT DRIVE HOLES:
These dies typically have a center line
radius of less than 3". Because the radius of
the die is so small, drive holes cannot be drilled
into the die. This does not present a problem
as the tube sizes for these dies is of relatively
small diameter and is easily bent. The ratchet
is not used.
Die installation procedure:
Swing the ratchet assembly out of the
way as shown below. Place the forming die
into the bender. Place the tubing to be bent
in the bender and using the 5 1/4" long drive
pin (not the shorter U-Strap pin that is usually
used) install the U-strap. If desired, tighten the
U-strap bolt to secure the tubing to the die.
This is not mandatory and may be omitted if
the tubing shows no signs of slipping through
the die while bending. Now install the followbar being sure the word 'TOP' is facing up. Rotate the drive links until their front edge
pushes directly on the U-strap pin as shown in figure 6. Place the handle diagonally through the drive links' two 3/4" spacer tubes.
Lightly pull on the handle to preload the tubing. Do not pull hard enough to actually bend the tubing. Using a free hand, loosen
the degree plate nut. Rotate the degree plate until the die's pointer is at 0 degrees and then hand tighten the nut to secure it into
position. Now, simply pull the handle and observe the pointer until the desired degree is reached.
- 7 -
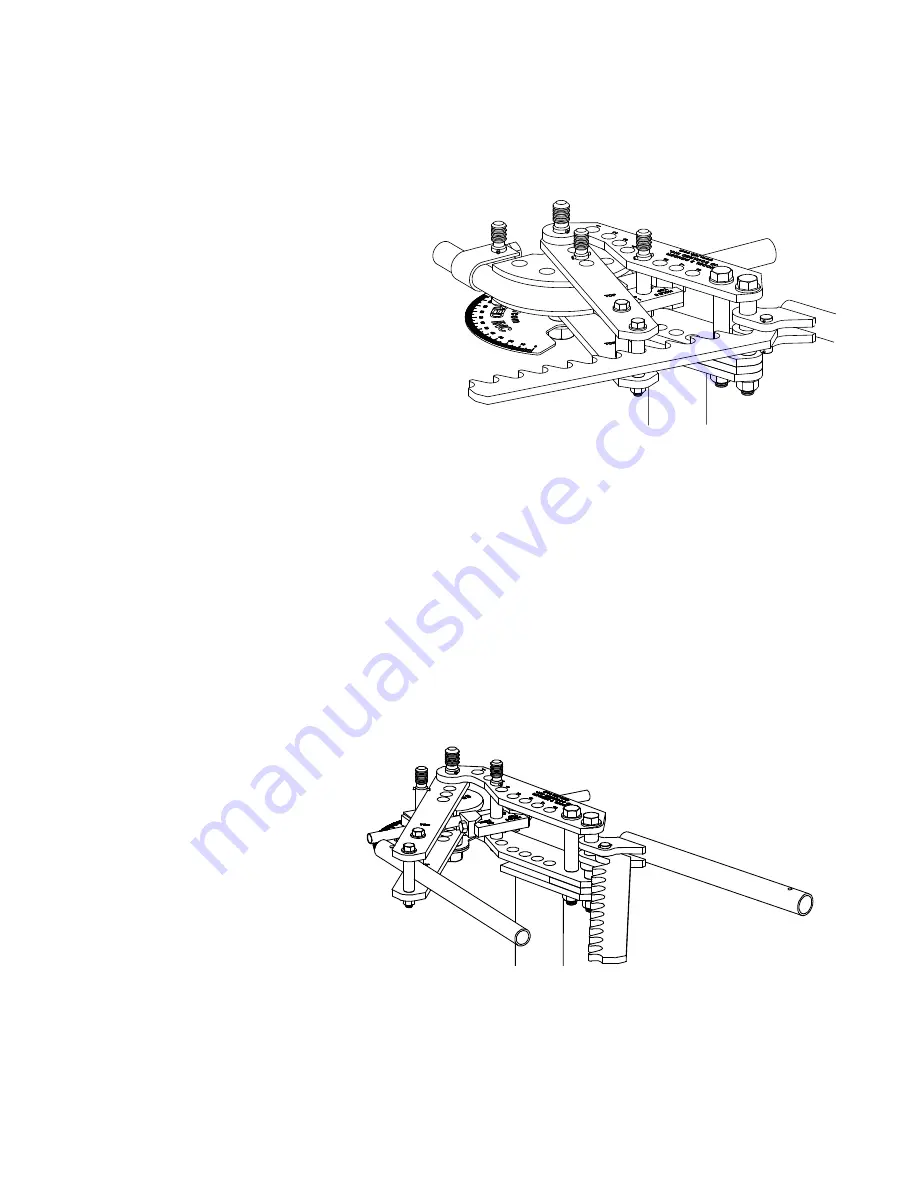
Figure 14 - Handle installed and ready to bend without drive holes
Figure 13 - Bending with drive holes and ratchet


