www.javad.com
19
LED).
• Show the modem’s status (MOD LED).
• Show the Bluetooth® module status (BT LED).
• Show the position solution status (POS LED).
You use NetView to configure MinPad settings.
Refer to the NetView Software Manual for all possible
MinPad configurations.
Connect the receiver and PC as described above.
Start NetView. Establish connection with the receiver.
Open TriPad tab. Set the following parameters and
click
Apply
:
• “File a, File b”
• “Function Key”
• “Automatic File Rotation Mode (AFRM)”
File a, File b
In the fields File a, File b can be specified current
log-file name, message output period, etc.
• Current log-file edit box allows the user to speci-
fy the prefix of the log file, which will be saved into
receiver memory during survey.
• In the Output Epochs Counter box the number of
outputted epochs is shown.
• In the Implicit Message Output Period edit box
the output period for the implicit messages can be
specified. This parameter specifies the interval of
outputting messages into the log-file when data
logging is activated with the TriPad or through the
AFRM.
• Elevation Mask for Measurements Output (the
minimum elevation angle for the satellites whose
data will be put in the receiver files logged when
pressing FN).
• Satellites Number Mask for Position computa-
tion - Satellites with elevations lower than this
mask will be excluded from position computation.
• File Name Prefix - this setting specifies what pre-
fix will be added to the names of the receiver files
created via MinPad, (i.e., by pressing FN). The pre-
fix can be up to 20 characters long. Default is log.
• Enable Implicit Management of Specific - en-
ables/disables the management of Implicit Mes-
sage Output Period.
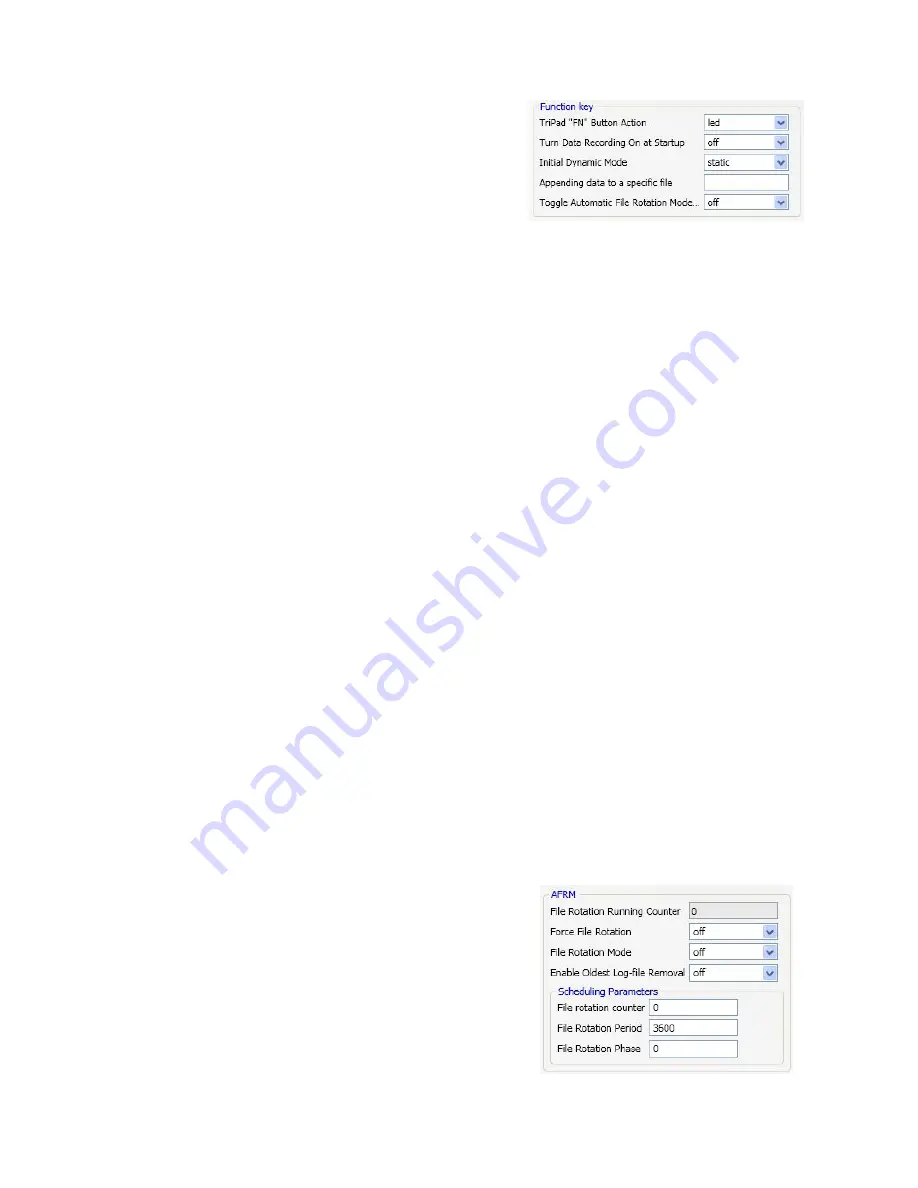
Function Key
Figure 16. Funktion Key
• TriPad “FN” Button Action - This drop-down list
box is used to program how the receiver will react
to clicking FN (i.e., keeping the button depressed
for less than one (1) second). In led blink mode
switch mode, clicking FN will toggle between the
MinPad’s standard and extended information
modes. In occupation mode switch you click FN
to get the receiver to insert into the corresponding
log file a message indicating that the occupation
type has been changed from static to kinematic, or
vice versa.
• Turn Data Recording on at Startup - enables/dis-
ables data recording on at startup,
• Initial Dynamic Mode - specifies the starting oc-
cupation type descriptor that will be inserted at
the beginning of each receiver files logged via the
MinPad. You select static and kinematic to specify
that the corresponding log file will start with a stat-
ic and kinematic occupation, respectively.
• Appending data to a specific file - If the new re-
ceiver data are to be appended to an existing log
file, enter the desired filename in the Always ap-
pend to the file edit box. The setting can be up to
twenty characters long.
• Toggle Automatic Rotation Mode - enables/dis-
ables Automatic File Rotation Mode.
Automatic File Rotation Mode (AFRM)
Figure 17. AFRM
• Period – specifies the time duration of each of


