Jason International, Inc. •
501.771.4477
Page 15 of 20
Customer Service : 800.255.5766
Copyright © 2018 Jason International, Inc.
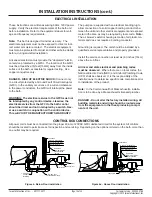
INSTALLATION INSTRUCTIONS (cont.)
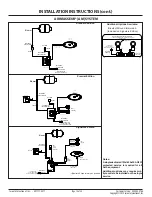
The Jason AirMasseur® system has been factory installed
following ETL/UL Standard safety guidelines. During in-
stallation, if remote mounting of the air blower is desired or
required, the following procedures should be followed.
Note:
Do not remote mount the blower more than 15 feet
[4.5m] away from the air inlet of the bath. Choose a loca-
tion as close as possible to the bath to ensure maximum
efficiency.
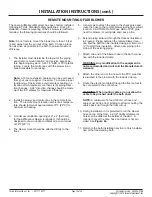
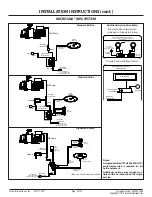
1. The installer must determine the layout of the piping;
exact remote mount location; and service access be-
fore beginning any work. Use 1.5” ABS or PVC plastic
tubing. Locate the control box with the blower in an
area accessible for servicing.
Note:
A 15 foot extension cable set can be purchased
from your Jason supplier, if needed. To ensure proper
functioning of the system, avoid remote mounting in a
location which requires more than six (6) piping direc-
tion changes. A 90° direction change should be made
up of two 45° elbows for maximum efficiency.
2. Install the blower and control box in the remote loca-
tion. The remote mount location ambient air tempera-
ture should remain at approximately 72°F [22°C] for
optimum air heating.
3. A minimum ventilation opening of 2” x 4” [5x10cm]
for the AirMasseur blower is required. It should be
designed to draw in indoor ambient air at a minimum
of 72°F [22°C].
4. The blower mount should be attached firmly to the
floor.
5. Use screws to attach the pipe to the check valve and
route the hose to the remote blower tubing floor cutout
location. CAUTION: Do NOT use ABS or PVC glue
near the blower, it could ignite and cause a fire.
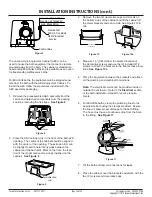
6. Extend piping stub-out through the floor as illustrated
in Figure 8. Piping between the remote blower loca-
tion and the bath can be insulated using a minimum of
½” [13mm] thick insulation. Attach new piping to the
elbow of the existing piping.
7. Attach one end of the blower hose to the bath connec-
tion with the included clamp.
WARNING: Any modification to the equipment is
not recommended and will void the Manufacturer’s
warranty.
8. Attach the other end of the hose to the PVC pipe that
is plumbed to the blower with the included clamp.
9. Route the electronic cables through the floor cutout to
be connected to the control box.
WARNING: When routing cables, do not allow the
cable to be pinched under the bath shell.
NOTE:
A minimum of 4 feet [122cm] of hose and
cable must be free from binding to allow for pulling the
cables back up through the floor cutout.
10. During installation if it is preferred to run the blower
hose on top of the floor, a 2-1/2” [6.35cm] diameter
holes can be drilled at the bottom of the skirt. A
means to cover the hole, hose and wires is not pro-
vided. See
Figure 8a
11. Return to the bath installation section to finish installa-
tion of the freestanding bath.
REMOTE MOUNTING OF AIR BLOWER


