35
Mechanical Adjustment
MODEL: AirThread 2000D
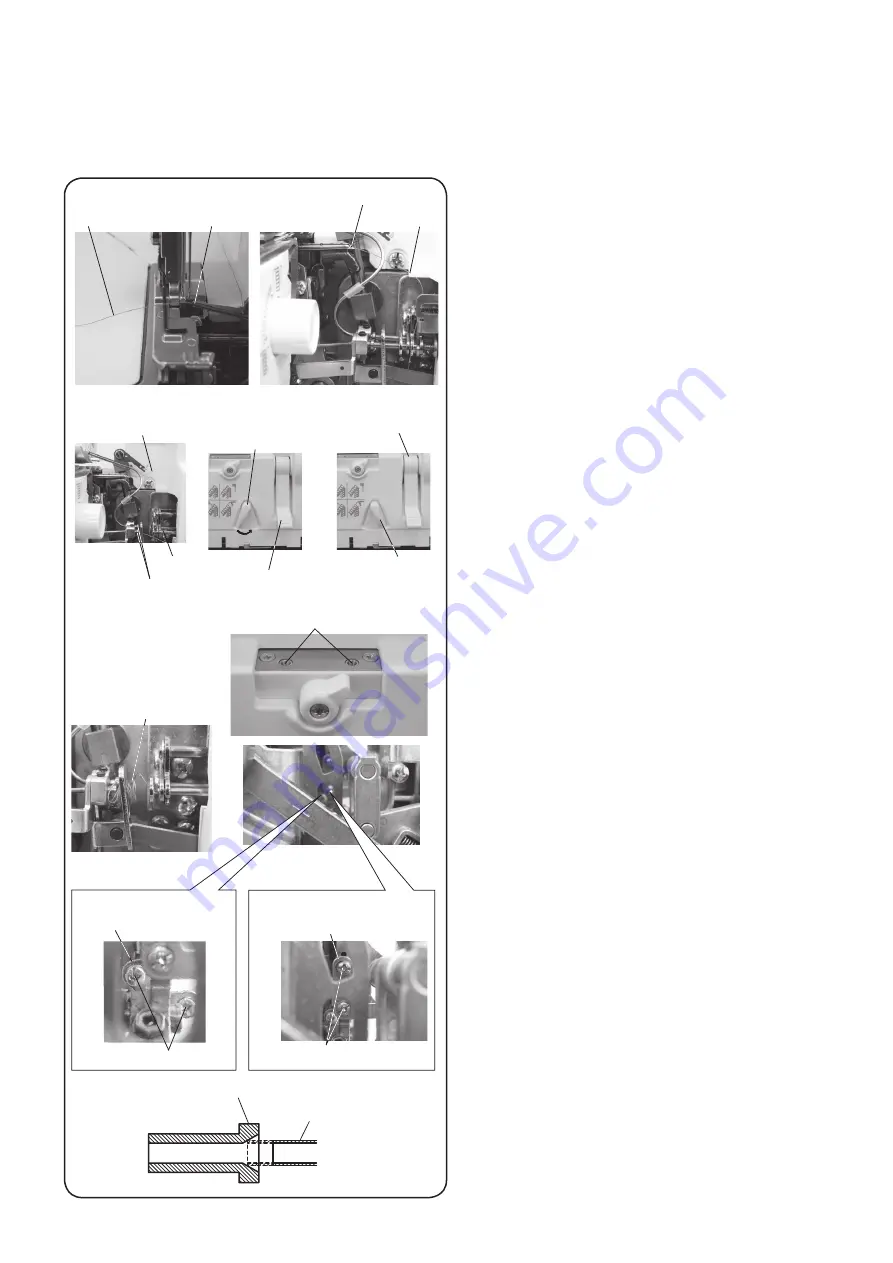
To adjust the looper threader (air) (1)
When threading the upper looper or the lower looper with a standard thread #60, a thread of 30 mm or longer should come out
from the hole of the looper.
For threading with the looper threader (air), see the instruction manual.
To check:
NOTE:
For checking the looper threader, do not use threads thicker
than #60, loosely twisted threads, special threads, moist or wet
threads. If the thread end is fluffed, trim it.
When you thread the looper with the looper threader (air), the
thread may be stained with grease or oil. Do not use it again.
Do not remove the thread pulling it from the threading hole.
1. Open the looper cover.
2. Thread the upper looper and the lower looper with the
looper threader (air).
If the thread does not come out from the hole of the looper
or the thread of less than 30 mm comes out of the hole of
the looper, remove both threads.
3. Set the looper threader switch lever to “SEWING”.
4. With the looper threader (air), thread the looper of which
thread does not come out from the hole correctly in the
step 2.
⇨
(a) If the thread of 100 mm or longer comes out:
Defect in the looper
⇨
(b) If the thread of less than 100 mm comes out:
Defect in the looper threader
5. Case (a)
5-1 There can be lint or objects stuck in the pipe of the looper.
Insert the looper threading wire into the mouth of the looper
connecting pipe to the tip of the looper to clean the pipe.
(Refer to page 53 in the instruction manual.)
5-2 Repeat the procedure from step 2.
5-3 If the problem is not solved yet, the slide pipe and the
looper connecting pipe may not be coaxial or straight.
6. Remove the top cover, the face plate, the belt cover, the
base plate, the looper cover and the front cover. Open the
side cover.
* To adjust:
・
Set the looper threader switch lever to “THREADING”
position.
Turn the handwheel toward you slowly until it clicks.
・
The slide pipe comes to the left and it is engaged with the
mouth of the looper connecting pige. Return the looper
threader switch lever to “SEWING” position to disengage
the slide pipe to the right.
・
Set the looper threader switch lever to “THREADING”
position and “SEWING” position slowly to check if the slide
pipe and the looper connecting pipe are getting coaxial and
straight.
NOTE:
The mouth of the looper connecting pipe is conical. If the slide
pipe and the looper connecting pipe are not coaxial or straight,
the slide pipe will be delicately moving to the coaxial position.
[Upper looper]
・
Adjust the position of the upper looper connecting pipe
supporter after adjusting the position of the looper take-up
lever.
・
Loosen the setscrews A (2 pcs.) of the upper looper
connecting pipe supporter slightly.
Adjust the position of the upper looper connecting pipe
supporter to the opposition direction to which the slide pipe
moves at engagement.
・
Tighten the setscrews A (2 pcs.).
・
Thread the upper looper with the looper threader and check
the length of the thread coming out from the hole of the
upper looper tip.
Tip of the lower looper
Tip of the upper looper
Thread
Thread
Looper
threading wire
Looper threader
switch lever:
SEWING
Looper threader
switch lever:
THREADING
Joint of the looper
connecting pipe
Looper threader
lever
Looper
threader lever
Slide pipe
Failure
Upper looper
Setscrews A
Mouth of the upper
looper connecting pipe
Arm of the lower
looper connecting pipe
Setscrew B
Lower looper
Mouth
Slide pipe
Threading hole


