


Summary of Contents for ePump
Page 2: ......
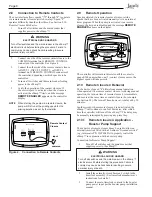
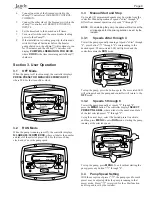
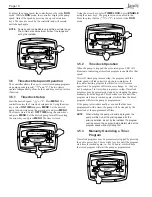
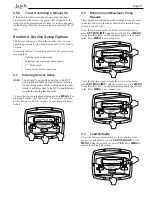
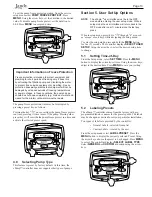
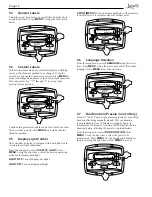
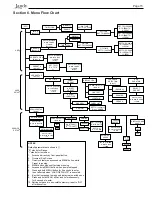
The Jandy ePump is a cutting-edge pool pump designed for energy efficiency and convenience. Ensure proper setup and operation by downloading the free Installation Manual from our website. This comprehensive manual provides step-by-step instructions for a hassle-free installation process. Download it now for optimal performance.
Page 2: ......


