background image

6

2

1

4

6

7

5

3

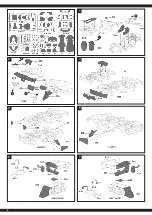
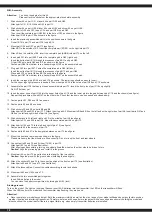
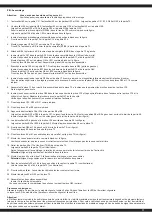
C16-C27

E33-E38

D28-D32

F40-F43

91600

67

68

67

68

69

71

70

66

65 64

60

62

63

72

73

61

74

A1-A2

G44-G59

B3-B15

42

46

44

43

45

Summary of Contents for 403115

Page 1: ...en Betreiben Sie das Modell nicht bei Regen Schnee N sse oder Sand Nicht auf befahrenen Stra en und Pl tzen fahren Fahren Sie nie au erhalb der Reichweite Ihrer Fernsteuerung Nicht direkter Sonnenbest...

Page 2: ...the environment and to your health If the batteries are marked with a chemical symbol Hg Cd or Pb below the crossed out waste bin on wheels it refers to that more than 0 0005 of mercury Hg more than...

Page 3: ...iva 2014 53 UE 2011 65 UE e 2009 48 CE Il testo integrale della dichiarazione di conformit UE disponibile al seguente indirizzo Internet www jamara shop com Conformity Attenzione Dopo ogni utilizzo at...

Page 4: ...cargarse bajo la supervisi n de un adulto Los conectores de conexi n no deben estar en cortocircuito Notas sobre el reciclado Bater as Acumuladores Bater as y acumuladores no deben desecharse en la b...

Page 5: ...laterales tijeras s lo deben ser utilizadas por adultos Por favor tenga cuidado para evitar lesiones CZ Mont st Pou ijte t pac kle t pro ust ihnut sou stky a potom ji no em zahla te Pomoc pinzety odl...

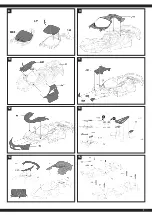
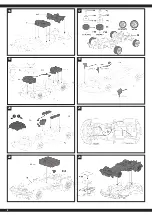
Page 6: ...6 2 1 4 6 7 5 3 C16 C27 E33 E38 D28 D32 F40 F43 91600 67 68 67 68 69 71 70 66 65 64 60 62 63 72 73 61 74 A1 A2 G44 G59 B3 B15 42 46 44 43 45...

Page 7: ...7 10 12 14 15 13 11 8 9 38 39...

Page 8: ...8 16 18 20 21 23 22 19 17 34 33...

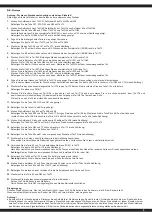
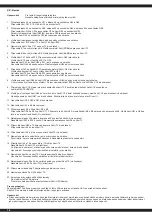
Page 9: ...Teile A1 und B3 wie gezeigt 13 Kleben Sie Aufkleber 38 und 39 auf Teil B9 und B6 Befestigen Sie die Teile D29 und D32 auf Teil C17 Bringen Sie diese auf Teil A2 an Montieren Sie die Teile B6 und B9 au...

Page 10: ...as shown 12 Fasten parts A1 and B3 as shown 13 Stick stickers 38 and 39 on parts B9 and B6 Attach parts D29 and D32 to part C17 Attach them to part A2 Mount parts B6 and B9 on the left and on the righ...

Page 11: ...es et ferm es facilement 11 Fixez les pi ces C23 D30 et D31 comme indiqu 12 Fixez les pi ces A1 et B3 comme indiqu 13 Apposer les autocollants 38 et 39 sur les parties B9 et B6 Joignez les parties D29...

Page 12: ...me mostrato in figura 12 Fissare le parti A1 e B3 come mostrato in figura 13 Incollare gli adesivi 38 e 39 sulla parte B9 e B6 Collegare le parti D29 e D32 alla parte C17 Attaccarli alla parte A2 Mont...

Page 13: ...e 11 Montar las partes C23 D30 y D31 como se muestra 12 Fijar las partes A1 y B3 como se muestra 13 Pegar las pegatinas 38 y 39 a las partes B9 y B6 Fijar las partes D29 y D32 a la parte C17 P ngalos...

Page 14: ...t 11 Upevn te sti C23 D30 a D31 dle zobrazen 12 Upevn te sti A1 a B3 dle zobrazen 13 P ilepte n lepky 38 a 39 na sti B9 a B6 P ipevn te sti D29 a D32 na st C17 P ipevn te je na st A2 Smontujte sti B6...

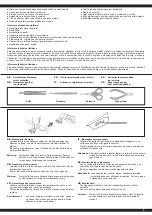
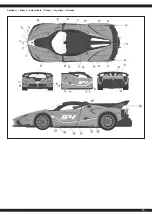
Page 15: ...15 Aufkleber Sticker Autocollants Sticker Pegatinas N lepka...

Page 16: ...encia CZ Servisn partner Reitter Modellbau Versand Patricia Reitter Degerfeldstrasse 11 72461 Albstadt Tel 07432 9802700 Fax 07432 2009594 Mail info modellbauversand de Web www modellbauversand de Mod...

Reviews: