Version: 3.1.0
53
3.1.1.3 System Construction of Type VI Sensor
To use a type VI torque sensor, configure it as follows:
a.
Correctly install the hardware of the torque sensor, and connect its connecting terminal to the TIO
interface at the robot end, with the XY direction of the sensor consistent with that of the end flange;
b.
Turn on the robot CAB, open the JAKA Zu app, connect the robot to the app, and power on the robot;
c.
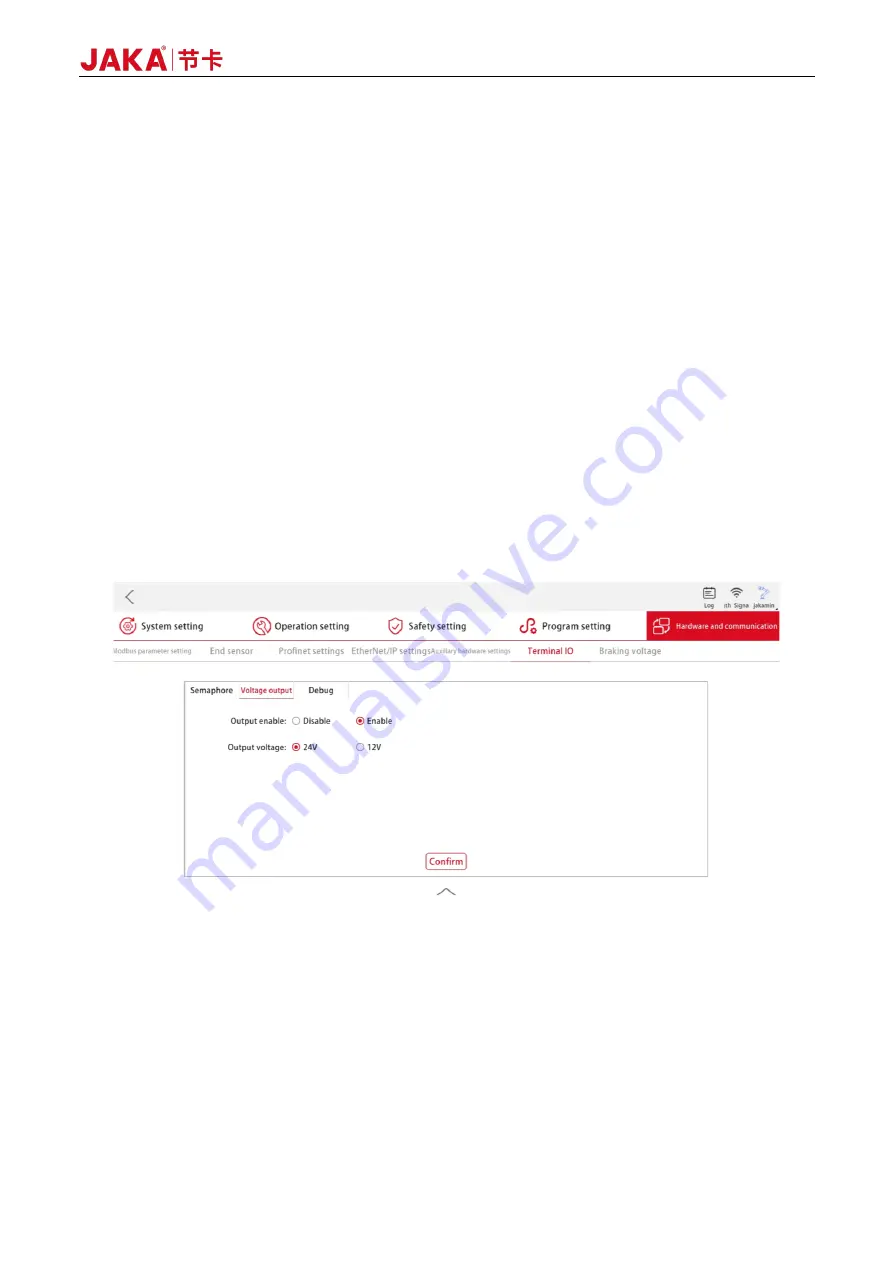
Tap [Settings] → [Hardware and communication] → [Terminal IO] → [Voltage output] to configure the
TIO output power supply, set the output voltage to 12V and enable it (see Figure 3-5). At this time, the
sensor indicator light is on, indicating the sensor is powered on.
d.
As shown in Figure 3-6, tap [I/O panel] → [Tool end], and tap "DO1" in the [Digital output] sub-window.
(Note: tap "DO1" instead of the toggle switch above it). Then the "I/O settings" window will pop up.
Select "Reuse as RS485 channel 1" in the drop-down box of the [Mode setting] bar, tap [Confirm] to
exit, and [RS485 configuration] will be displayed on the right of the title of the [Digital output] sub-
window;
e.
Tap [RS485 configuration], and the configuration interface of the RS485 channel will pop up, including
communication parameters and function/mode configuration. As shown in Figure 3-6, select [Torque
sensor], and set the baud rate to 230400, the data bit length to 8, the stop bit length to 1, and the parity
method to be none. After that, tap [Confirm], and the communication configuration between TIO and
external torque sensor is completed;
Figure 3-5 Power-on Configuration Interface of Type VI Sensor
Summary of Contents for Zu Series
Page 1: ...JAKA ROBOTICS Force Control Products JAKA Se and JAKA Sp...
Page 3: ......
Page 4: ......
Page 17: ...Version 3 1 0 13 M3 2 0 M4 4 0 M5 8 0 M6 13 0 M8 35 0...
Page 41: ...Version 3 1 0 37 Figure 2 36 Installation and Dimensions of the Force Sensor Indicator light...
Page 61: ...Version 3 1 0 57 Figure 3 8 Force Display Interface of the App...
Page 75: ...Version 3 1 0 71 Figure 3 19 Force Display Interface of the App...
Page 79: ...Version 3 1 0 75 Figure 3 21 Collision Detection Function Settings of JAKA Zu Sp...


