4
PACKAGE CONTENT
O
Q
R
P
Page 1: ...32 MODEL SYDNEY SP32C ITEM 0665844 Purchase date _________________________ Product Tracking Reference ________________________ Questions problems missing parts Before returning to your retailer call o...
Page 2: ...ntact customer service at the number provided in this guide Install the shower on a floor that is level and able to accommodate the weight of the unit and an occupant Consult local building codes and...
Page 3: ...QUIRED 6 SHOWER REVERSIBILITY 7 BASE INSTALLATION GUIDELINES OPTIONAL 8 WALL TRACK INSTALLATION 9 FIXED PANEL INSTALLATION 10 RETURN PANEL INSTALLATION 11 DOOR PANEL INSTALLATION 13 HANDLE INSTALLATIO...
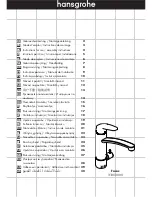
Page 4: ...4 PACKAGE CONTENT O Q R P...
Page 5: ...NT PART DESCRIPTION QTY CODE O Return panel 1 99SG10034 WM P Return panel fixture 2 99SGC1047 WM Q Return panel s bottom seal strip 1 99SRU0115 R Return panel s clamp 1 99SGC1048 WM S Hardware content...
Page 6: ...n Level Measuring Tape Silicone Rubber mallet Box cutter Ratchet 5 mm Bit socket Safety glasses PP OO QQ RR SS TT UU Screw ST8x30mm 1x Screw ST5x25mm 2 1 Cap 4x Cap 1x Fitting 1x Fitting 2x Fitting 1x...
Page 7: ...is drawn up for an opening from right to left see illustration A For an installation from left to right see illustration B use the same instructions but switch around the panels mirror effect SHOWER...
Page 8: ...8 BASE INSTALLATION GUIDELINES OPTIONAL 1 2 4 Tile Wall Studs Drywall Silicone 5 Shower Base 3 Shower Base Cement Floor Wood shim Flange Stud Drywall Silicone Flange...
Page 9: ...bit 3 Insert the wall anchors EE using a rubber mallet until the wall anchors are flush with the wall 4 Replace and secure the metal track B with screws CC Do not overtighten WALL TRACK INSTALLATION...
Page 10: ...otects the fixed glass panel 5 6 Place the fixed glass panel A into the wall track B and the sliding door guide E Note The wall track B allows you to adjust the position of the fixed glass panel A Adj...
Page 11: ...e support bar to the return panel O using screw OO fitting PP QQ RR and cap SS 5 Install the fixer P to the return panel O using screws DD 6 7 Mark the positions of the fixer P and the clamp R 8 9 Rem...
Page 12: ...rotects the return panel 3 4 Drill pilot holes in the marked locations of the fixer with a 8mm 5 16in drill bit Insert the wall anthor EE 5 6 Install the return panel O and the support bar 7 8 Secure...
Page 13: ...ake sure to place the bottom of the door inside the guide E 5 Install the 2 bottom rollers K on the door glass panel C 6 7 Install the 2 glass panels seal strips F 8 Using silicone install the decorat...
Page 14: ...els and the frame as well as the support bar Apply a clear silicone water sealant around the outside perimeter of any fixed shower components horizontally between bottom of fixed side glass panel and...
Page 15: ...imer Except as permitted the Disclaimer is not intended to waive modify release or limit the applicability of preemptive state province or national legislation inconsistent with the terms of this Limi...
Page 16: ...E 0665844 SYDNEY 32 Date de l achat _______________________ Num roder f renceduproduit ______________________ Questions probl mes ou pi ces manquantes Avant de retourner le produit votre d taillant co...
Page 17: ...n veuillez communiquer avec le service la client le au num ro indiqu dans ce guide Installez la douche sur un plancher au niveau et capable de supporter le produit et son utilisateur Veuillez consulte...
Page 18: ...DOUCHE EST R VERSIBLE 22 GUIDE D INSTALLATION DE LA BASE OPTIONNEL 23 INSTALLATION DU RAIL MURAL 24 INSTALLATION DU PANNEAU FIXE 25 INSTALLATION DU PANNEAU DE RETOUR 26 INSTALLATION DE LA PORTE 28 INS...
Page 19: ...19 CONTENU DE L EMBALLAGE O Q R P...
Page 20: ...ION QUANTIT CODE O Panneau de retour 1 99SG10034 WM P Attache du panneau de retour 2 99SGC1047 WM Q Joint d tanch it pour panneau de retour 1 99SRU0115 R Serre joint pour panneau de retour 1 99SGC1048...
Page 21: ...UINCAILLERIE FOURNIE OUTILS REQUIS Crayon Tournevis Perceuse avec foret ceramique 3mm 1 8 po 8mm 5 16 po Niveau PP OO QQ RR SS TT UU Vis ST8x30mm 1x Vis ST5x25mm 2 1 Capuchon 4x Capuchon 1x Raccords 1...
Page 22: ...ur une ouverture de la porte de droite gauche illustration A Pour une installation de gauche droite illustration B suivez ces m mes instructions mais permutez l emplacement des panneaux effet miroir C...
Page 23: ...IDE D INSTALLATION DE LA BASE OPTIONNEL 1 2 4 Mur de tuiles Montant mural Placopl tre Silicone 5 Base de douche 3 Base de douche Ciment Plancher Cale en bois Bride Montant mural Placopl tre Silicone B...
Page 24: ...m 5 16po 3 Ins rez les ancrages muraux EE en utilisant un maillet en caoutchouc 4 Replacer le rail B et le fixer avec les vis CC Ne pas visser trop fortement INSTALLATION DU RAIL MURAL Note Ins rez le...
Page 25: ...u de verre fixe 5 6 Placez le panneau de verre fixe A dans le rail mural B et le guide de la porte coulissante E Note Le rail mural B permet d ajuster la position du panneau fixe A Ajuster la profonde...
Page 26: ...t au panneau de retour O avec les vis et les raccords PP QQ RR et les capuchons SS 5 Installez l attache P au panneau de retour O avec les vis DD 6 7 Marquez la position de l attache P et du serre joi...
Page 27: ...e le panneau de retour O 3 4 Percez les trous l endroit o vous les avez marqu s sur l attache avec un foret 8mm 1 4po Ins rez l ancrage mural EE 5 6 Installez le panneau de retour O dans la barre de s...
Page 28: ...2 roues et placer le bas de la porte dans le guide E 5 Installez les 2 roues du bas K sur la porte C 6 7 Installer les 2 joints d tanch it verticaux F 8 Installez le rail d coratif J l avant de la por...
Page 29: ...tement fix s aux panneaux de verre Appliquez un scellant tanche base de silicone sur le contour ext rieur de toutes les composantes de la douche horizontalement entre la partie inf rieure des panneaux...
Page 30: ...modifier de d gager ou de modifier l applicabilit de la l gislation tatique provinciale ou nationale ayant pr pond rance et qui serait incompatible avec les modalit s de la pr sente garantie limit e o...
Page 31: ...T CULO 0665844 SYDNEY 32 Fecha de compra ___________________ Seguimiento y referencia del producto ___________________ Preguntas problemas piezas faltantes Antes de volver a la tienda llame a nuestro...
Page 32: ...tel fono que figura en esta gu a Instale la ducha en un piso que est nivelado y pueda contener el peso de la unidad y de un ocupante Consulte los c digos de construcci n locales y normas requeridas a...
Page 33: ...A 37 GU A PARA LA INSTALACI N LA BASE OPCIONAL 38 INSTALACI N DEL RIEL DE LA PARED 39 INSTALACI N DEL PANEL FIJO 40 INSTALACI N DEL PANEL LATERAL 41 INSTALACI N DEL PANEL DE LA PUERTA 43 INSTALACI N D...
Page 34: ...34 CONTENIDO DEL PAQUETE O Q R P...
Page 35: ...N CANTIDAD C DIO O Panel lateral 1 99SG10034 WM P Pieza de fijaci n de panel lateral 2 99SGC1047 WM Q Tira de sellado inferior del panel lateral 1 99SRU0115 R Abrazadera del panel lateral 1 99SGC1048...
Page 36: ...e goma Cuchilla Llave de trinquete Copa de 5mm Anteojos de seguridad CONTENIDO DE HARDWARE HERRAMIENTAS NECESARIAS PP OO QQ RR SS TT UU Tornillo ST8x30mm 1x Tornillo ST5x25mm 2 1 Capuch n 4x Capuch n...
Page 37: ...ra una abertura de puerta de derecha a izquierda ilustraci n A Para una abertura de izquierda a derecha ilustraci n B siga estas mismas instrucciones pero cambie el lugar para la ubicaci n del riel ef...
Page 38: ...38 PAUTAS PARA LA INSTALACI N BASE OPCIONAL 1 2 4 Pared de Baldosas Soportes Tablaroca Silicona 5 Plato de ducha 3 Plato de ducha Cemento Piso Madera cu as Brida Soportes Tablaroca Silicona Brida...
Page 39: ...rte los tarugos EE con un mazo de goma hasta que estos EE queden al ras de la pared 4 Vuelva a colocar el riel de metal B y aseg relo con los tornillos CC No apriete demasiado INSTALACI N DEL RIEL DE...
Page 40: ...el de vidrio fijo 5 6 Coloque el panel de vidrio fijo A en el riel de pared B y la gu a de la puerta corrediza E Nota Los rieles murales B permiten ajustar la posici n de los paneles fijos A Al ajusta...
Page 41: ...ilizando el tornillo OO los accesorios PP y QQ y RR y el capuch n SS 5 Instale la pieza de fijaci n P al panel lateral O utilizando los tornillos DD 6 7 Marque las posiciones de la pieza de fijaci n P...
Page 42: ...ege el panel lateral 3 4 Perfore los agujeros piloto en los lugares marcados en la pieza de fijaci n con una broca de 8mm 5 16 pulg Inserte el tarugo de pared EE 5 6 Instale el panel lateral O en la b...
Page 43: ...es et placer le bas de la porte dans le guide E 5 Installez les 2 roues du bas K sur la porte C 6 7 Installer les 2 joints d tanch it verticaux F 8 Installez le rail d coratif J l avant de la porte en...
Page 44: ...gual que con la barra se soporte Aplique silicona transparente resistente al agua alrededor del per metro interno y externo de todos los componentes de la ducha horizontalmente entre la parte inferior...
Page 45: ...a exoneraci n de responsabilidad mencionada arriba Excepto lo permitido la exoneraci n de responsabilidad no est destinada a generar la renuncia modificar liberar o limitar la aplicabilidad de legisla...