J/Boats J 35 Owner'S Manual Download Page 5


J/80 Owner Guide  5


Copyright

©

  J/Boats, Inc., 2007


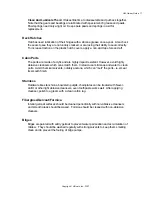
Getting Started With Your J/80 

Generally, your dealer will help you prepare your boat before launching.  They are 
experts in the field and are capable of completing most commissioning tasks.  

Before Proceeding 

Before you begin to assemble your new boat you should become familiar with the 
different sail control systems and associated hardware.  All running rigging and loose 
deck hardware items are shipped from the factory in parts boxes complete with part 
inventory sheets.  To help you properly install these items please refer to the rigging 
and hardware sections and diagrams in this guide. 

The Commissioning Checklist: will help you double check that the J/80 is assembled 
properly and all systems and rigging are functioning properly.  If a boatyard other than 
an authorized J/Boat dealer is performing the work, review this list with them to 
establish what needs to be done and by whom. 

Topsides: wash off all the dirt and grime accumulated from delivery.  Use only non-
abrasive cleansers on the gelcoat.  Then apply a coat of high quality carnauba car or 
boat wax or use a synthetic poly-based coating.  Either finish will prolong the life and 
sheen of the gelcoat.   

Bottom: preparation is critical to long-lasting enjoyment.  To ensure a professional finish 
carefully review the paint manufacturers recommendations for preparing the bottom, 
and have your dealer to roll it or spray it on.  Be sure that there are a minimum of 4 
coats of epoxy primer covering the keel and rudder prior to final coating of bottom paint.  

Deck Hardware 

Chainplates: are custom built of polished 304 grade stainless steel.  Each pair 
surrounds the main structural bulkhead and is anchored directly to it with bolts.  The 
backstay chainplate is also 304 grade and through bolts directly to a reinforced area of 
the transom. 

Stemhead Fitting: is a custom polished 304 grade stainless fabrication.  It is designed to 
withstand all headstay loads, and is attached with bolts directly to the stem of the hull.   

Toe Rail: is low maintenance white plastic extrusion, which is attached through the 
Hull/deck joint and between custom stanchion bases where necessary.   

Stanchions & Pulpits: are designed for proper offshore safety as well as to facilitate 
access to the boat.   The bow pulpit is properly braced with a mid-height bar across the 
front end, to allow easier handling of the spinnaker.  The stern push-pit is arranged with 
an aft gate, stern running light, and is a convenient place to mount an outboard bracket, 
etc..  All stanchions are 1” diameter tapered stainless steel, which fit into stainless steel 
bases.  The stanchion gates are well supported with an additional bar and socket.  

Summary of Contents for J 35

Page 1: ......

Page 2: ...EARSON COMPOSITES This guide is furnished for your benefit but shall in no way be construed as any sort of warranty or contract express or implied creating any obligation on the part of J Boats Inc wi...

Page 3: ...9 4 Clew Set up Slug Feeder Type Milled Slot Main Sheet Polyester 8mm 55 8 Finish Anodized Jib Sheets 2 Polyester 10mm 26 ea Spin Sheet continuous Polyester 10mm 118 Cunningham Polyester 6mm 10 Boom V...

Page 4: ...De winterize outboard engine ___ Check battery charge Loose Gear ___ Fenders and lines ___ Dock lines ___ Winch handles ___ Bilge pump bucket ___ Mast wedges ready Step Mast ___ Hoist spar and lower...

Page 5: ...to long lasting enjoyment To ensure a professional finish carefully review the paint manufacturers recommendations for preparing the bottom and have your dealer to roll it or spray it on Be sure that...

Page 6: ...tch from Lewmar Marine s Ocean Series hardware line The hatch is equipped with a ventilation position and 180 degree articulation DO NOT PERMIT ACETONE OR OTHER HARSH CLEANSERS TO GET ON PORTS OR HATC...

Page 7: ...rn cleat on the side of the mast and jib halyard exit to port leading to double aligned Harken cam cleats The spinnaker halyard leads to starboard down to a turning block on the mast and aft to a larg...

Page 8: ...with your hand Rigging the Bow Sprit Lead the tail of the pole control line through the inboard hole at the back end of the sprit and tie a stopper knot Then run the line through the Harken single bl...

Page 9: ...bodies of the three turnbuckles on each side and tie a square knot The turnbuckles won t unwind yet they re easy to get to for future rig adjustments For the backstay turnbuckles tie a messenger line...

Page 10: ...goes all the way in front of the spinnaker luff is only effective in high wind 20 knot conditions Spare Parts It s always prudent to carry spares The following is a recommended list of items to keep o...

Page 11: ...1 Copyright J Boats Inc 2007 Engine Minimum nominal power of 2 kilowatts 3hp minimum weight 12 5kg empty of fuel When not in use engine and any removable outboard bracket shall be stowed aft of forwar...

Page 12: ...Copyright J Boats Inc 2007 J 80 Polar Diagram True Wind Speeds kts 180 165 10 16 20 14 12 6 8 Status One Design Configuration Boat J 80 Boat Speed 4 kts 6 True Wind 8 105 150 135 120 60 30 45 Angle d...

Page 13: ...to yield more than other gelcoats and provides more flexibility to improve cracking resistance Testing also indicates that NPG ISO GELCOATS produce the highest gloss and the best color retention unde...

Page 14: ...ufactured to designer specified templates and molds The keel is made of cast lead reinforced with 4 antimony with high strength stainless bolts cast into the lead The molded keel stub area of the J 80...

Page 15: ...metallic objects inside or outside the boat Avoid contact with any items connected to the lightning conductive system mast shrouds etc and especially in a manner to act as a bridge between them mast t...

Page 16: ...two weeks to scrub the bottom with a sponge pad Deck Hardware Running Rigging Wash deck hardware frequently with fresh water to remove accumulated salt and grime Wash down the jib sheets spinnaker she...

Page 17: ...nt However avoid highly abrasive cleansers which can scratch them Instead use mild soap and water to clean ports Avoid chemical solvents notably acetone which can melt the ports ie smear its smooth fi...

Page 18: ...d rail attachment to deck ___ Check all cleats for signs of fatigue Tighten fasteners or replace as required Steering System ___ Lubricate Rudder pins ___ Check tiller extension joint for wear Electri...

Page 19: ...onics Remove as many as possible to avoid condensation caused by the extreme rise and fall of temperature and humidity that come with winter Interior Ventilation Clean the cabin thoroughly with a damp...

Page 20: ...aches to lower hole on mast bracket long length to upper hole Wire Block attaches to boom vang bale Harken 2621 Carbo Fiddle Block floating mount on end of long wire Harken 060 Little Fiddle w Hexarat...

Page 21: ...t System Harken 2670 Carbo Ratchet block mounts on 144 Cam Base Harken 2622 Mainsheet Carbo Fiddle Block w becket mounts on S S Bale on J 80 Boom Harken 2621 Mainsheet Carbo Fiddle Block mounts on mai...

Page 22: ...Link Plate 2 098A Wire Bullet Blocks grey sheaves attach to link plate using extra shackles from traveler car control blocks Harken 342 Carbo Double Block connects to Link Plate as shown Harken 340 S...

Page 23: ...that the Tack Line as shown below is always rigged over the top of Starboard spinnaker sheet This ensures that after hoisted the spinnaker will be ready for inside out jibes between the headstay and l...

Reviews: