


4: Installing The Motherboard
○
○
○
○
○
○
○
○
○
○
○
○
○
○
○
○
○
○
○
○
○
○
○
○
○
○
○
○
○
○
○
○
○
○
○
○
○
○
○
○
○
○
○
○
○
○
○
○
○
○
User’s Manual
4•7
○
○
○
○
○
○
○
○
○
○
○
○
○
○
○
○
○
○
○
○
○
○
○
○
○
○
○
○
○
○
○
○
○
○
○
○
○
○
○
○
○
○
○
○
○
○
○
○
○
○
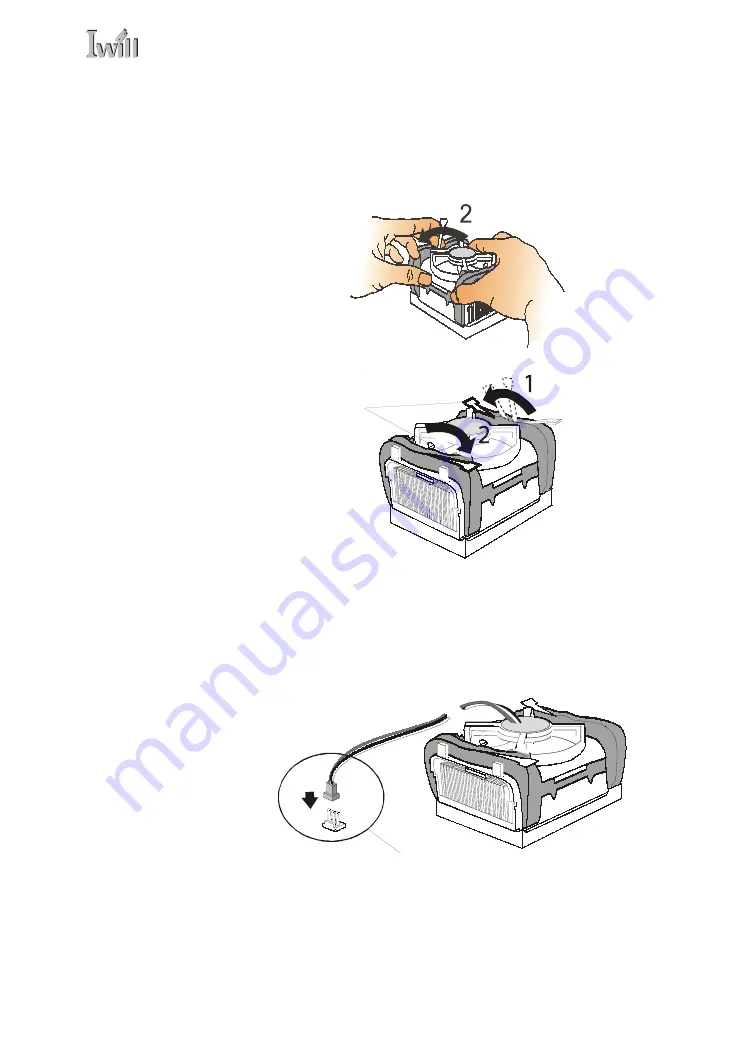
3. Repeat the process for the second clip. Keep hold-
ing the Fan/Heatsink steady so that you don’t dam-
age the TIM. The locking levers should now hold
the heatsink securely in the Retention Mechanism.
Connect Fan/Heatsink Power Lead
Plug the fan power lead onto the CPU Fan power connec-
tor near the CPU socket. When you do this the CPU in-
stallation is complete.
Step 3:
Hold the assembly steady
and press the other retain-
ing clip’s locking arm into
the locked position
Step 4:
Plug the Fan power lead
onto the CPU fan power
connector
Summary of Contents for P4R533
Page 1: ...IWILL P4R533 P4R533 N Motherboard User s Manual...
Page 2: ...P4R533 P4R533 N Motherboard User s Manual II...
Page 14: ...P4R533 P4R533 N Motherboard User s Manual 1 6...
Page 46: ...P4R533 P4R533 N Motherboard User s Manual 3 10...
Page 69: ...5 System Configuration User s Manual 5 9 CMOS Setup Utility Interface commands...
Page 71: ...5 System Configuration User s Manual 5 11 CMOS Setup Utility Main Screen...
Page 82: ...P4R533 P4R533 N Motherboard User s Manual 5 22...
Page 88: ...P4R533 P4R533 N Motherboard User s Manual 5 28...
Page 100: ...P4R533 P4R533 N Motherboard User s Manual 6 12...