background image

- 12 -

Operation

3. Calibration

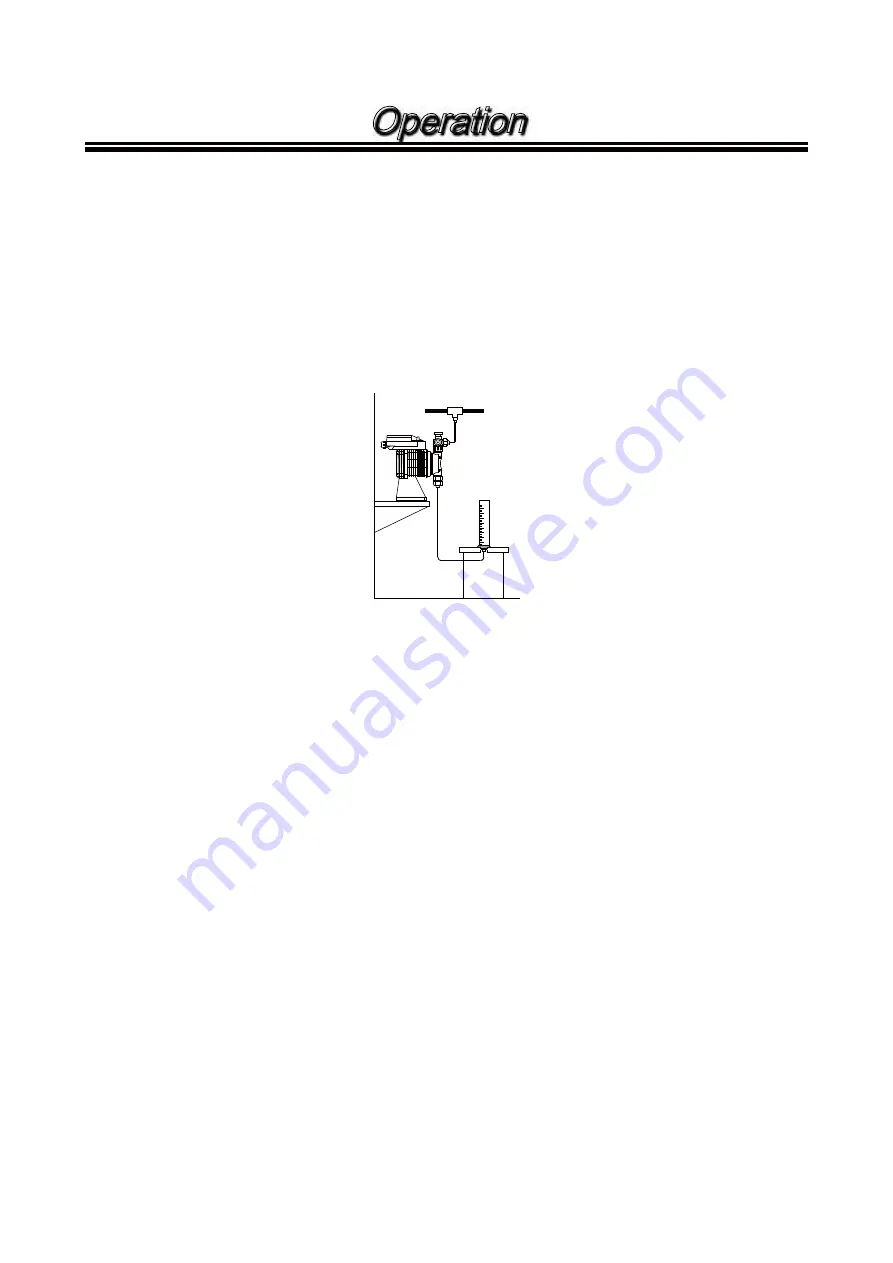
If exact output calibration is required, first prime and adjust the pump as above. Then connect a calibra-
tion column to the suction side of the pump. Turn the pump on for one minute and read the amount of liquid 
pumped from the column. Adjust the frequency up or down as necessary and check the output again. When 
the desired output is reached, disconnect the calibration column and reconnect the suction tubing (See 
Figure 4).

Figure 4

Calibration

Summary of Contents for ES-B Series

Page 1: ...Read this manual before use of product IWAKI Electromagnetic Metering Pump ES B C Type Asia version Instruction Manual...

Page 2: ...s Important instructions 1 Safety instructions 2 Outline 1 Safety and Caution Notes 5 2 Principle of Operation 5 3 Specifications 6 Installation 1 Unpacking 8 2 Location 8 3 Supply Tubing 9 4 Discharg...

Page 3: ...angerous situations The symbols on this instruction manual have the following meanings WARNING Nonobservance or misapplication of the contents of Warning section could lead to a serious accident which...

Page 4: ...ling the pump Do not place the pump close to water The pump is not water proof construction The use of the pump in a humid place or a place where the pump can bet wet electrical shock or short cir cui...

Page 5: ...duct without an optional leakage breaker Secure a leakage breaker to reduce the risk of electrical shock Purchase separately Damaged power cable Do not use any damaged power cable for the prevention o...

Page 6: ...4 Outline 1 Safety and Caution Notes 5 2 Principle of Operation 5 3 Specifications 6...

Page 7: ...ering pump consists of a pump unit a driving unit and a control unit The drive unit is an electromagnetic solenoid When the solenoid coil is energized by the control unit the armature shaft moves forw...

Page 8: ...att Connection tubing ID OD 4 9 or 6 8mm 8 13 mm or 9 12mm 4 9 or 6 8mm 8 13 mm or 9 12mm Max capacity is measured with clean water under the Max discharge pressure Actual discharge capacity may incre...

Page 9: ...7 Installation 1 Unpacking 8 2 Location 8 3 Supply Tubing 9 4 Discharge Tubing 9 5 Electrical 9...

Page 10: ...would be exposed to direct sunlight Flooded suction mounting the pump below the level of liquid in the supply tank is strongly recommended especially when pumping liquids that readily generate gas bub...

Page 11: ...critical and can be any length required to reach the application point Avoid sharp bends or kinks in the tubing and protect the tubing from sharp edges that could chafe or cut it Install a check valve...

Page 12: ...10 Operation 1 Priming 11 2 Adjustment 11 3 Calibration 12...

Page 13: ...d If the installation bolts on the pump head are loosened liquid leakage may result Fasten the 4 hex socket bolts tightly before starting the initial pump operation The bolts may be loosened during st...

Page 14: ...on column to the suction side of the pump Turn the pump on for one minute and read the amount of liquid pumped from the column Adjust the frequency up or down as necessary and check the output again W...

Page 15: ...13 Maintenance 1 Diaphragm Replacement 14 2 Valve Replacement 14 3 Tubing 14 4 Troubleshooting 15 5 Model Code 16 6 Dimensions 17 7 Exploded View 19 8 Parts List 20...

Page 16: ...16 21 2 55N m B31 C31 36 2 Valve Replacement Remove the suction and discharge tubing Remove the suction fitting the valve ass y consists of 2 valve ball 2 valve seat 2 valve guide 1 gasket 1 O ring In...

Page 17: ...or discharge valve is clogged with foreign matter Air is trapped in pump Overfeeding Diaphragm is damaged Disassemble inspect clean Open air vent valve Install injection valve or back pressure valve...

Page 18: ...ective diameter 11 10mm 16 15mm 21 20mm 31 30mm 36 35mm Liquid end material symbol See the table of Liquid End Materials presented page 6 VH Hastelloy ball valves VC Ceramic ball valves Power supply v...

Page 19: ...s in mm Model A B C D E F G H J L P Q Tubing W ES B11 ES B16 ES B21 81 5 22 2 90 37 5 150 184 28 175 4 9 or 6 8 100 ES B31 81 5 26 2 90 16 5 172 8 158 8 13 or 9 12 100 Mounting hole Dimensions in mm M...

Page 20: ...odel A B D E F G H J L P Q Tubing W ES C16 ES C21 105 27 100 37 8 160 194 36 196 5 4 9 or 6 8 116 ES C31 105 29 100 16 8 182 186 5 18 177 5 8 13 or 9 12 116 ES C36 105 28 5 100 16 8 181 5 186 5 18 5 1...

Page 21: ...11 13 12 1 11 13 12 B 3 4 D 47 44 45 46 55 56 38 42 41 39 43 48 53 52 C ES B31 C31 C36 7 Exploded View Models with thermoplastic liquid end materials and air vent valve A Air Vent Ass y B Valve Ass y...

Page 22: ...4 13 Valve ball HC CE 4 14 Gasket PTFE 2 17 O ring S14 EPDM FKM 2 18 Spacer 0 2 0 3 0 5 0 7mm Brass 1 19 Bolt M4X40 SUS316 equivalent 4 23 Adjusting Screw PVC 1 25 O ring P4 FKM A 1 26 O ring P10A FK...

Page 23: ...4 14 Gasket PTFE 2 O ring S14 EPDM FKM 2 18 Spacer 0 2 0 3 0 5 0 7mm Brass 1 Bolt M4X35 SUS316 equivalent 4 23 Adjusting Screw PVC 1 25 O ring P4 FKM A 1 26 O ring P10A FKM A 1 27 O ring P7 FKM A 1 38...

Page 24: ...6 2 320 1303 FAX 2 322 2477 TEL 852 2 607 1168 FAX 2 607 1000 TEL 86 20 8435 0603 FAX 20 8435 9181 TEL 86 10 6442 7713 FAX 10 6442 7712 TEL 86 21 6272 7502 FAX 21 6272 6929 TEL 63 2 888 0245 FAX 2 843...

Reviews: