FEATURES AND OPTIONS
11
sounds three times, indicating the patient's temperature has
been reached.
3. Note the temperature, withdraw the probe, press the probe
ejection button to eject the used probe cover, and return the
rectal (red) probe to the red probe storage well.
In Monitor mode, the TURBO TEMP™ Electronic Thermometer
continuously measures the patient's temperature as it rises or
falls.
Monitor Mode
1. Push and hold the PULSE TIMER button.
2. While pressing the pulse timer button select and remove one
probe.
3. Attach a probe cover.
4. When the display test has completed, release the PULSE
TIMER button.
M ONITO R M O D E
will be displayed.
5. After positioning the probe, observe the changing display
reading. When the display stops changing (3-5 minutes), the
patient’s current temperature is indicated on the display.
(The instrument will not beep to indicate final temperature
reading.)
1.For axillary temperature measurement,
instrument must be
placed in the Monitor Mode
(follow steps 1-3 under
Monitor Mode Operating Instructions above).
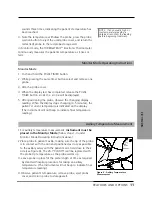
2.Place probe in patient's axilla, making sure the tip of the probe
is in contact with the skin and positioned as close as possible
to the axillary artery with the patient's arm held close to their
side (see Figure 8). The 26.7°C (80.0°F) will be replaced with
the probe tip temperature as the probe warms up.
3. Leave probe in place for the same length of time as required
by standard hospital procedure for taking an axillary
temperature. (The instrument will not beep to indicate final
temperature reading.)
4. Observe patient's temperature, remove probe, eject probe
cover, and return probe to storage well.
Axillary Temperature Measurement
Monitor Mode Operating Instructions
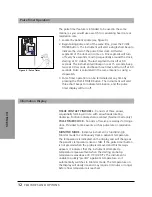
Figure 8 - Axillary Temperature
Measurement
NORMAL USE
NOTE: If an unusually high or
low temperature reading is
obtained, reconfirm the reading
before beginning treatment.
*
Summary of Contents for 218X
Page 1: ...TURBO TEMP ELECTRONIC THERMOMETER MODELS 218X DIRECTIONS FOR USE ...
Page 2: ......
Page 4: ......
Page 8: ......
Page 12: ......
Page 20: ...16 FEATURES AND OPTIONS ACCESSORIES Accessories 2031 ...


