3-3. Direction Setting
5-1. Speed Variation
5. Operation Instructions
・
Power Moller is adequately installed in compliance with the manual.
・
Power Moller shafts are adequately secured with the supplied brackets or
accessories.
・
Each connector on the driver card is adequately wired and inserted.
・
Operating and environmental conditions are respected.
・
Power supply has sufficient capacity (Stable 24VDC, 5A or over) so as not to be
affected by varying load
・
The protector for the power supply should not react with peak current 20A
1msec or less.
Supply 24VDC to the driver card, and the LED1(Green)
illuminates.
Close the contact of CN2-1, and the Power Moller starts
running.
・
0V should be common to the power voltage.
・
7.3mA current is drawn to CN2-1.
・
Wait 1sec after the driver card is powered before
running Power Moller.
Open the contact of CN2-1, and the Power Moller stops.
・
Power Moller run/stop should be manipulated only
by CN2-1 and 0V, not by the 24VDC power to the
driver card.
To vary the motor speed, follow the section 5-1.
To reverse the motor, follow the section 5-2.
To accelerate or decelerate the motor, follow the section 5-3.
①
②
③
④
⑤
⑥
①
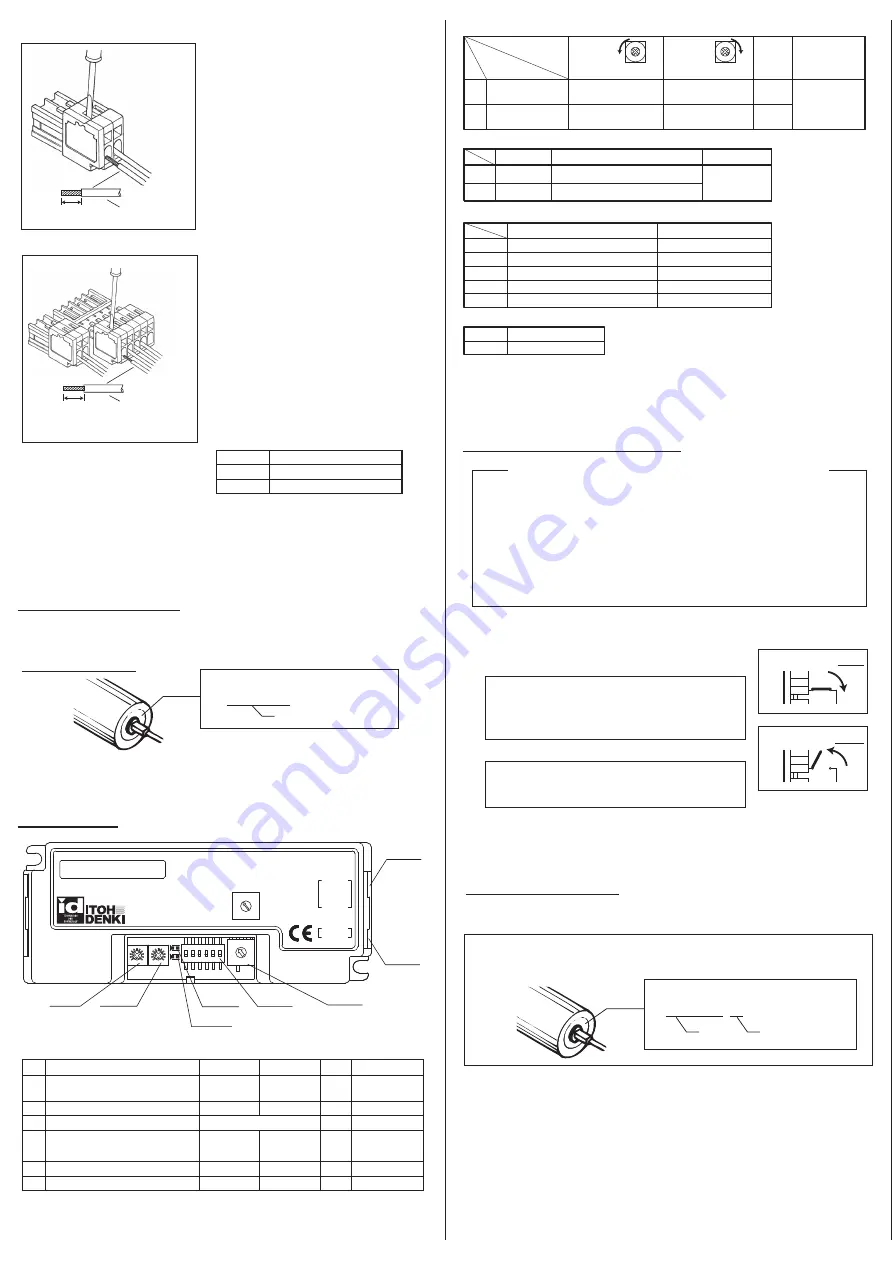
Wire 24VDC and 0V to the Power Connector CN1(2P)
Connector current capacity is 10A.
Avoid
wiring causing excessive current.
Make sure the +/- wiring is correct.
Wiring should be made before inserting into the
driver card.
②
Wire to the Control Connector CN2 (5P) per the diagram in section 3.
③
Insert the pre-wired Power connector CN1, Control connector CN2 and Motor
connector respectively to the counter connectors in the diver cad.
(Motor connector to CN3) while the power is shut off.
【
5-1-1. Internal Speed Variation
】
①
Set the SW1-2 OFF to effect the internal speed variation.
②
Speed can be varied by Rotary Switch(SW2) in 10steps.
Speed of the Power Moller can be varied either internally by internal Rotary
Switch (SW2) or externally by analog voltage input(CN2).
Motor direction can be changed by SW1-3 or CN2-2.
→
See section 5-2
※
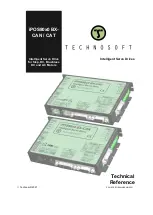
he setting differs according to the Power Moller model. Check the model from the
circular label put on the Power Moller end housing.
Example
P M 4 8 6 F E - 6 0 - 4 0 0 - D - 0 2 4
【
5-1-2. External Speed Variation
】
①
Set the SW1-2 ON to effect the external speed variation.
②
Inject and vary the analog voltage between 0V and 10V to CN2-3 to vary the motor
speed in 20steps.
※
Max 2mA current is consumed at CN2-3.
※
The analog voltage input should not exceed 10V. Its 0V should be common to
the Power Voltage.
(
2
)
(
3
)
7mm
0.5
~
1.5mm
2
DC 24V
(
AWG:20
~
14
)
(
AWG:28
~
20
)
DC 0V
7mm
0.08
~
0.5mm
2
4. Function
No
Function
ON
OFF
Default
Remarks
1
2
3
4
5
Thermister / Low Voltage / Back EMF
Auto Reset / Manual Reset
Manual
Automatic
O N
See section8
See section 5-1
See section 9
See section 5-2
See section 6
O F F
Speed variation
External
Internal
O F F
O F F
O F F
Direction
See section 5-2
Error signal
Discharged in
normal status
Discharged in
error stats
Brake Type
Servo
Dynamic
6
See section 6
※
※
In case of CBM-105FN; Default setting on SW1-6 is OFF
In case of CBM-105PN; Default setting on SW1-6 is ON
Error signal output type
PNP
NPN
①
Dip Switch (SW1)
2
1
0V
DC24V
⑤
Power Connector (CN1)
⑥
SW2
10 index speed setting
(
※
20 index speed setting on external speed function
)
5
4
3
2
1
Function
See section 7
Motor pulse signal output
See section 6
Error signal output
See section 5-1
External speed variation
See section 5-2
Motor turning direction
See section 5
Motor RUN/STOP
④
Control Connector (CN2)
1
2
Powered and functions normally
Indicates type of error
Green
Remarks
Remarks
Status
Color
Red
③
LED
See section8
Ensure the following before operating the product
Model
Model
Model nomenclature
Example
PM486FE-60-400-D-024
Nominal Speed
・
Range of speed variation differs according to the Power Moller model.
Check the nominal speed of the model from the circular label put on its end
housing.
V-IN
RUN
DIR
123
RUN
V-IN
RUN
DIR
123
STOP
③
LED2
①
SW1
③
LED1
⑥
SW2
④
CN2
⑤
CN1
SW2
SW1
LED1
LED2
4
3
2
1
0
9
8
7
6
5
SPEED
6
5
4
0 1
9
8
7
2
3
24V
1.RUN
3.V-IN
2.DIR
4.ERR
5.PLS
0V
CBM-105F□
4. E/N-OUT
2. INT/EXT
3. DIRECTION
1. AUTO/MANU
ERR/PWR
5. SV
-BRK
6. N/P-OUT
VR1-ACC
VR2-DEC
VR2
VR1
4
3
2
1
DEC
ACC
CBM-105
②
VR1
②
VR2
SW1-6
ON
OFF
Error signal output
PNP Open collector
NPN Open collector
※
※
※
0V to CN2-1(Run/Stop) and CN2-2
(CW/CCW) should be common to the power
voltage.(Connector current capacity is 4A)
Analog voltage input to CN2-3(External
voltage) should not exceed 10V. 0V should
be common to the power voltage.
CN2-4(Error signal output) can be selected
by SW1-6.
Connecting with external device such as
Relay Coil requires apply coil surge
absorption type or add protective devices to
protect from surge otherwise remote
OUTPUT in CBM-105 may be damaged by
back EMF when output signal is changed.
Motor Pulse signal from CN2-5 is NPN Open
collector.
※
※
※
※
※
※
Connecting with external device such as
Relay Coil requires apply coil surge
absorption
type or add protective devices to protect
from surge otherwise remote
OUTPUT in CBM-105 may be damaged by
back EMF when output signal is changed.
Default
Remarks
See section 5-3
Min
Min
Min
1
Acceleration from
RUN signal
0 sec
2
Deceleration from
STOP signal
0 sec
2.5 sec
2.5 sec
②
Potentiometer (VR)
(
To the CCW end
)
(
To the CW end
)
Max


