Engine Control System (4HK1) 1A-373
Recording from each fuel injector
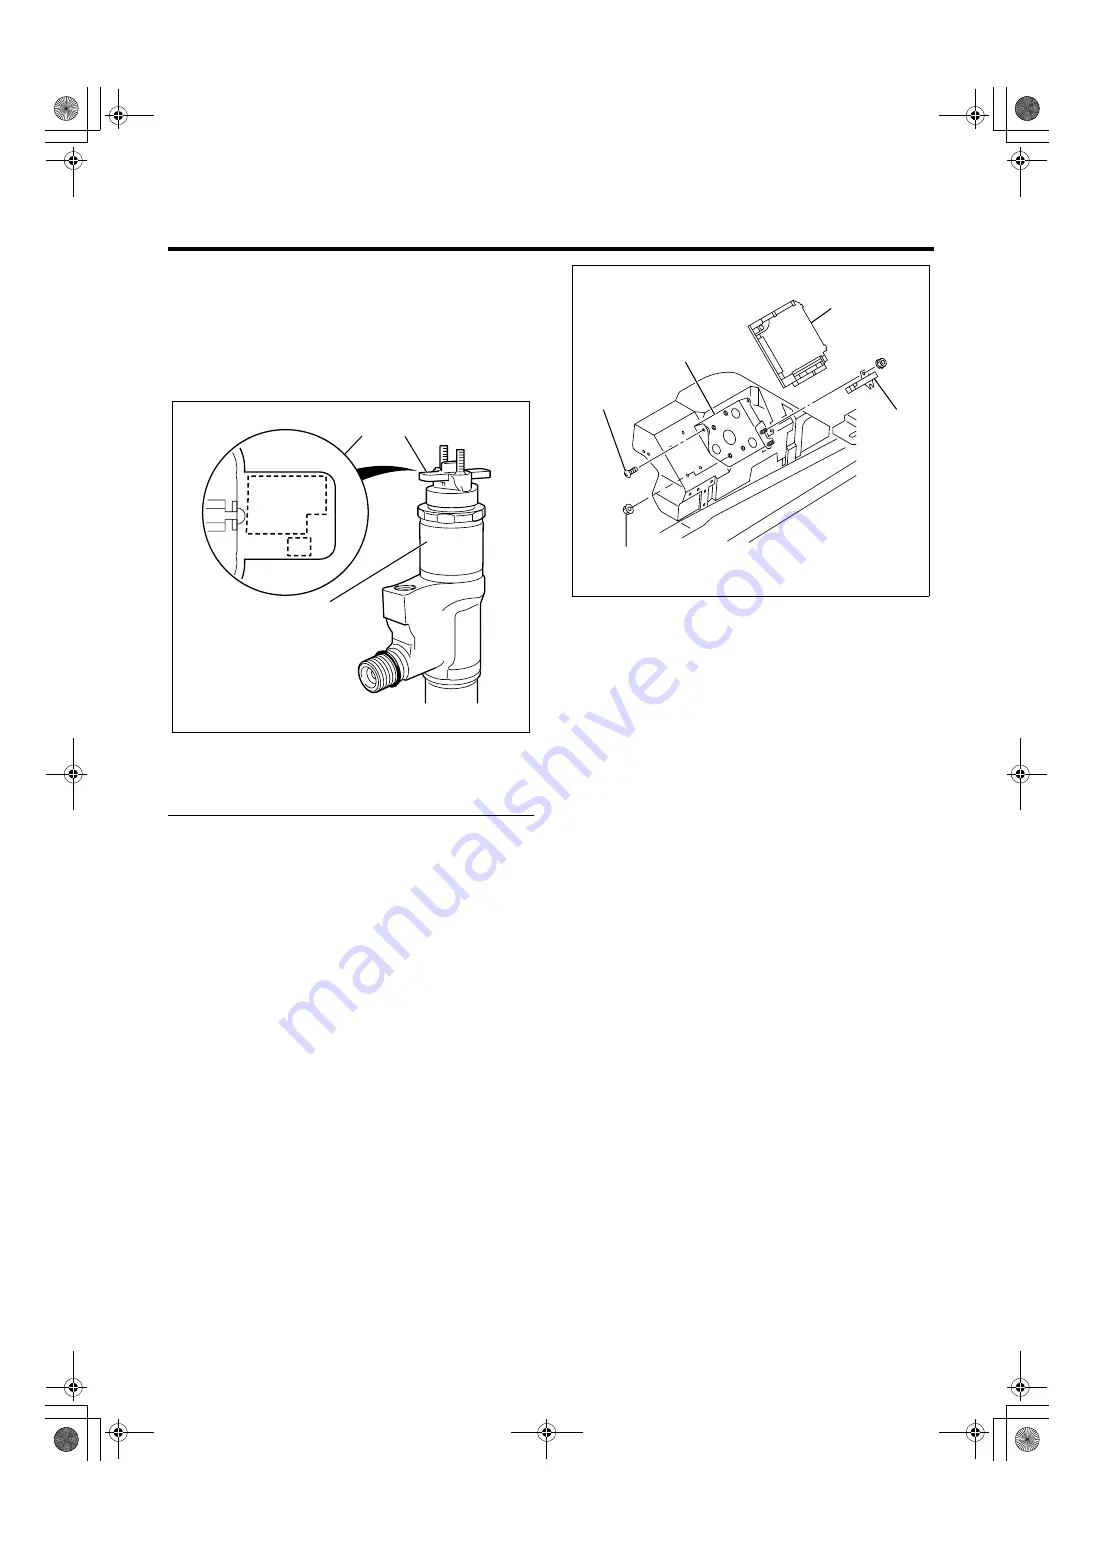
1. Remove the cylinder head cover. Refer to Fuel
Injector Replacement.
2. Record 24 figures of each fuel injector ID plate.
The correct order for the fuel injector ID codes of
the following illustration is as follows:
64 DA A5 05 2F 4C 0F 36 FA 17 25 8C
Legend
1. Fuel injector ID plate
2. Fuel injector ID code
3. Fuel injector
B. Removal and Installation
Removal Procedure
1. Disconnect the negative battery cable.
2. Disconnect the dropping resistor harness
connector.
3. Disconnect the ECM harness connectors.
4. Remove the dropping resistor (2).
5. Loosen the nuts (3).
6. Remove the ECM with bracket (5) from side cover.
7. Loosen the bolts (4) and remove the ECM (1).
Installation Procedure
1. Install the ECM (1) to the bracket (5) and tighten
the ECM fixing bolts(4).
2. Install the ECM with bracket (5) to the engine side
cover and tighten the nuts (3).
3. Reconnect the dropping resistor (2).
4. Reconnect the ECM harness connector.
5. Reconnect the dropping resistor harness
connector.
6. Reconnect the negative battery cable.
C. Programming Software and Calibrations
Program latest software/ calibrations if released. Refer
to Service Programming System (SPS) Description and
SPS (Remote Procedure) or SPS (Pass-Thru
Procedure) in this section.
D-1. Programming Fuel Injector ID Codes and VIN
(Except Euro 4 specification)
If the old ECM cannot be communicated with a scan
tool, go to next procedure.
1. Install a scan tool.
2. Turn ON the ignition, with the engine OFF.
3. Select Diagnostics > appropriate vehicle
identification > 4HK1 > Programming > Download
ID Code.
4. Select VIN programming. Verify the VIN on the
screen if programmed at previously described
SPS. If not programmed or incorrect VIN, input
correct VIN. In order to get programming approval,
the on-screen displays a message to user. Get
programming approval from the TIS 2000 using
the following procedure:
a. Connect a scan tool to the terminal that
installed TIS 2000 with the latest software and
the hardware key is plugged into port.
b. Turn ON the scan tool and keep at title screen.
LNW76ESH002601
1
2
3
2F4C
64DA A505
0F36
0000
FA17 25 00
8C
LNW71ASH003501
5
1
2
4
3
LG4HKED-WE-0871.book 373
ページ
2007年11月29日 木曜日 午後6時29分


