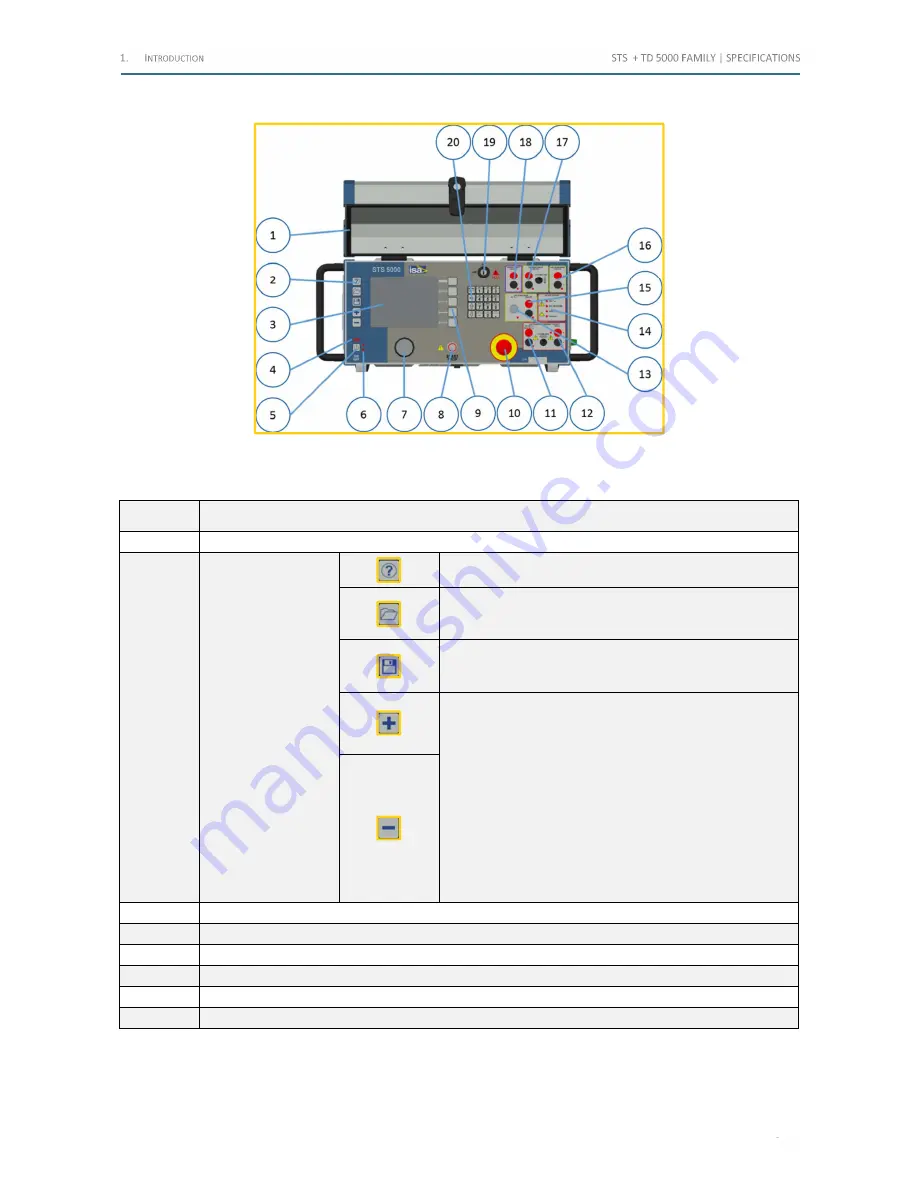
The following image exhibits the front panel:
Figure 2 - Test set front panel
The following table lists all the elements of the front panel:
ITEM
Component
1
Cover
2
Pushbuttons
Help. Pressing it, the screen displays the information
related to the test performed
Open file. It allows to access the list of saved test results
(the list can be located in the internal memory or on the
USB key)
Save file. It allows saving the test result. Pressing it, it is
possible to access the list of saved test results (the list can
be located in the internal memory or on the USB key)
Increment and decrement buttons. To input a value, select
the field, and then:
•
Edit the desired value, via the keypad
•
Increment or decrement the value, pressing the above
pushbuttons
•
Rotate the knob clockwise (increment) or anti-
clockwise (decrement)
•
Press the keyboard up key to increment, and the
keyboard down key to decrement
The amount of the increment or decrement is: ten units, for
the plus and minus keys; one unit, for the knob, and one
tenth, for the up-down arrows
3
Display
4
Power-on light: it is ON when the test set is operating
5
Power ON and OFF push-button
6
Mains lights: they turn on very shortly as the test set is connected to the mains
7
MENU control knob, with switch
8
Test START and STOP push-button
Table 9 - Frontal panel components (1/2)
Shop for Power Metering products online at:
1.877.766.5412
www.
PowerMeterStore
.ca


