12
GETTING STARTED
This section explains how to quickly begin using the drum machine
module. For more information on the module, please read the iDM02
Drum Machine Reference Manual.
•
While the drum machine is powered on, turn the volume up on the
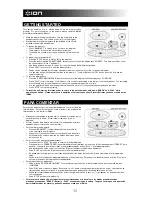
headphones half way. The volume control is (2) on the diagram.
•
Striking the electronic drum pads with the included sticks should
produce sounds in the headphones.
•
To change the drum kit:
o
Press “DRUM SET” in section (6) as shown on the diagram.
o
The display (1) will show the current drumset number.
o
To change the sounds, press the up and down arrows in section
(3).
•
To play along to preset patterns:
o
Press the “STOP” button in section (3) on the diagram.
o
Press the button labeled “PRESET/USER” listed in section (4) until the display says “PRESET”. The display will then show
the current preset (‘Rock 1’ by default).
o
Use the up and down arrows in section (3) to shuffle through the 50 different patterns.
o
Press “PLAY” in section (3) to hear the preset pattern.
o
Tempo can be adjusted by the tempo up and down buttons in section (5) shown on the above diagram.
o
You can play along with the preset samples on the drum kit. To add a fill press the “FILL” button in section (3) while the
sample is playing.
•
To record a drum pattern:
o
Press the “PERFORM/COMPOSE” button in section (4) of the diagram until the display says “COMPOSE”.
o
Press “PLAY” to start recording. You will hear a click sound corresponding to the tempo of the current pattern. The recording
will continually loop through the pattern so that you may add drum parts one at a time.
o
You can enter drum beats by pressing the drum buttons in section (7) or by hitting the drum pads with the sticks.
o
Press “STOP” to stop the recording.
•
To reset the unit, erasing all stored values to return to the default modes, hold down “ERASE” and “PLAY” while
powering the unit on. Please note that this operation will also erase any User Presets/Patterns you have created on the
iDM02.
PARA COMENZAR
Esta sección explica cómo comenzar rápidamente a usar el módulo de
caja de ritmos. Para más información sobre el módulo, lea el Manual de
referencia de la caja de ritmos iDM02.
•
Mientras está encendida la caja de ritmos, aumente el volumen de los
auriculares hasta la mitad. El control del volumen es (2) en el
diagrama.
•
Al tocar los pads de la batería electrónica con las baquetas incluidas
se deben producir sonidos en los auriculares.
•
Para cambiar el kit de batería:
o
Presione “DRUM SET” (conjunto de batería) en la sección (6)
como se muestra en el diagrama.
o
La pantalla (1) mostrará el número actual del conjunto de batería.
o
Para cambiar los sonidos, presione las flechas de arriba y abajo
en la sección (3).
•
Para tocar con los patrones predeterminados:
o
Presione el botón “STOP” (parar) en la sección (3) en del diagrama.
o
Presione el botón “PRESET/USER” (Usuario/predeterminado) indicado en la sección (4) hasta que aparezca “PRESET” en la
pantalla. La pantalla mostrará entonces el valor predeterminado actual (“Rock 1” es el predeterminado).
o
Use las flechas de arriba y abajo en la sección (3) para visualizar los 50 patrones diferentes.
o
Pulse “PLAY” en la sección (3) para escuchar el patrón predeterminado.
o
Se puede ajustar el tempo con los botones de arriba/abajo de tempo de la sección (5) que se muestra en el diagrama de
arriba.
o
Puede tocar con las muestras predeterminadas en el kit de la batería. Para añadir un llenado presione el botón “FILL” en la
sección (3) mientras la muestra se está reproduciendo.
•
Para grabar un patrón de batería:
o
Pulse el botón “PERFORM/COMPOSE” (Tocar/componer) de la sección (4) del diagrama hasta que la pantalla indique
“COMPOSE”.
o
Pulse PLAY para comenzar a grabar. Escuchará un “clic” que le corresponde al tempo del patrón actual. La grabación se
reproducirá de manera continua a lo largo del patrón para que pueda añadir partes de batería una por una.
o
Puede entrar ritmos de batería presionando los botones de la batería en la sección (7) o golpeando los pads de la batería
con las baquetas.
o
Pulse “STOP” para parar la grabación.
•
Para resetear la unidad y borrar todos los valores almacenados a fin de volver a los modos predeterminados,
mantenga presionados “ERASE” (Borrar) y “PLAY” mientras enciende la unidad. Tenga en cuenta que esta operación
borra también todos los presets y patrones que haya creado en el iDM02.


