background image

Connecting Your FireWire

®

 Peerless Drive System


To connect your FireWire Peerless Drive System, first 

determine your type of FireWire connection

 (either 6-

pin or 4-pin). Then use the instructions for either 

Connecting Your Peerless Drive System to a 6-pin FireWire 

Connector

 or 

Connecting Your Peerless Drive System to a 4-pin FireWire Connector

 as appropriate. 

Determining Your Type of FireWire Connection


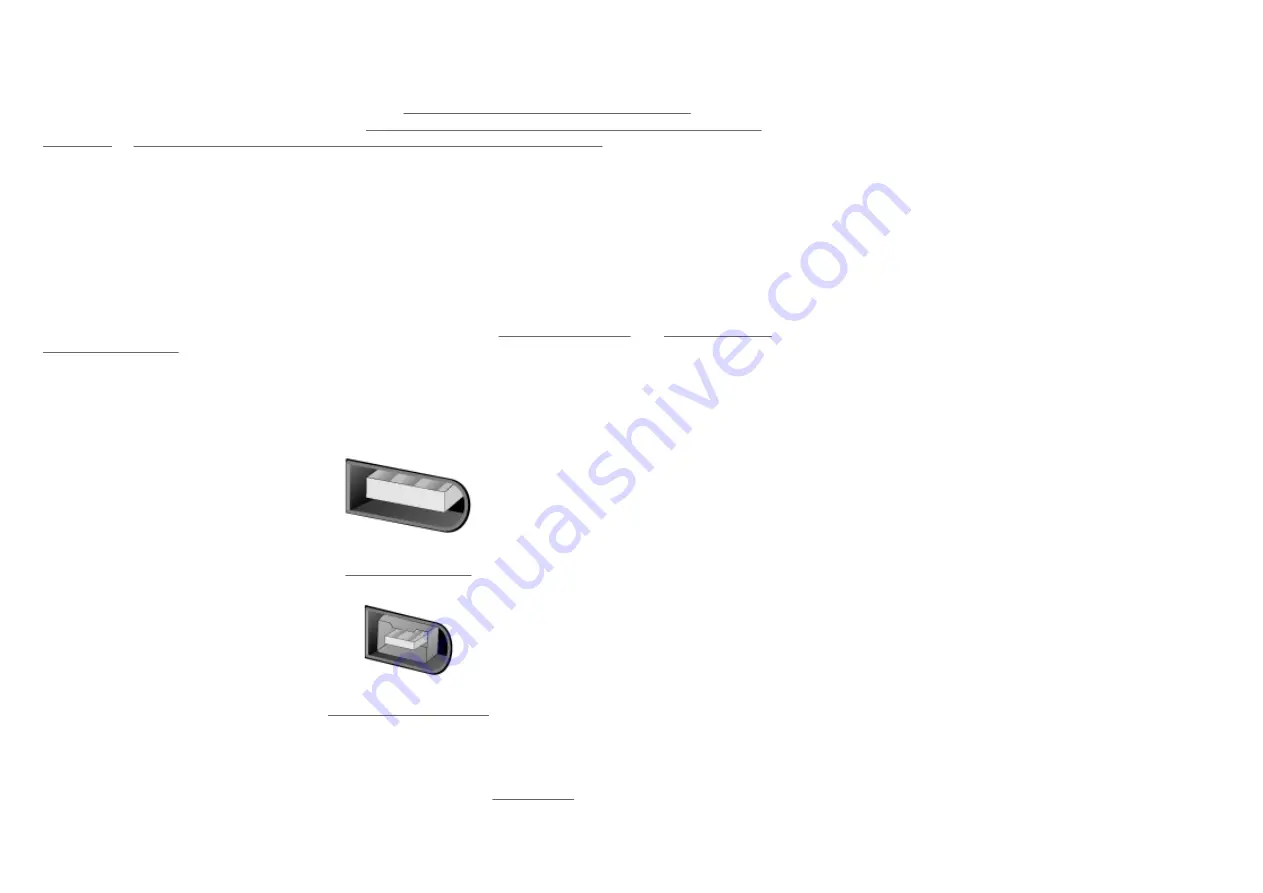
There are two types of FireWire connectors. Most desktop computers have 6-pin FireWire connectors and 
most laptop computers have 4-pin FireWire connectors (iLink

®

). Some desktops have both. The 6-pin 

connection is the preferred connection. Computers that have 6-pin devices can supply power to some 
devices. Determine the type of connector that is on your computer. Click on the picture of your connector to 
continue to the next step.  

CAUTION!

 If you are connecting multiple FireWire devices, read the 

FireWire Guidelines

 and 

Troubleshooting 

for FireWire Devices

 sections in this User's Manual for important power information to prevent potential 

system or device damage.  

The FireWire cable, attached to the Peerless drive module, can be connected to the computer while the 
computer is running.  


6-pin FireWire Port 


4-pin FireWire iLink Port


Connecting Your Peerless Drive System to a 6-pin FireWire Connector


1.

If you have not already installed the IomegaWare

 software, 

install it now

 and shut down your 

computer. (Even though the Peerless drive system is plug-and-play, shutting down your computer the 
first time you connect the drive makes it easier for the computer to recognize the drive system when 
you restart.) 

Summary of Contents for Peerless

Page 1: ...s and or other countries Certain other product names brand names and company names may be trademarks or designations of their respective owners Version 1 0 6 04 30 01 Getting Started This section help...

Page 2: ...tall IomegaWare software before connecting the Peerless drive system to the computer Trust us you will avoid a few frustrating installation problems if you follow our advice here 3 Set up the Iomega P...

Page 3: ...idual installation instructions are given for your operating system Macintosh or Windows In addition instructions for locating the IomegaWare software s help information are outlined below Installing...

Page 4: ...s pushed all the way down 3 Select a language select IomegaWare Software from the Solutions CD menu then select Click to Install to start the software installation 4 Follow the instructions on the scr...

Page 5: ...PC Users IomegaWare software includes complete help information in HTML format You can access IomegaWare help by following these instructions 1 Right click on the Peerless icon in My Computer or Windo...

Page 6: ...the USB Peerless Drive System to your computer 1 If you have not already installed the IomegaWare software install it now and shut down your computer Even though the Peerless drive system is plug and...

Page 7: ...to the documentation for your computer For the best performance connect the Peerless drive system to a built in USB port on the computer USB ports usually come in pairs sometimes four or more ports ma...

Page 8: ...m to your computer Look closely at the cable ends for correct orientation when connecting CAUTION Do not use any USB cables but the cables provided from Iomega Data loss may result top of page 4 Conne...

Page 9: ...Mac Desktop If the appropriate icon does not appear refer to the section Troubleshooting for USB Drives or see the Iomega Web Support Site at www iomega com support Congratulations l For information...

Page 10: ...es Determine the type of connector that is on your computer Click on the picture of your connector to continue to the next step CAUTION If you are connecting multiple FireWire devices read the FireWir...

Page 11: ...performance connect the Peerless FireWire cable directly to your computer You can use any FireWire port See the FireWire Guidelines for important information Mac 8 6 through 9 X Windows 98 second edit...

Page 12: ...ert the Windows 98 CD ROM disk Insert the Solutions CD that came with the FireWire Peerless Drive System Click OK This message will only appear the first time you connect the FireWire Peerless Drive S...

Page 13: ...Peerless Drive System refer to the Troubleshooting section top of page Connecting Your FireWire Peerless Drive System to a 4 pin FireWire Connector 1 Your FireWire Peerless Drive System does not incl...

Page 14: ...s Manual for your computer or FireWire adapter card For the best performance connect the Peerless FireWire cable directly to your computer You can use either FireWire port The drive system can be conn...

Page 15: ...8 6 through 9 X Windows 98 second edition Windows Me and Windows 2000 After initial installation the drive system can be connected or disconnected while the computer is on To prevent any data loss ej...

Page 16: ...m refer to the Troubleshooting section Peerless Drive System Guidelines If Then If the first time you connect the Peerless FireWire drive to the computer you see the Insert Disk dialog box Please inse...

Page 17: ...therboards may not support all types of USB devices l Microsoft Windows 98 2000 Me l Recommended RAM requirements for your operating system see your OS manual for details l 4X CD ROM drive for softwar...

Page 18: ...ll USB devices decreases as additional USB devices are connected l You can ensure maximum performance by connecting your USB Peerless Drive System directly to one of the USB connections on your comput...

Page 19: ...lete See Installing IomegaWare Software for instructions FireWire Guidelines You can use this section to verify that you have the necessary system requirements to support the FireWire Peerless Drive S...

Page 20: ...ing the interface cable or power cable from the interface module NOTE PC users must stop the FireWire Peerless Drive System first Mac users should select the Peerless icon and use the Put Away command...

Page 21: ...y files to and from the Peerless drive system using the same methods you use for other drives on your computer The following topics are discussed in this section l Inserting Peerless Disks l Ejecting...

Page 22: ...eerless icon and use Put Away from the File menu or drag the Peerless icon to the Trash icon The disk eject button will not eject a Peerless disk that is mounted on the Mac desktop Windows systems Use...

Page 23: ...d from the base station when you shut down your computer remove it and store it in its case Separating the Peerless Base Station To separate the Peerless base from the interface module 1 Eject the Pee...

Page 24: ...g a power failure 1 Disconnect the power cable and interface cable from the interface module 2 Separate the interface module from the base 3 Find the disk eject hole on the base 4 Push a straightened...

Page 25: ...ns the following information 1 Indicates the rate of transfer in megabytes MB s or kilobytes KB s 2 Graphically shows the rate of transfer 3 Indicates the percentage of space used on the disk Using Yo...

Page 26: ...n drag and drop files from any folder on your Desktop to the Peerless drive system l In Windows you can use My Computer or Windows Explorer to select files or folders from your hard drive and drag and...

Page 27: ...lder on your Mac hard disk then open the Tools folder and double click the Tools icon 3 In the main Tools window click on the icon for the disk you want to protect or unprotect 4 Select the Disk Prote...

Page 28: ...r option to change the format type from PC to Mac 6 Click Erase to start formatting the Peerless disk top of page Windows PC Users 1 Insert the disk you want to format into your Peerless base station...

Page 29: ...d a Mac formatted Peerless disk unless special software is installed on the system If you try to use a Mac formatted Peerless disk on a PC that does not have disk exchange software installed you will...

Page 30: ...the outside of the disk General Troubleshooting If you encounter a problem while connecting or using your Peerless drive system check the topics listed below for possible solutions For additional hel...

Page 31: ...t the drive letter you want to assign to each removable device attached to your system by selecting a new drive letter in the pull down menu box below the drive icon 5 Click OK 6 Restart your system f...

Page 32: ...oblem Troubleshooting for Your USB Drive System If you encounter a problem while connecting or using your Peerless drive system check the topics listed below for possible solutions For additional help...

Page 33: ...connections on your computer rather than a USB hub or keyboard 8 If the problem continues there may be an extension conflict on your system Please contact the Iomega web site www iomega com or refer...

Page 34: ...10 Check your BIOS to ensure USB is enabled Refer to your computer s User s Guide or manual for directions NOTE If you disconnect your Iomega USB drive system and reconnect to the same USB port the d...

Page 35: ...ng large amounts of data If you are using a hub to connect several devices to your computer disconnect the other devices and connect the device directly to either of the computer s USB ports Your Iome...

Page 36: ...ines They are designed to help you avoid some of the problems caused by non compliant USB devices If you continue to have problems contact the manufacturer of your laptop computer for additional infor...

Page 37: ...se there are other bus powered devices connected and there is not enough available power for the Iomega FireWire drive system If this condition exists try the following disconnect other FireWire devic...

Page 38: ...e to a FireWire controller chip or other FireWire device on your computer system that is not SBP 2 compliant Try the following suggestions l Carefully follow the FireWire guidelines They are designed...

Page 39: ...000 to use the Iomega FireWire Peerless Drive System CAUTION FireWire devices including controller chips cables cards and peripherals that do not comply with the FireWire specification may cause syste...

Reviews: