


10
To use IX66 Internet Gate with static IP-addressing on LAN
If you want your IX66 Internet Gate to be part of an existing network that uses static IP addresses
you can change the IP address of your Internet Gate’s LAN port (ET1) with the front panel keys:
1.
Press and hold
SET
pressed for 3 seconds, to enter setup mode
AD
CFG
DHP RST
LQ
TX
RX
2. Press
SELECT
once, so CFG is lit
AD
CFG
DHP RST
LQ
TX
RX
3. Press
SET
.
The first 3 digits of the IP address are shown and the first digit flashes
4. Press
ALT CFG
repeatedly, until the correct digit is displayed
AD
CFG DHP RST
LQ
TX
RX
5. Press
SELECT
: the next digit flashes, and can be changed using
ALT CFG
AD
CFG DHP RST
LQ
TX
RX
6. Use
SELECT
to step through all digits of the IP address.
Use
SET
to step back to previous digit if you have made any error.
Use
ALT CFG
to change the value of the flashing digit.
You can cancel the IP address set-up, without saving any changes, by
pressing the
SELECT
key and holding it pressed for 2 seconds
7. After stepping through all digits of the IP address, the subnet mask appears
and can be modified. Each subnet mask number can only be set to values
255, 254, 252, 248, 240, 224, 192, 128, or 0
AD
CFG DHP RST
LQ
TX
RX
8. Press
ALT CFG
repeatedly, until the correct value is displayed.
Press
SELECT
to step to the next subnet mask number.
9. The IP address and mask is stored after all digits have been set.
AD CFG
DHP
RST
LQ
TX
RX
If the display displays “no” after setting an IP address, it means that there is already someone using
that IP address on the LAN. Two units can not share the same IP address on the same LAN. You
must select another IP address for your IX66 Internet gate. Redo the settings from step 1 again.
You can also change the LAN IP address of your IX66 Internet Gate by changing the settings for ET1
in the built-in Network Settings page (see picture on page 12). Enter the desired IP address and
Network mask, and de-select DHCP. ET1 shall be used as “inside”.
NOTE:
The steps described here must be performed on all
PC-s of the LAN.
(The steps described here are for Windows
98. Other operating systems have similar menues, though
accessing them might be done differently.)
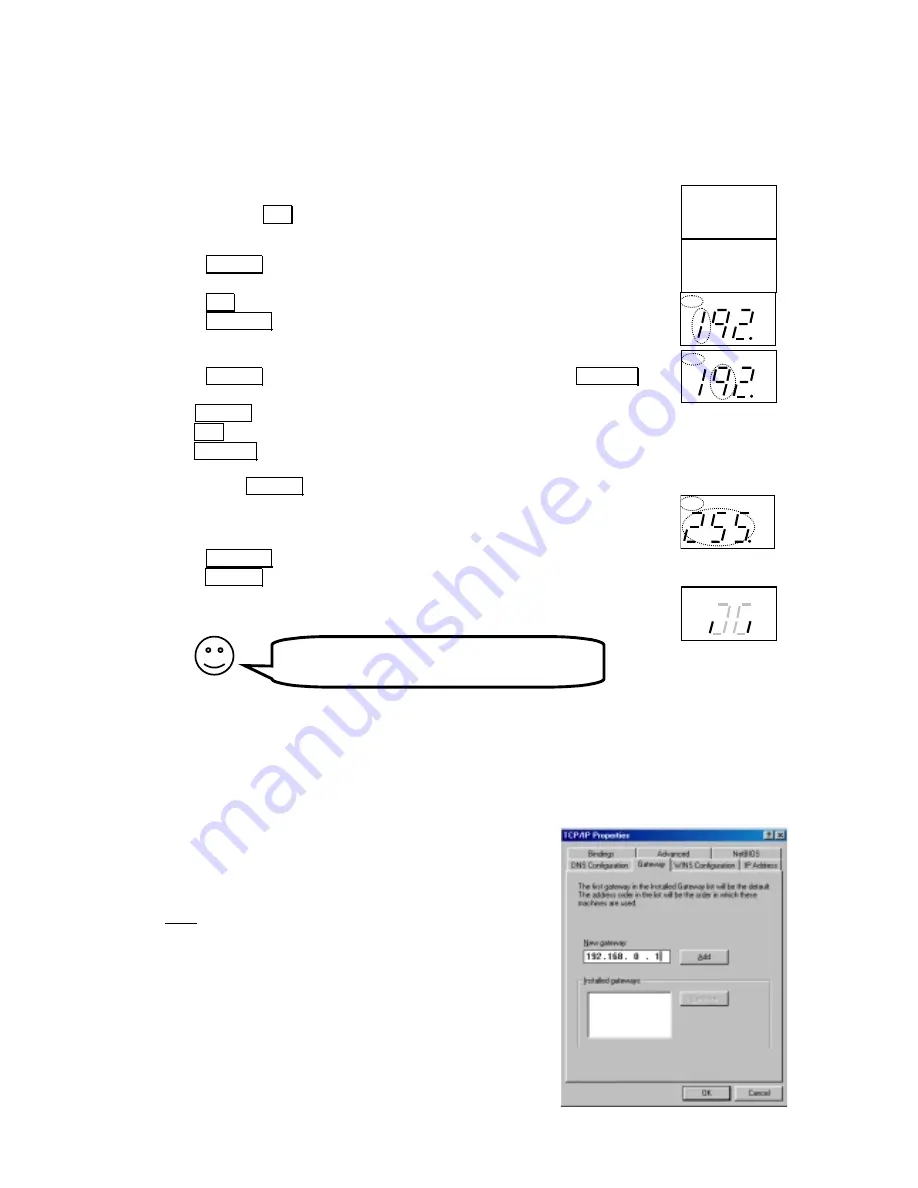
1. Rightclick on the ”
Network
” icon on your desktop, and
select ”
Properties
”.
2. Click on ”
TCP/IP
” for your network card on the list that
appears.
3. Click on ”
Properties
”, select ”
Gateway
”.
4. Enter the IP-address of your IX66 Internet Gate (same value
as set at steps 3-6 above), and click ”
Add
”.
To just read the current LAN IP address,
select AD instead of CFG in step 2 above.