


01-9932-00 ViewBladder 10 User Guide Revision 2 7
6.
ViewBladder 10 User Controls
The User Interface Section on the right side of the screen contains five tabs:
Auto Scan, Adv.
Scan, Patient, Settings,
and
Measure.
Each of these tabs has its own page in this user guide.
Video help and embedded help are also available for each of these tabs. To access
Video Help
,
select a tab and then use the
Help
pull down in the upper left corner of SeeMore and select
Video Help
. To access embedded help, select
Help
in the upper left corner of SeeMore and
select
Help Topics
.
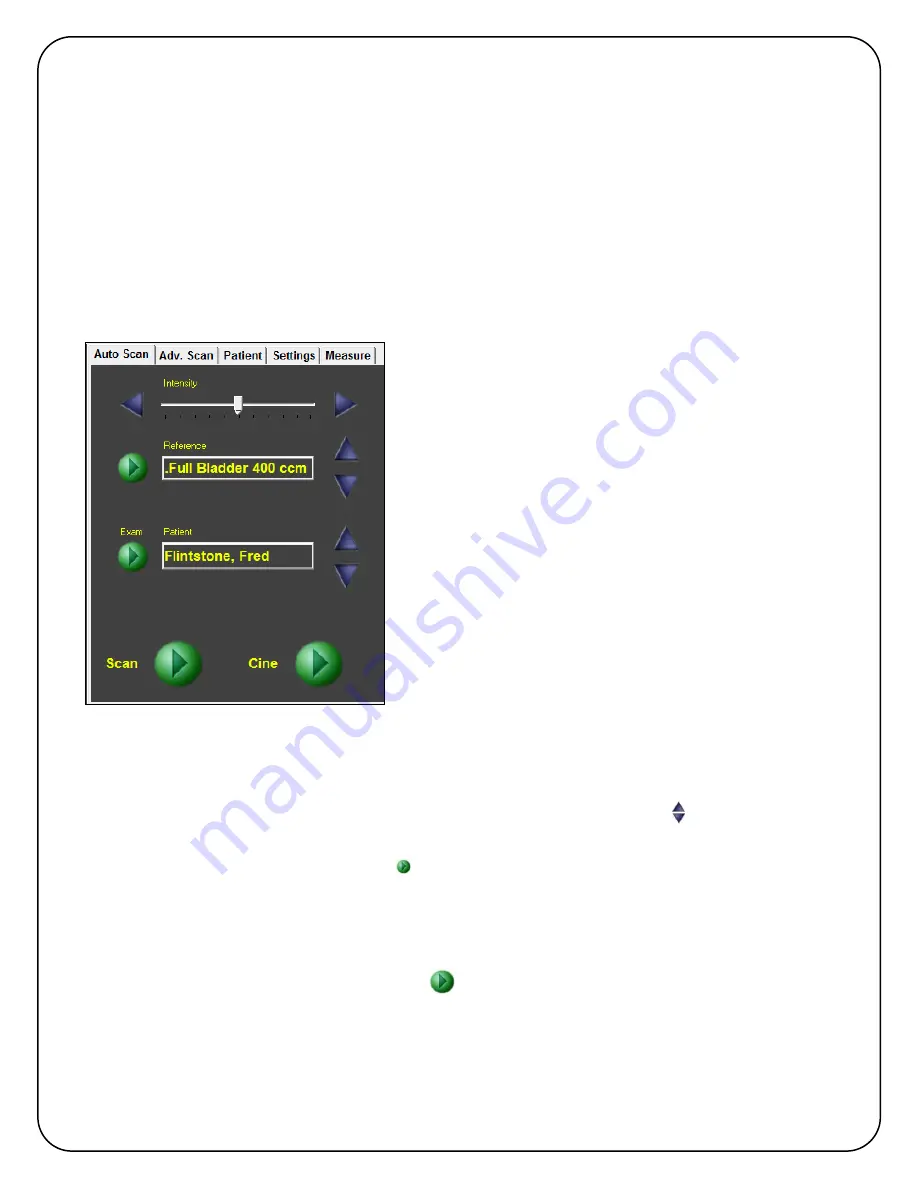
6.1. Auto Scan Tab
The
Auto Scan
tab is the default view. You may adjust intensity, select and display reference
images, and start an exam for a specific patient.
È
Intensity
adjusts the brightness of the image. It is
typically best to leave the slider in the center of the
range.
Reference
images can be displayed using the green
play button or the up and down blue arrows. By
comparing your patient’s bladder to one of the reference
images you can easily asses the state of your patient to
be full, empty or partial
The Patient Exam automatically collects and saves
images, volume measurement data, and a single-page
report.
The following steps will guide you through acquiring a
Bladder Volume using three distance measurements.
First you will acquire a transverse image of the bladder
to measure the height and width of the bladder.
Followed by a mid-sagittal scan to measure the
thickness.
In the Measure tab you can select from either Bladder Volume 3D or Bladder Volume. Bladder
Volume displays the volume using only the height and width from the transverse scan. If you are
performing a two dimension Bladder Volume measurement, you will skip steps 7, 8, and 9.
1.
From the Auto Scan tab, press on the up and down Patient Exam arrows to scroll through
the Patient list to select a specific patient.
2.
Press the green Patient Exam button to begin the exam. The button will change to yellow
and then inactive grey while you are in the exam.
3.
Follow the on-screen instructions to acquire the transverse image. Position the probe on the
centerline of the patient’s stomach just above the pubic bone with the probe’s blue button
pointed to the patient’s right side. Start the scan by briefly pressing either the blue button on
the probe or the large green Scan button on the screen.
4.
Make minor adjustments to probe position to obtain the largest, most optimal bladder image.
5.
Freeze the image by pressing the blue button on the probe or the yellow pause Scan button
on the screen.


