


01-9932-00 ViewBladder 10 User Guide Revision 2 9
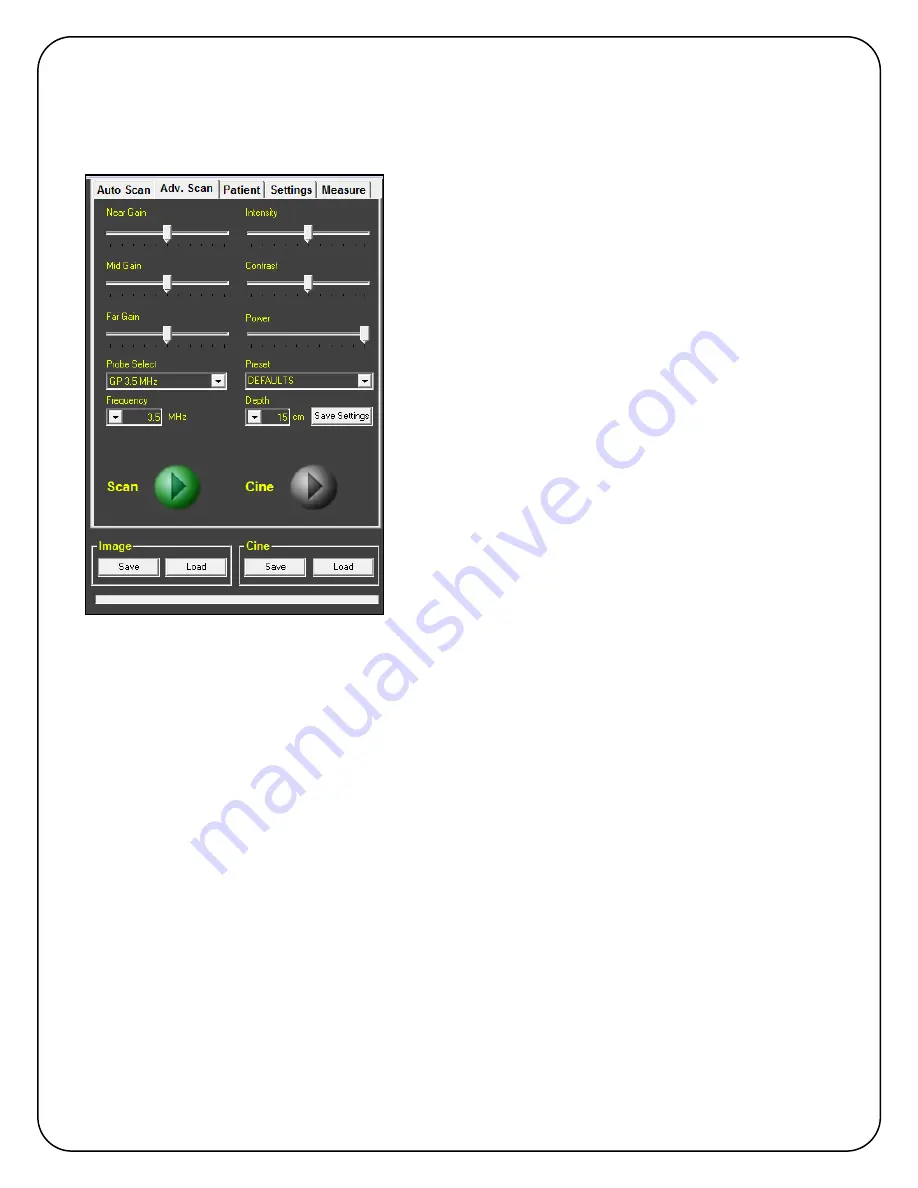
6.2. Advanced Scan Tab
The
Adv. Scan
tab provides the complete ultrasound controls. This tab is typically only used if
you are using ViewBladder 10 to analyze abdominal structures other than the bladder.
È
In the right hand column of sliders you can adjust the
Intensity
and
Contrast
. Typically you will leave these in
the center.
Power
controls the probe’s pulse power.
Typically you will leave this at the maximum. If the
displayed image is saturated, you may get a better
image by lowering the pulse power.
In the left hand column of sliders you can adjust the
three gains. The typical starting point is with all three
gains in the center.
Near Gain
adjusts the first third of
the image.
Mid Gain
adjusts the middle third, and
Far
Gain
the last third. If the technique of starting with all
gains in the middle doesn’t seem to give you a good
image, adjust all gains to the minimum (left), move pulse
power to maximum (right) and intensity and contrast in
the middle. Now raise the
Near Gain
until the first third
of the image is just below saturation. Now, similarly,
adjust
Mid Gain
and then the
Far Gain
.
Probe Select
identifies all connected probes and
enables you to select which probe you would like to use.
Preset
enables you to select from an included preset of
ultrasound parameters.
A specific preset contains: Intensity, Contrast, Near Gain, Mid Gain, Far Gain, Frequency, Depth,
and Power. The list of available presets changes based on the probe that is selected. To save a
new preset, type a new name over an existing preset name (no spaces allowed) and select
Save
Settings
. To delete a preset, select the preset name and then press
delete
on the keyboard.
Frequency
allows you to select from available pulse frequencies. Pulse frequencies are probe
specific, and as such, different probes may have different pulse frequencies. As image resolution
is better at higher frequencies, always use the highest pulse frequency that allows you to scan to
your desired depth.
Depth
changes the displayed depth range. Depth ranges are dependent on the probe selected
and the selected pulse frequency.
Scan
starts and stops the scan. The scan button on the probe and the keyboard’s space bar will
also start and stop the scan.
ViewBladder 10 automatically saves the most recent frames. After stopping a scan the most
recent frames can be replayed by pressing the
Cine
play button. The number of frames that are
automatically saved in the Cine frames buffer can be set in the
Settings
tab.
Image Save
stores the current displayed frame of native format scan data and also a jpeg with
measurements and annotations.
Image Load
recalls a saved frame of native format scan data.
Cine Save
stores the buffer of most recent scan frames.
Cine Load
recalls a previously saved
buffer of the most recent scanned frames.


