background image

1.1

1.2

ORACLE WIRELESS KEYPAD (OWK) INSTALLATION


                              PARTS SUPPLIED

- 15 -

  INITIALIZING A NEW MASTER PIN NUMBER

INSTALLING THE OWK

- 2 -

GENERAL INFORMATION

The  beeping  you  hear  is  the  OWK  prompting  you  to  enter  a  new 
Master Pin Number. 
 
On the Keypad, press: 
 
Followed by your four digit Master PIN Number (for example): 
 
 
A  tone  indicates  that  the  unit  has  accepted  your  Master  PIN 
Number. 
 
Note:         Is a ‘Cancel’ button to cancel any call or key sequence.


1 - Oracle Wireless Keypad (OWK) 
1 – OWK Mounting Kit which includes: 

4 – ¼ x 1 Steel Screws 
4 – ¼ Washers 
4 – ¼ Lock Nuts 

4 – 8-32 X 1 5/8 Black Socket Assembly Screws 
1 – Hex Key 


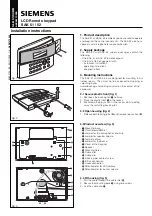
The Oracle Wireless Keypad Unit has been designed specifically for 
easy  installation.  After  determining  where  you  want  the  Wireless 
Keypad  Unit (OWK) to be mounted, just fasten the back panel to a 
post or solid surface, using the included OWK mounting kit, making 
sure that is within easy reach of a visitor.  
 
Place four ‘AA’ batteries in the OWK’s battery pack. You will hear a 
periodic low-volume beep, indicating that the unit is operational and 
ready to be programmed with your secure master PIN number.  

For 

longer  battery  life  and  better  functionality,  use  lithium  ‘AA’ 
batteries. 

 
Install  the  front  of  the  Wireless  Keypad  Unit  onto  the  already 
installed  mounting  plate,  using  the  included  Assembly  screws  and 
hex key provided.


Utilizing  Universal's  newest  wireless  protocols,  this  keypad  product  line  is 
able  to  meet  and  exceed  the  most  stringent  security  and  environmental 
requirements.  
Ultra  long  Range, Low  Power  Usage  and  its  Two  Way  design,  which 
provides  Confirmation  Feedback  of  Receiver  Action  make  this  system  the 
most robust available. 

#

*

1 2 3 4

# #

Sample Configuration 3:  

Open, Close Gate and Verify Gate Status 
  

Use this configuration when you wish to use the Reporter Gate System to open and 
close your gate and check the gate’s actual status, connecting the Gate Controller 
to a limit switch or external gate status indicator. 
 
Enable or disable the Auto-close feature on your Automatic Gate Opener. 
 
Connect Reporter Gate Controller Contacts 7 and 8 to “Strike Open”, “Open Only”, 
“Remote”  or  a  similarly  named  contact  pair  on  your  Automatic  Gate  Opener.

Please refer to your product-specific manual for wiring information. 

 
Connect Contact 2 to Ground, COM, or (-) on your Automatic Gate Opener. 
 
Flip Gate Controller Dipswitch #3 to the UP position to enable status checking. 
 
If  your  Automatic  Gate  Opener  has  a  “Close”  or  “Close  Only”  contact  pair  (e.g. 
connecting  like  a  3-button  station),  connect  Contacts  5  and  6  to  the  “Close” 
contacts and flip Gate Controller Dipswitch #5 to the UP position. 
 
If  desired,  enable  Auto-close  on  the  Gate  Controller  by  flipping  Gate  Controller 
Dipswitch #6 to the UP position. If you use this feature, disable auto-close on your 
Automatic Gate Opener. 
 
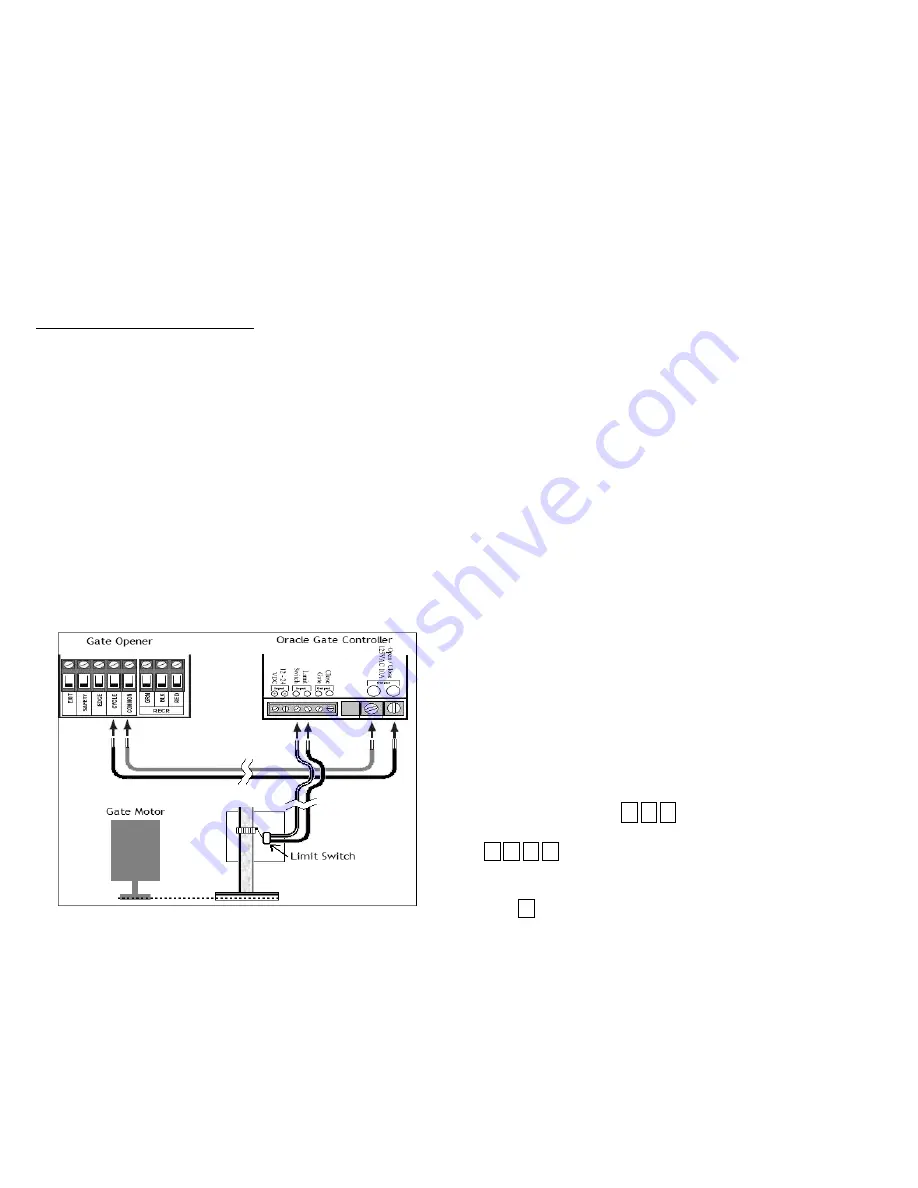
Connect terminals #3 and #4 across the “Gate Closed” limit switch.  Polarity does 
not matter. 

Model OWK

9/6/2007

Patents Pending

Summary of Contents for Oracle OWK250

Page 1: ...I based on the list of handling fees shown above Please note that you may need to send multiple units for warranty service testing and upgrading though only the applicable fee for handling the failed unit s will be charged Please allow 2 4 weeks for service and return shipping If an EXPEDITED repair replacement is requested a 100 surcharge applies In this case please write EXPEDITED after the RA n...

Page 2: ...the Gate Controller If the Gate Controller is 2 3 or 4 make sure that the corresponding ID is set with dipswitches 1 2 in the Gate Controller See Basic Gate Control Unit Installation I need the Manufacturer s Reset Code to reset my Wireless Keypad Unit The Wireless Keypad Unit s serial number is printed on the inside of the Wireless Keypad Unit s mounting plate Call our Product Support staff at 88...

Page 3: ...newest wireless protocols this keypad product line is able to meet and exceed the most stringent security and environmental requirements Ultra long Range Low Power Usage and its Two Way design which provides Confirmation Feedback of Receiver Action make this system the most robust available 1 2 3 4 Sample Configuration 3 Open Close Gate and Verify Gate Status Use this configuration when you wish t...

Page 4: ... or a magnetic loop Enable the Auto close feature on your Automatic Gate Opener Connect the Reporter Gate Controller as shown in the Basic Gate Controller Installation diagram Please refer to your product specific manual for wiring information On the Reporter Intercom disable gate status checking as described above Sample Configuration 2 Wiring to separate OPEN and CLOSE terminals Use this configu...

Page 5: ...an proceed to the next step For additional GCU s repeat the process until all GCU s have been successfully activated Note You can now assemble the GCU by snapping the box shell back onto the unit 1 4 Selecting Gate Controller ON Time For most connections to an Automatic Gate Opener the default setting of second is best However for connection to yard lights cameras etc you may wish to adjust how lo...

Page 6: ... From left to right Gate Controller Terminals are Optional power input 9Vto 24VDC Make sure that your gate s DC power supply Ground is wired to terminal 2 Ground or Common terminal Limit switch input A Wire such that when the limit switch is closed terminal 4 is shorted to terminal 3 Limit switch input B Wire such that when the limit switch is closed terminal 4 is shorted to terminal 3 Secondary R...

Page 7: ...l functions enabled Enabling Power save Mode can extend the battery life up to two years Enable OWK Learn Mode PIN 05 Add User Level PIN numbers PIN 9 PIN Add User Level PIN numbers w GCU restrict PIN 9 PIN 1 4 Add a Temporary PIN number PIN 51 PIN Add a Temporary PIN number w GCU restrict PIN 51 PIN 1 4 Removing PIN numbers PIN 7 PIN Change the Master PIN number PIN 09 PIN OWK Brightness Control ...

Page 8: ...xit Party Mode cycle the gate by entering a PIN number or by pressing the button on a Remote or Intercom If you are going to be gone for an extended length of time the unit can be put into a Deep Sleep mode to conserve power and will only respond to the Master PIN number being entered on the Wireless Keypad Unit To enter Vacation Mode Enter the Master PIN Number for example Followed by To exit Vac...

Page 9: ... 8 9 Model OWK 9 6 2007 Patents Pending ...

Page 10: ... 12 9 Model OWK 9 6 2007 Patents Pending ...

Page 11: ... 10 11 Model OWK 9 6 2007 Patents Pending ...

Page 12: ...Model OWK 9 6 2007 Patents Pending ...

Page 13: ...Model OWK 9 6 2007 Patents Pending ...

Page 14: ...Model OWK 9 6 2007 Patents Pending ...

Page 15: ...Model OWK 9 6 2007 Patents Pending ...

Page 16: ...Model OWK 9 6 2007 Patents Pending ...

Page 17: ...Model OWK 9 6 2007 Patents Pending ...

Page 18: ...Model OWK 9 6 2007 Patents Pending ...

Page 19: ...Model OWK 9 6 2007 Patents Pending ...

Page 20: ...Model OWK 9 6 2007 Patents Pending ...

Page 21: ...Model OWK 9 6 2007 Patents Pending ...

Page 22: ...Model OWK 9 6 2007 Patents Pending ...

Reviews: