background image

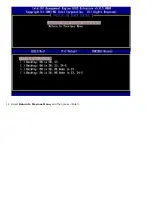
16.  Type the port number in the 

Port number

 field and press <Enter>.

The default setting is 0. If left at the default setting of 0, the Intel AMT attempts to contact the provisioning server on

port 9971. If the provisioning server is listening on a different port, enter it here.

Summary of Contents for Active Management Technology v5.0

Page 1: ...eferences in this document to Microsoft Windows operating systems are not applicable Information in this document is subject to change without notice 2008 Dell Inc All rights reserved Reproduction of these materials in any manner whatsoever without the written permission of Dell Inc is strictly forbidden Trademarks used in this text Dell Latitude and the DELL logo are trademarks of Dell Inc Intel ...

Page 2: ... independent software vendors ISVs are building software packages to work with Intel AMT features This provides IT administrators many options when it comes to remotely managing the networked computer assets within their company Features and Benefits Intel AMT Features Benefits Out of band OOB access Allows remote management of platforms regardless of system power or operating system state Remote ...

Page 3: ...e Dell computer is defaulted to Enterprise mode when it leaves the factory The mode can be changed during the setup and configuration process Small Medium Business SMB mode This mode is a simplified operational mode that does not support TLS and does not require a setup application SMB mode is for customers who do not have independent software vendor ISV management consoles or the necessary networ...

Page 4: ... is set up and configured you can reconfigure the technology as needed for your business environment Once Intel AMT is set up in SMB mode the computer does not have to initiate any configuration across the network It is set up manually and is ready to use with the Intel AMT Web GUI Intel AMT Setup and Configuration States The act of setting up and configuring Intel AMT is also known as provisionin...

Page 5: ...y s IT department The following are required Setup and configuration server Network and security infrastructure Intel AMT capable computers in the factory default state are given to the IT department which is responsible for Intel AMT setup and configuration The IT department can use the methods described below to input Intel AMT setup information after which the computers are in Enterprise Mode a...

Page 6: ...x The SCS can create a list of custom keys and put them onto a specially formatted USB thumb drive Then each AMT computer retrieves a custom key from the specially formatted USB thumb drive during BIOS boot as detailed in the Configuration Service section of this document Back to Contents Page ...

Page 7: ...E non volatile memory NVM until you exit MEBx Hence if MEBx crashes the changes made until that point are NOT going to be committed to ME NVM Access MEBx Configuration User Interface The MEBx configuration user interface can be accessed on a computer through the following steps 1 Turn on or restart your computer 2 When the blue DELL logo appears press Ctrl p immediately If you wait too long and th...

Page 8: ... on all newly deployed platforms You must change the default password before changing any feature configuration options The new password must include the following elements Eight characters no more than 32 One uppercase letter One lowercase letter A number A special nonalphanumeric character such as or excluding the and characters The underscore _ and spacebar are valid password characters but do ...

Page 9: ... This page allows you to configure the specific functions of the ME such as features power options and so on Below are quick links to the various sections Intel ME State Control Intel ME Firmware Local Update Intel ME Features Control Manageability Feature Selection Intel ME Power Control Intel ME ON in Host Sleep States Intel ME State Control When the ME State Control option is selected on the ME...

Page 10: ...m In fact the ME is not really disabled with the Disabled option Instead it is paused at the very early stage of its booting so the computer has no traffic originating from the ME on any of its busses ensuring that you can debug a computer problem without worrying about any role the ME might have played in it Intel ME Firmware Local Update Qualifier This option on the ME Platform Configuration men...

Page 11: ... Features Control menu contains the following configuration selection Manageability Feature Selection When you select the Manageability Feature Selection option on the ME Features Control menu the ME Manageability Feature menu appears ...

Page 12: ...ption is changed from Intel AMT to None a warning message is displayed If the user accepts the change from Intel AMT to None Intel AMT will go through a full un provision If the None option is selected there is no manageability feature provided by the Intel ME system so management applications are not be able to use the Intel ME However Intel ME is still enabled the Intel ME firmware is still runn...

Page 13: ...d ON The default power package is Desktop ON in S0 The end user administrator can choose which power package is used depending on computer usage The power package selection page can be seen above Information on this page provided by Intel Back to Contents Page ...

Page 14: ... to support the Intel AMT management features You need to have a basic understanding of networking and computer technology terms such as TCP IP DHCP VLAN IDE DNS subnet mask default gateway and domain name Explaining these terms is beyond the scope of this document The Intel AMT Configuration page contains the user configurable options listed below For images of these menu options refer to the Ent...

Page 15: ...ine what subnet IP address belongs to Default Gateway address The default gateway of the Intel Management Engine Preferred DNS address Preferred domain name server address Alternate DNS address Alternate domain name server address Domain name Domain name of the Intel Management Engine Provision Model The following provisioning models are available Provisioning Mode Enterprise Small Business This a...

Page 16: ...sed PKI only FQDN FQDN of the provisioning server mentioned in certificate PKI only Serial Number The 32 character that indicate the Certificate Authority serial numbers Time Validity Pass Indicates whether the certificate passed the time validity check Provisioning Server IP The IP address and port number 0 65535 for an Intel AMT provisioning server This configuration is only shown for the enterp...

Page 17: ...S Enter the PID and PPS in the dash format Ex PID 1234 ABCD PPS 1234 ABCD 1234 ABCD 1234 ABCD 1234 ABCD A PPS value of 0000 0000 0000 0000 0000 0000 0000 0000 does not change the setup configuration state If this value is used the setup and configuration state stays as Not started Delete PID and PPS Deletes the current PID and PPS stored in ME If there is no PID and PPS entered the MEBX returns an...

Page 18: ...n process is in process This parameter can only be modified while the computer is in the factory default or un provisioned state Enabling disabling remote configuration causes a partial un provision if the setup and configuration is In process Manage Certificate Hashes Select the Manage Certificate Hashes option under the Remote Configuration menu to display the Manage Certificate Hashes menu Five...

Page 19: ...ressing Enter you are prompted to enter the certificate hash value 3 The certificate hash value is a 20 byte hexadecimal number You must enter the hash data in the correct format or the message Invalid Hash Certificate Entered Try Again is displayed Upon pressing Enter you are asked about setting the active state of the hash 4 This query allows for setting the active state of the customized hash Y...

Page 20: ... Provisioning Server The Key Value is maintained in EPS Un provision The Un Provision option allows you to reset the Intel AMT configuration to factory defaults There are three types of un provision Partial Un provision ndash This option resents all the Intell AMT settings to their default values but will not change the PID PPS or the MEBx password Full Un provision This option resets all of the I...

Page 21: ...uthentication on the SOL IDER session Serial Over LAN SOL DISABLED ENABLED SOL allows the Intel AMT managed client console input output to be redirected to the management server console if the client system supports SOL If the system does not support SOL this value cannot enable it IDE Redirection IDE R DISABLED ENABLED IDE R allows the Intel AMT managed client to be booted from remote disk images...

Page 22: ...be changed through the network interface if the default password has not been changed yet During Setup and Configuration The MEBX password can be changed through the network interface during the setup and configuration process but at no other time Once the setup and configuration process is complete the MEBx password cannot be changed via the network interface Anytime The MEBX password can be chan...

Page 23: ... user name and password are not supplied the firmware cannot be updated When the secure firmware update feature is enabled you are able to update the firmware using the secure method Secure firmware updates pass through the LMS driver If secure and local firmware update is disabled the user must enable secure firmware update or local firmware update to allow the firmware updates ...

Page 24: ...T UTC format YYYY MM DD HH MM SS Valid date range is 1 1 2004 1 4 2021 Setting PRTC value is used for virtually maintaining PRTC during power off G3 state This configuration is only displayed for the Enterprise Provision Model ...

Page 25: ...re and to define the Intel ME idle timeout in M1 state The value should be entered in minutes The value indicates the amount of time that the Intel ME is allowed to remain idle in M1 before transitioning to the M off state If the Intel ME is M0 it will not transition to M off ...

Page 26: ...l AMT Configuration Select and press Enter Host Name Example IntelAMT This is the same as the operating system machine name TCP IP Set the parameters as follows Enable Network interface Enable DHCP Mode Set a domain name e g amt intel com Provision Model Intel AMT 4 0 Mode Small Business SOL IDE R Enable SOL Enable IDE R Remote FW Update Enabled Save and exit MEBx and then boot the computer to the...

Page 27: ...el AMT Configuration Select and press Enter Host Name Example IntelAMT TCP IP Set the parameters as follows Enable Network interface Disable DHCP Mode Set an IP address e g 192 168 0 15 Set a subnet mask e g 255 255 255 0 The default gateway address is optional The preferred DNS address is optional The Alternate DNS address is optional Set the domain name e g amt intel com Provision Model Intel AM...

Page 28: ... if the system is within the corporate network This is configured through an ISV app 2 A remote connection policy must be created before an Intel Fast call for help can be initiated The policy for the BIOS initiated call does not need to be configured but another policy must exist before initiating a help call from the BIOS The BIOS must support the hot key that initiates the Intel Fast call for h...

Page 29: ...ng process from a GUI console on their server with only one touch on each of the Intel AMT capable computers The PPS and PID fields are completed using a file created by the configuration service saved to a USB mass storage device MEBx interface The IT administrator manually configures the Management Engine BIOS Extension MEBx settings on each Intel AMT ready computer The PPS and PID fields are co...

Page 30: ...owing 1 Unpacks and connects computers if necessary 2 Inserts the USB drive key into a computer 3 Turns on that computer 6 The computer BIOS detects the USB drive key If found the BIOS looks for a setup bin file at the beginning of the drive key Go to step 7 If no USB drive key or setup bin file is found then restart the computer Ignore the remaining steps 7 The computer BIOS displays a message th...

Page 31: ...a USB storage device is required and must conform to the requirements listed in Configuration Service Using a USB Device The nature of management software is that it is not always dynamic or real time In fact sometimes if you tell a computer to do something such as to reboot you may just have to do it again before it will work 1 Format a USB device with the FAT16 file system and no volume label an...

Page 32: ...4 Click the to expand the Intel AMT Getting Started section ...

Page 33: ...5 Click the to expand the Section 1 Provisioning section ...

Page 34: ...6 Click the to expand the Basic Provisioning without TLS section ...

Page 35: ...7 Select Step 1 Configure DNS The notification server with an out of band management solution installed must be registered in DNS as ProvisionServer ...

Page 36: ...8 Click Test on the DNS Configuration screen to verify that DNS has the ProvisionServer entry and that it resolves to the correct Intel setup and configuration server SCS ...

Page 37: ...The IP address for the ProvisionServer and Intel SCS are now visible ...

Page 38: ...9 Select Step 2 Discovery Capabilities ...

Page 39: ...10 Verify that the setting is Enabled If Disabled click the check box next to Disabled and click Apply ...

Page 40: ...11 Select Step 3 View Intel AMT Capable Computers ...

Page 41: ...Any Intel AMT capable computers on the network are visible in this list ...

Page 42: ...12 Select Step 4 Create Profile ...

Page 43: ...13 Click the plus symbol to add a new profile ...

Page 44: ... the administrator can modify the profile name and description along with the password The administrator sets a standard password for easy maintenance in the future Select the manual radio button and enter a new password ...

Page 45: ...n the MEBx The TLS Transport Layer Security tab provides the ability to enable TLS If enabled several other pieces of information are required including the certificate authority CA server name CA common name CA type and certificate template The ACL access control list tab is used to review users already associated with this profile and to add new users and define their access privileges ...

Page 46: ...r Intel AMT as well as an Idle Timeout setting It is recommended that Idle timeout is always set to 0 for optimal performance The setting for the Power Policy tab can potentially impact a computer s ability to remain E Star 4 0 compliant 14 Select Step 5 Generate Security Keys ...

Page 47: ...15 Select the icon with the arrow pointing out to Export Security Keys to USB Key ...

Page 48: ...16 Select the Generate keys before export radio button ...

Page 49: ...ber of computers that need to be provisioned The default is 50 18 The Intel ME default password is admin Configure the new Intel ME password for the environment 19 Click Generate Once the keys have been created a link appears to the left of the Generate button ...

Page 50: ...ng Serverr 21 Click the Download USB key file link to download setup bin file to the USB device The USB device is recognized by default save the file to the USB device If additional keys are needed in the future the USB device must be reformatted before saving the setup bin file to it ...

Page 51: ...a Click Save in the File Download dialog box b Verify the Save in location is directed to the USB device Click Save ...

Page 52: ...er window 22 Close the Export Security Keys to USB Key and drive explorer windows to return to the Altiris Console 23 Take the USB device to the computer insert the device and turn on the computer The USB device is recognized immediately and you are prompted to Continue with Auto Provisioning Y N Press y ...

Page 53: ...Press any key to continue with system boot 24 Once complete turn off the computer and move back to the management server 25 Select Step 6 Configure Automatic Profile Assignments ...

Page 54: ...26 Verify that the setting is enabled In the Intel AMT 2 0 dropdown select the profile created previously Configure the other settings for the environment ...

Page 55: ...27 Select Step 7 Monitor Provisioning Process ...

Page 56: ...r which the keys were applied begin to appearing in the system list At first the status is Unprovisioned then the system status changes to In provisioning and finally it changes to Provisioned at the end of the process ...

Page 57: ...28 Select Step 8 Monitor Profile Assignments ...

Page 58: ...The computers for which profiles were assigned appear in the list Each computer is identified by the FQDN UUID and Profile Name columns ...

Page 59: ...Once the computers are provisioned they are visible under the Collections folder in All configured Intel AMT computers ...

Page 60: ...Back to Contents Page ...

Page 61: ...ndependent software vendors ISVs and is contained within the ISV management console product Consult with the management console supplier for more information Follow the steps below to set up and configure Intel AMT in the Enterprise mode ME Configuration To enable Intel Management Engine ME on the target platform 1 Press Ctrl p at the Dell logo screen to enter the MEBx screens 2 Type admin in the ...

Page 62: ...characters but do NOT add to the password complexity 4 Change the password to establish Intel AMT ownership The computer then goes from the factory default state to the setup state 5 Select Intel ME Configuration and then press Enter ME Platform Configuration allows you to configure ME features such as power options firmware update capabilities and so on ...

Page 63: ...6 Press y when the following message appears System resets after configuration change Continue Y N ...

Page 64: ...e Control is the next option The default setting for this option is Enabled Do not change this setting to Disabled If you want to disable Intel AMT change the Manageability Feature Selection option to None in step 9 ...

Page 65: ...7 Select Intel ME Firmware Local Update Qualifier Press Enter 8 Then select either Always Open Never Open or Restricted Press Enter The default setting for this option is Always Open ...

Page 66: ...9 Select Intel ME Features Control and then press Enter ...

Page 67: ...Manageability Feature Selection is the next option This feature sets the platform management mode The default setting is Intel AMT Selecting the None option disables all remote management capabilities ...

Page 68: ...10 Select Return to Previous Menu and then press Enter ...

Page 69: ...11 Select Intel ME Power Control and then press Enter ...

Page 70: ...Intel ME ON in Host Sleep States is the next option The default setting is Mobile ON in S0 ...

Page 71: ...12 Select Return to Previous Menu and then press Enter ...

Page 72: ...13 Select Return to Previous Menu and then press Enter ...

Page 73: ...tel AMT settings Intel AMT Configuration To enable Intel AMT Configuration settings on the target platform perform the following steps 1 At the initial boot screen press Ctrl p to re enter the MEBx screens as seen in step 1 of Enabling Management Engine for Enterprise Mode 2 When a prompt for the password appears enter the new Intel ME password 3 Select Intel AMT Configuration and then press Enter...

Page 74: ...que name for this Intel AMT machine and then press Enter Spaces are not accepted in the host name Make sure there is not a duplicate host name on the network Host names can be used in place of the computer s IP for any applications requiring the IP address ...

Page 75: ...6 Select TCP IP and then press Enter 7 Press n when the following message appears DHCP Enable Disable DHCP Y N ...

Page 76: ...8 Type the domain name into the Domain name field ...

Page 77: ...9 Select Provision Model from the menu and then press Enter 10 Choose between an Enterprise or Small Business configuration The default setting is Enterprise ...

Page 78: ...11 Select Setup and Configuration from the menu and then press Enter ...

Page 79: ...12 Select Current Provisioning Mode to display the current mode and then press Enter The current provisioning mode is displayed Press Enter or Esc to exit ...

Page 80: ...ss Enter The screen displays the provision PSK PKI record data of the computer If the data has not been entered the MEBX displays a message that states Provision Record not present If the data is entered the Provision Record displays one of several messages ...

Page 81: ...14 Select Provisioning Server from the menu and then press Enter ...

Page 82: ...er IP in the Provisioning server address field and press Enter The default setting is 0 0 0 0 This default setting works only if the DNS server has an entry that can resolve the provision server to the IP of the provisioning server ...

Page 83: ...t number field and press Enter The default setting is 0 If left at the default setting of 0 the Intel AMT attempts to contact the provisioning server on port 9971 If the provisioning server is listening on a different port enter it here ...

Page 84: ...17 Select Provisioning Server FQDN from the menu and then press Enter ...

Page 85: ...18 Type the fully qualified domain name FQDN for the provisioning server and press Enter ...

Page 86: ...19 Select TLS PSK from the menu and then press Enter ...

Page 87: ...enerates the codes This option is for entering the provisioning ID PID and provisioning passphrase PPS PIDs are eight characters and PPS are 32 characters There are dashes between every set of four characters so including dashes PIDs are nine characters and PPS are 40 characters An SCS must generate these entries ...

Page 88: ... Delete PID and PPS option This option returns the computer to factory defaults See the Return to Default section for more information about unprovisioning 21 Select Return to Previous Menu and then press Enter ...

Page 89: ...22 Select TLS PKI from the menu and then press Enter ...

Page 90: ...Select Remote Configuration Enable Disable from the menu and then press Enter This option is Enabled by default and can be Disabled if the network infrastructure does not support a Certificate Authority CA ...

Page 91: ...Manage Certificate Hashes option is the next option Four hashes are configured by default Hashes can be deleted or added per customer needs ...

Page 92: ...24 Select Set PKI DNS Suffix from the menu Press Enter 25 Type the PKI DNS Suffix in the text field and press Enter ...

Page 93: ...26 Select Return to Previous Menu and press Enter ...

Page 94: ...27 Select Return to Previous Menu and then press Enter This returns you to the Intel AMT Configuration menu ...

Page 95: ...Skip the Un Provision option This option returns the computer to factory defaults See the Return to Default section for more information about unprovisioning ...

Page 96: ...28 Select SOL IDE R and then press Enter ...

Page 97: ...29 Press y when the following message appears Caution System resets after configuration changes Continue Y N ...

Page 98: ...For User Name Password select Enabled and then press Enter This option allows you to add users and passwords from the WebGUI If the option is disabled then only the administrator has MEBx remote access ...

Page 99: ...For Serial Over LAN SOL IDE R select Enabled and then press Enter ...

Page 100: ...For IDE Redirection select Enabled and then press Enter ...

Page 101: ...Password Policy is the next option The default setting is Default Password Only ...

Page 102: ...Secure Firmware Update is the next option The default setting is Enabled ...

Page 103: ...Skip Set PRTC ...

Page 104: ...Idle Timeout is the next option The default setting is 1 This timeout is applicable only when a WoL option is selected for enabling ME for the Enterprise operating mode ...

Page 105: ...30 Select Return to Previous Menu and then press Enter ...

Page 106: ...31 Select Exit and then press Enter ...

Page 107: ...32 Press y when the following message appears Are you sure you want to exit Y N ...

Page 108: ...The computer restarts 33 Turn off the computer and disconnect the power cable The computer is now in setup state and is ready for deployment Back to Contents Page ...

Page 109: ...Business instead of Enterprise Follow the steps below to set up and configure Intel AMT in the SMB mode ME Configuration To enable Intel Management Engine ME on the target platform perform the following steps 1 Press Ctrl p at the Dell logo screen to enter the MEBx screens 2 Type admin in the Intel ME Password field Press Enter Passwords are case sensitive You must change the default password befo...

Page 110: ... but do NOT add to the password complexity 5 Change the password to establish Intel AMT ownership The computer then goes from the factory default state to the setup state 6 Select Intel ME Configuration and then press Enter ME Platform Configuration allows you to configure ME features such as power options firmware update capabilities and so on ...

Page 111: ...7 Press y when the following message appears System resets after configuration change Continue Y N ...

Page 112: ...ol is the next option The default setting for this option is Enabled Do not change this setting to Disabled If you want to disable Intel AMT change the Manageability Feature Selection option to None later in this procedure ...

Page 113: ...8 Select Intel ME Firmware Local Update and then press Enter 9 Select either Always Open Never Open or Restricted and then press Enter The default setting for this option is Disabled ...

Page 114: ...10 Select Intel ME Features Control and then press Enter ...

Page 115: ...Manageability Feature Selection is the next option This feature sets the platform management mode The default setting is Intel AMT Selecting the None option disables all remote management capabilities ...

Page 116: ...11 Select Return to Previous Menu and then press Enter ...

Page 117: ...12 Select Intel ME Power Control and then press Enter ...

Page 118: ...Intel ME ON in Host Sleep States is the next option The default setting is Mobile ON in S0 ...

Page 119: ...13 Select Return to Previous Menu and then press Enter ...

Page 120: ...14 Select Return to Previous Menu and then press Enter ...

Page 121: ...s After the ME configuration is complete you can configure the Intel AMT settings Intel AMT Configuration Enabling Intel AMT for SMB Mode 1 At the initial boot screen press Ctrl p to re enter the MEBx screens 2 When a prompt for the password appears enter the new Intel ME password 3 Select Intel AMT Configuration and then press Enter ...

Page 122: ...que name for this Intel AMT machine and then press Enter Spaces are not accepted in the host name Make sure there is not a duplicate host name on the network Host names can be used in place of the computer s IP for any applications requiring the IP address ...

Page 123: ...6 Select TCP IP and then press Enter 7 Press n when the following message appears DHCP Enable Disable DHCP Y N ...

Page 124: ...8 Type the domain name into the field ...

Page 125: ...rovision Model from the menu and then press Enter This allows you to choose between an Enterprise or a Small Business configuration The default setting is Enterprise 10 Press y when the following message appears ...

Page 126: ...11 Skip the Un Provision option This option returns the computer to factory defaults See the Return to Default section for more information about unprovisioning 12 Select SOL IDE R Press Enter ...

Page 127: ...13 Press y when The following message appears Caution System resets after configuration changes Continue Y N ...

Page 128: ...4 Select Enabled for Username Password and then press Enter This option allows you to add users and passwords from the WebGUI If the option is disabled then only the administrator has MEBx remote access ...

Page 129: ...15 For Serial Over LAN select Enabled and then press Enter ...

Page 130: ...16 For IDE Redirection select Enabled and then press Enter ...

Page 131: ...17 For Password Policy select Enabled and then press Enter ...

Page 132: ...Secure Firmware Update is the next option The default setting is Enabled ...

Page 133: ...18 Skip Set PRTC ...

Page 134: ...is the next option The default setting is 1 This timeout is applicable only when a WoL option is selected for Intel ME ON in Host Sleep States screen of the process for enabling ME for the Enterprise operating mode ...

Page 135: ...19 Select Return to Previous Menu and then press Enter ...

Page 136: ...20 Select Exit and then press Enter ...

Page 137: ...21 Press y when the following message appears Are you sure you want to exit Y N ...

Page 138: ...22 After the computer restarts turn off the computer and disconnect the power cable The computer is now in setup state and is ready for deployment Back to Contents Page ...

Page 139: ...the end user There is no feedback mechanism to tell you that the computer is broadcasting the message The SCS uses the information in the Hello message to initiate a Transport Layer Security TLS connection to the Intel AMT capable computer using a TLS Pre Shared key PSK cipher suite if TLS is supported The SCS uses the PID to look up the provisioning passphrase PPS in the provisioning server datab...

Page 140: ...nzips and prompts the user to continue the installation process Once you install the SOL LMS driver the PCI Serial Port entry becomes the Intel Active Management Technology SOL COM3 entry HECI Driver The Intel AMT Host Embedded Controller Interface HECI driver is available on support dell com and on the ResourceCD under Chipset Drivers The driver is labeled Intel AMT HECI Once the driver is obtain...

Page 141: ...n the same subnet as the Intel AMT computer 3 Connect to the IP address specified in the MEBx and port of the Intel AMT capable computer example http ip_address 16992 or http 192 168 2 1 16992 By default the port is 16992 Use port 16993 and https to connect to the Intel AMT WebGUI on a computer that has been configured and set up in the Enterprise mode If DHCP is used then use the fully qualified ...

Page 142: ...console Similarly the management console may send serial data over the LAN connection that appears to have come through the client s serial port IDE Redirection Overview IDE Redirection IDER is capable of emulating an IDE CD drive or a legacy floppy or LS 120 drive over a standard network connection IDER enables a management machine to attach one of its local drives to a managed client over the ne...

Page 143: ...bout 1 minute After un provisioning completes control is passed back to the Intel AMT Configuration screen Provisioning Server Set PID and PPS and Set PRTC options are available again because the computer is set to the default Enterprise Mode 2 Select Return to previous menu 3 Select Exit and then press y The computer restarts Firmware Flash Flash the firmware to upgrade to newer versions of Intel...

Reviews: