background image

EN-9 

48619852_ed3

EN

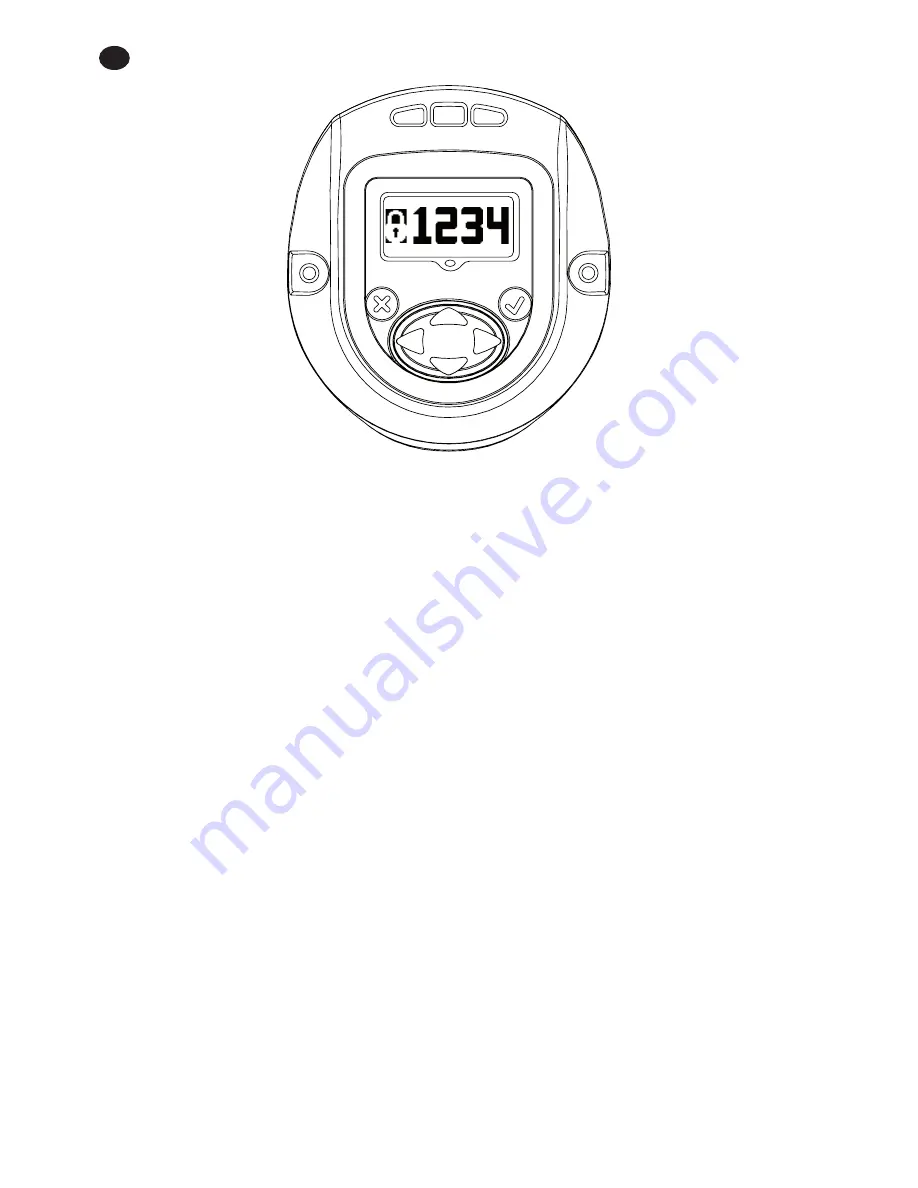
Press ‘ENTER’ to enter the ‘EDIT’ mode.  Enter the appropriate password to unlock the tool.  Press ‘ENTER’ to exit the ‘EDIT’ 

mode.

2.3.1.  Updating fastening parameters of the QX Series tool

After display is unlocked with a valid password,   Pressing “RIGHT” key will advance to following settings that  can be 

modified as required.
The settings can be modified by entering “EDIT MODE” and using “UP” or “DOWN”  key or “RIGHT” or “LEFT” key as 

required.

RELEASED 18/Apr/2014

Summary of Contents for QX Series

Page 1: ...QX Series Display User Manual Save These Instructions 48619852 Edition 3 April 2014 RELEASED 18 Apr 2014 ...

Page 2: ...tion and how to edit those screens in display module required for the operation of QX Series Hand Tool The image Below shows the display of QX Series display module with descriptions of the programming keys ESCAPE LEFT DOWN UP ENTER RIGHT Symbol Function Escape Exit Enter Edit UP DOWN RIGHT LEFT RELEASED 18 Apr 2014 ...

Page 3: ... and High screen RUN SCREEN Press UP key to increment the value Press DOWN key to decrement the value Press ENTER to select the changed values Press ESC to undo and keep the old values After display is unlocked Press RIGHT Key Press UP key to go to next screen Save or Ignore changes If not on Save screen use the up or down key to scroll to the Save screen Press DOWN key to scroll on one by one to ...

Page 4: ... or anti clockwise Unit of Torque Target Angle Angle strategy OR Target torque Torque strategy Torque High Torque Low Angle High Angle Low Torque threshold Free Speed Shift down torque Shiftdown Speed Gang count Save ignore the changes settings RELEASED 18 Apr 2014 ...

Page 5: ... bottom of the display 2 1 Run Screen Pressing ENTER key after switching on the display will show this image PRIMARY Section shows latest peak torque for a torque strategy or the latest peak angle for an angle strategy with units The SECONDARY LEFT shows the cycle count or gang count if gang count is programmed The SECONDARY RIGHT shows the active configuration number RELEASED 18 Apr 2014 ...

Page 6: ...o next screen Screen shows CONFIGURATION setting used in the tool NOTE Only Configuration 1 can be programmed through the display module Pressing ENTER will enable the EDIT MODE This procedure to enter EDIT MODE is same for all settings update RELEASED 18 Apr 2014 ...

Page 7: ... configuration Pressing ENTER again will select the modified configuration 2 3 Password The password screen shows whether the display is locked or unlocked If the display is locked the parameters of the QX Series Hand tool cannot be edited RELEASED 18 Apr 2014 ...

Page 8: ... 1234 is entered on the Password screen the user may use the left arrow to go to the Tool ID and software version page The Primary Display is the Tool Location ID Lower Secondary Right is the Display Firmware Version Lower Secondary Left is the Motor Controller Firmware Version RELEASED 18 Apr 2014 ...

Page 9: ...reens are for internal use only to view log location Press the Down key to display a screen for internal use only to view log location Press the Down key again to display a second log screen Press the Down key again to return to the Tool ID page Pressing the right arrow from this page exit back to the Run screen RELEASED 18 Apr 2014 ...

Page 10: ...DIT mode 2 3 1 Updating fastening parameters of the QX Series tool After display is unlocked with a valid password Pressing RIGHT key will advance to following settings that can be modified as required The settings can be modified by entering EDIT MODE and using UP or DOWN key or RIGHT or LEFT key as required RELEASED 18 Apr 2014 ...

Page 11: ...guration being used This can be changed by entering EDIT MODE and using RIGHT or LEFT key 2 3 1 2 Direction of Rotation Image shows direction of rotation in which the QX Series hand tool rotates Indicates counter clock wise rotation Indicates clock wise rotation This can be changed by entering EDIT MODE Key and updating using RIGHT or LEFT key RELEASED 18 Apr 2014 ...

Page 12: ... by entering EDIT MODE and updating using UP or DOWN key 2 3 1 4 Torque Torque LOW Display Torque LOW can be modified in this mode by entering EDIT mode and using UP or DOWN key Torque HIGH Display Torque HIGH can be modified in this mode by entering EDIT mode and using UP or DOWN key Torque TARGET Display RELEASED 18 Apr 2014 ...

Page 13: ...EDIT mode and using UP or DOWN key 2 3 1 5 Angle Angle LOW Display Angle LOW can be modified in this mode by entering EDIT mode and using UP or DOWN key Angle HIGH Display Angle HIGH can be modified in this mode by entering EDIT mode and using UP or DOWN key RELEASED 18 Apr 2014 ...

Page 14: ...d The value can be edited by entering EDIT mode and using UP and DOWN arrow 2 3 1 7 Free Speed The below screen indicates free speed of the QX Series tool The value can be edited by entering EDIT mode and using UP and DOWN arrow Programmed speed is a percentage of tool maximum speed RELEASED 18 Apr 2014 ...

Page 15: ...can be changed by entering EDIT MODE and updating using UP or DOWN key 2 3 1 9 Shiftdown Speed This screen indicates shiftdown speed of the QX Series tool Shiftdown speed can be edited by entering EDIT MODE and updating using UP and DOWN arrow Programmed speed is a percentage of tool maximum speed RELEASED 18 Apr 2014 ...

Page 16: ...cond time causes the tool to leave edit mode SAVE SETTINGS CANCEL SETTINGS 2 3 2 General Settings of the QX Series tool After display is unlocked with a valid password pressing LEFT key will advance to following settings that can be modified as required The settings can be modified by entering EDIT MODE and using UP or DOWN key or RIGHT or LEFT key as required 2 3 2 1 Radio Enable Disable This scr...

Page 17: ...screen 2 5 Shunt Calibration RF Signal Strength and Battery level This is the next screen obtained after pressing UP key when QX Series displays password screen Primary display indicates Shunt Calibration Value Secondary display on left indicates RF signal strength and the one on the right indicates Battery Level RELEASED 18 Apr 2014 ...

Page 18: ...to clear the cycle count For this change to be retained a cycle must be run before removing power to the tool Otherwise the old cycle count is restored NOTE After entering the correct password user has to use the UP arrow button from password settings screen to move to the cycle count screen 2 7 Angle Primary display Target Angle Secondary Display on left Angle low Secondary Display on right Angle...

Page 19: ...3 EN 18 EN 2 8 Torque Primary Display Target Torque Secondary display on left Torque low Secondary display on Right Torque high Pressing UP advances back to RUN SCREEN the first display screen RELEASED 18 Apr 2014 ...

Page 20: ...lay screen The Status LEDs shall be used as follows Red The last tightening cycle exceeded its high limit Yellow The last tightening cycle ended below its low limit Blue Reverse LED Angle tool only Green The last tightening cycle ended between its high and low limits Blue The tool has an active fault condition RELEASED 18 Apr 2014 ...

Page 21: ...sing to ensure that tool s RF settings match with PCM C 01 Configuration Fault Configuration ID value is 0 or greater than 8 Invalid configuration programmed Program the configuration from ICS C 02 Configuration Fault Number of configuration steps is greater than 8 Invalid configuration step is programmed Value should be between 1 to 8 Program the configuration from ICS C 03 Configuration Fault Cu...

Page 22: ...guration steps is set to 0 Invalid configuration is programmed Program configuration from ICS C 0A Configuration Fault Current Angle High Limit is greater than Tool s maximum Angle value to be set to 9999 Invalid Angle hi limit value is programmed Program the Angle hi limit from ICS C 0B Configuration Fault Current Angle Low Limit is greater than Tool s maximum Angle value to be set to 9999 Invali...

Page 23: ...cle is complete E 11 Motor Controller Fault Current Plausibility Low Current Plausibility Low Failure E 12 Motor Controller Fault Early Trigger Release The trigger was released before the cycle completed E 13 Motor Controller Fault Motor Controller Watchdog Reset Motor Controller Watchdog Reset E 14 Motor Controller Fault Motor Controller Stop Timeout Motor Controller Stop Timeout E 18 Motor Contr...

Page 24: ...Trigger Fault Trigger was pulled during a configured delay period between cycles Wait for configuration delay and pull trigger again F 03 Trigger Fault Smart Socket function has the tool locked until PCM indicates the correct socket has been attached to the tool Attach the correct socket for the selected configuration 1 FF Tool Communication Error USB enumeration fault Bad Command received by Comm...

Page 25: ...l memory reset to defaults Complete Tool Memory reset to defaults 20 02 Reset Event Tool reset configuration to Defaults Tool reset configuration to defaults 2 xx PM Alarm Cycle Fault User configured alarm that occurs after the tool runs the number of configured cycles where xx 01 to 05 Reset alarm s cycle count configuration 3 xx PM Alarm Time Fault User configured alarm that occurs after a speci...

Page 26: ...Notes RELEASED 18 Apr 2014 ...

Page 27: ...Notes RELEASED 18 Apr 2014 ...

Page 28: ...ingersollrandproducts com 2014 Ingersoll Rand RELEASED 18 Apr 2014 ...

Reviews: