Quick Installation Guide
4
Hard Drive Installation
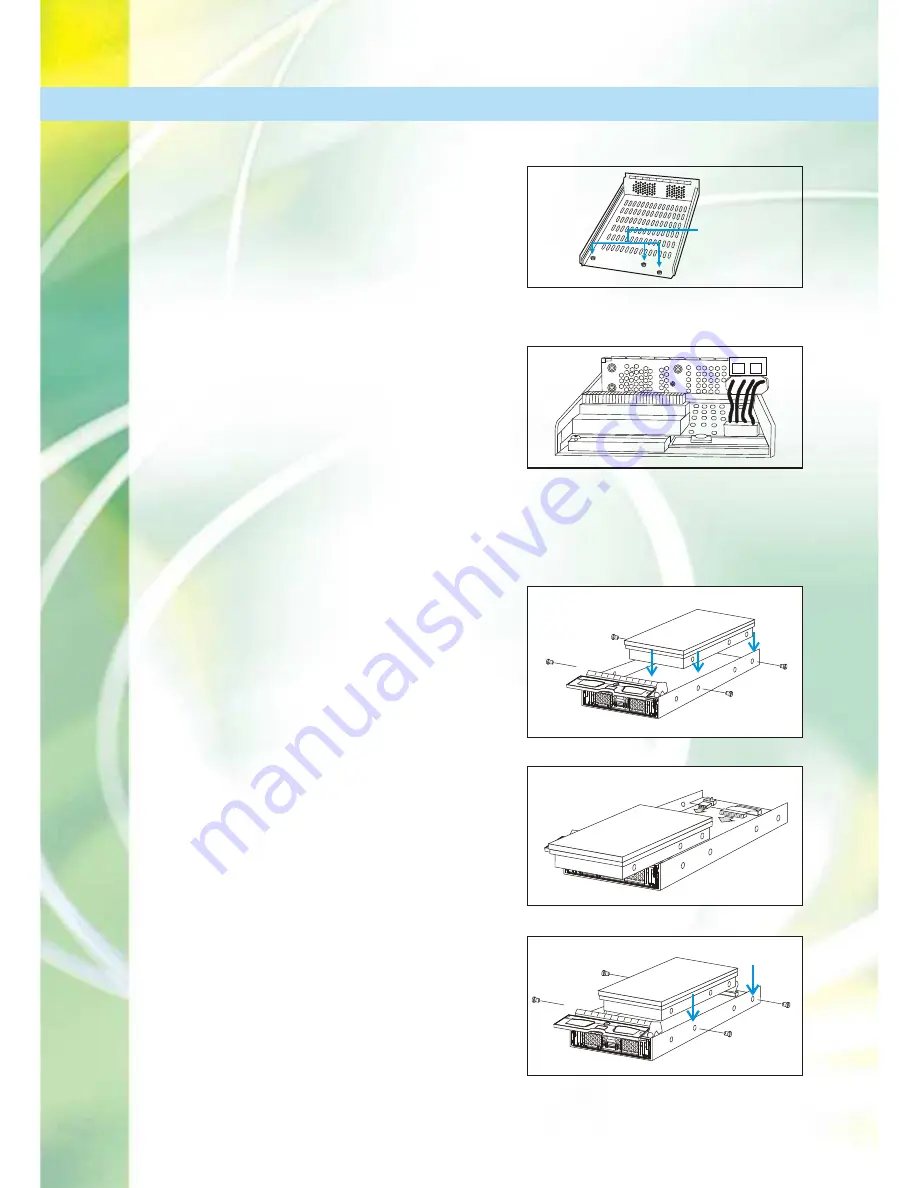
Hard drive installation without a
dongle/MUX kit
Step 1: Place the SATA hard drive into
the drive tray
(as shown in
Figure 8
)
making sure that the hard drive is
oriented in such a way that the single
connector attachment (SCA) connector
is facing the back of the drive tray.
Step 2: Adjust the drive's location
until the mounting holes in the drive
canister are aligned with those on the
hard drive. Secure the drive with 4
supplied 6/32 flat-head screws. (See
Figure 8
)
Hard drive installation with a
dongle/MUX kit
Step 1: For the SATA drives, connect
the HDD to the dongle/MUX kit
and
make sure that the dongle/MUX kit
connector is firmly attached to the HDD
connector.
For the PATA drives,
connect the ATA and power cables
from the dongle/MUX kit to the hard
drive (see
Figure 9
). Make sure that
these connections are secure and will
not come loose.
Figure 10: Inserting the PATA Drive
Figure 8: Installing a SATA Hard Drive
Figure 7: Place the dongle board at the rear
of the drive tray.
Step 3: Place the dongle/MUX kit at
the back of the drive tray
. Hold
the dongle kit in place and turn
the drive tray over.
Align the
holes
in the base of the drive
tray with the holes in the dongle
/MUX kit base tray.
(Refer to
Figure 7
)
Step 4: Insert the three available
retention screws
from the
bottom of the drive tray. These
screws will firmly secure the
dongle/MUX kit to the drive tray
and facilitate the installation of
The appropriate drive.
Figure 6: Retention screw locations in empty
drive tray
Retention
Screws
Figure 9: PATA Hard Drive Connectors
Summary of Contents for EonStor A16F
Page 10: ...Quick Installation Guide 8...
Page 11: ...Quick Installation Guide 9...


