Quick Installation Guide
2
Battery Backup Unit (BBU)
Installation
NOTE:
The BBU is installed in the controller
module, directly above the DIMM.
Prior to installing the BBU, make sure
that a DIMM has been installed on
the controller board.
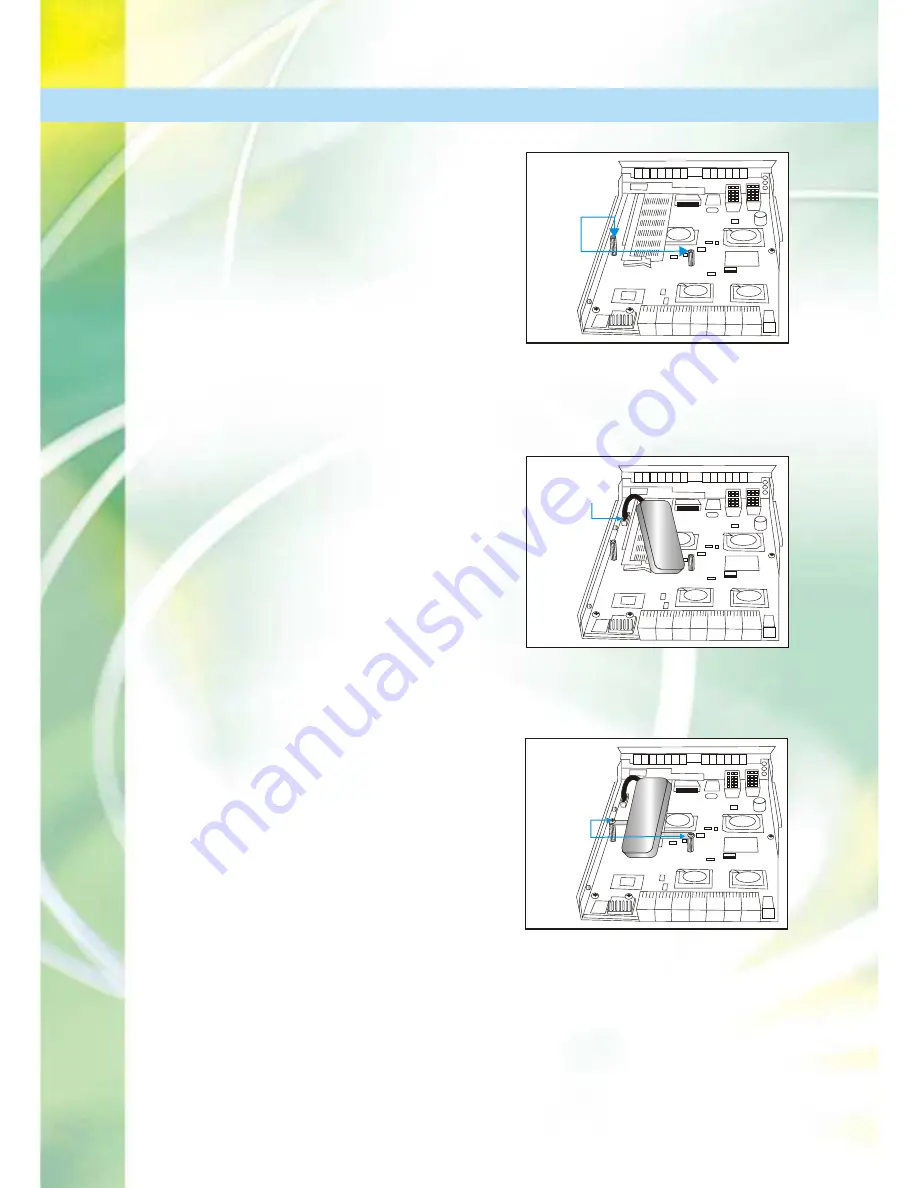
To install the BBU please follow these
steps:
Step 1: Remove the two retention
screws
that are on either side of the
DIMM module, diagonally across from
each other. Two spacers should have
come with each BBU unit. Install one
spacer into each of the screw holes
that previously contained the retention
screws. (see
Figure 1
)
Step 2:
Once the spacers have been
inserted,
connect the BBU connector
to the onboard connector on the side of
the controller board. Make sure that
the connector is firmly attached and
that the connection is secure. (See
Figure 2
)
Step 3:
After the BBU connectors have
been firmly connected to the controller
board,
mount the BBU bracket
onto
the two spacers. Correctly line the
arms of the bracket with the two
spacers such that it is possible to re-
insert the previously removed
retention screws. (See
Figure 3
)
Step 4:
Once the arms have been
correctly aligned with the spacers,
re-
insert the retention screws
through
the arms of the bracket, into the
spacers. This will secure the BBU to
the controller module. (See
Figure 3
)
Figure 1: Insert Spacers
Figure 2:
Connecting the BBU to the
controller board
Figure 3: Mounting the BBU
8
Inset
spacers
8
Connector
BBU
Mounting
Bracket
Arms
8
Summary of Contents for EonStor A16F
Page 10: ...Quick Installation Guide 8...
Page 11: ...Quick Installation Guide 9...


