Preparing for use
1. Make sure you have completely charged the battery before using it
for the first time.
2. Room preparation:
A. Pick up all large items off of the floor that could get stuck in the
brushes or the vacuum intake.
B. Pick up/hide all cords that could get tangled in the unit.
C. Move all items that could be easily knocked over.
D. Roll under loose edges of rugs with any type of stringy fringe.
3. DO NOT use the CleanMate on plush or long pile carpet or rugs.
4. When using the CleanMate in a room for the first time, watch how it
operates in the room. Watch for areas that the unit has troubles
operating in, and either block these areas of the room or move objects
around so that the unit can clean effectively and not get stuck or hung
up before it has had an opportunity to clean the entire room.
Starting Operation
1. Clean out the dust bin before use.
2. Place the CleanMate on the floor in a relatively open space near the
middle of the room to be cleaned.
3. Press the power button on the main unit to turn it on.
4. Set the timer of the unit to the desired cleaning time by pressing the
Timer button on the control panel of the unit or on the remote
control.
For Reference: Use 10 minutes of cleaning time for every 54-72
square feet of floor space.
Cleaning time may vary depending on the type of floor being
cleaned.
5. Press the Start button on the control panel or the remote control. After
a short delay, the CleanMate will begin
to automatically clean the
floor.
6
.
At the end of the cleaning cycle, the CleanMate will emit a long beep
and will stop moving.
If the power light on the unit is still blue, then the unit still has battery
power and can be used again.
If the low
battery light on the unit is flashing red, then the battery is
low and needs to be recharged before the unit can be used again.
15
Clean Mate 365
Installing Accessories
General Operation
Illustration 2
CleanMate
CleanMate
Illustration 1
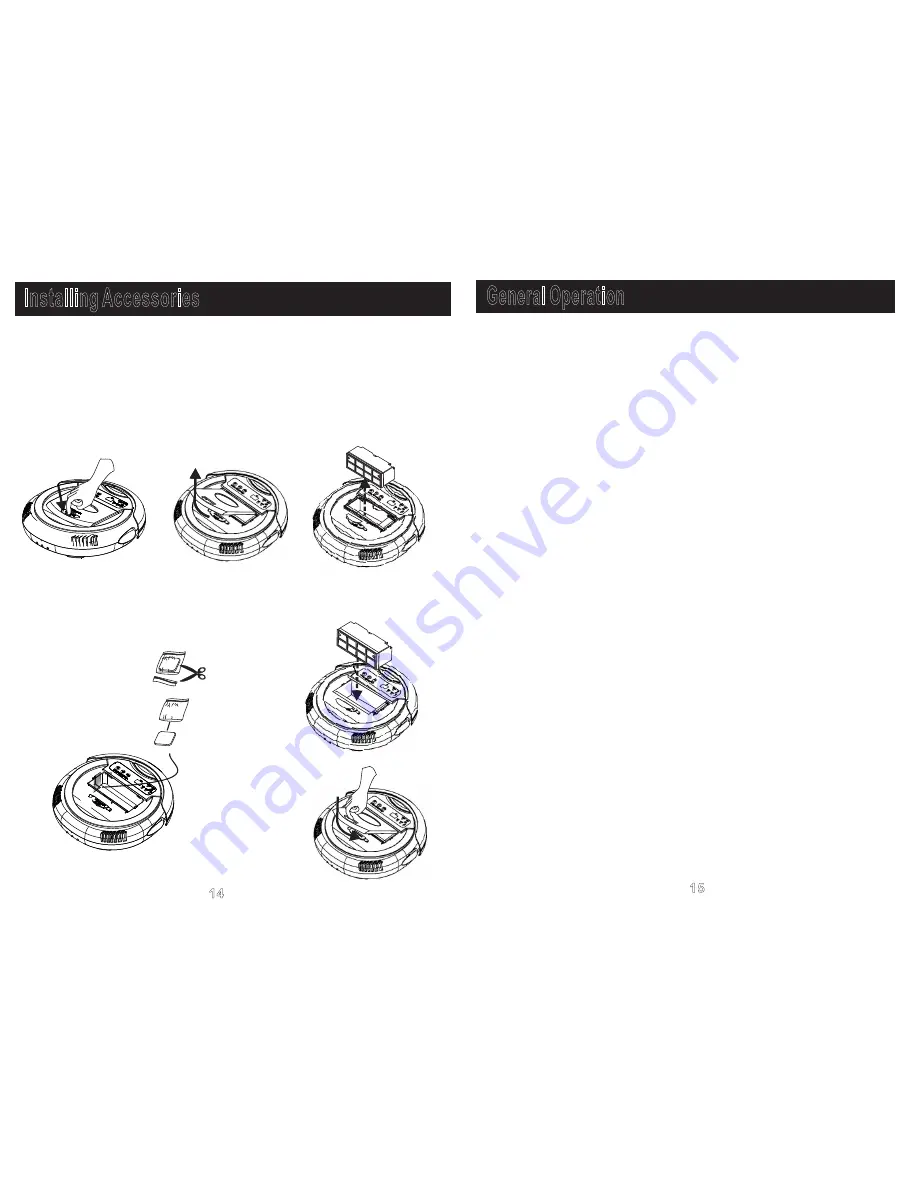
Fragrance Installation and Removal
This robotic vacuum cleaner has a compartment built into it for adding
fragrance to the air as the unit cleans.
Any solid scent packet, insert, or dryer sheet can be used.
DO NOT use any type of Liquid or Oil Fragrance with this unit.
1.Press the "Dust
Bin
Release
Button
"
to
release the dust bin
cover. See
the arrow in Illustration 1.
2.Remove the dust bin cover as shown in Illustration 2
.
3
.Remove the dust bin from its compartment as shown in Illustration 3.
4.Open the fragrance package and place it in the small compartment as
shown in Illustration 4.
5. Replace the dust bin as shown in Illustration 5.
6. Replace the dust bin cover as shown in Illustration 6.
14
Illustration 4
Illustration 3
Illustration 2
Illustration 5
Illustration 6


